TreeView Configuration
Defines the nodes of a tree.
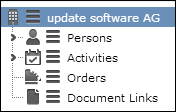
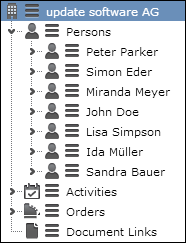
The TreeView configuration defines the nodes of the tree, which sibling or child info areas are displayed in the tree view of a record.
To define a Tree view (seeDesigning Configuration Units):
- Click
 to add a new node (i.e. sub-info area) to the tree.
 - Select the desired info area under Info Area Settings > Info Area.
- show linked: Lists all info areas linked to the new node's current parent info area.
-
show all: Lists all available info areas.
Enable the Link ID check box and select/enter a link ID, if you want to use another than the default link. For further details, see Specifying Link IDs.
- Click on an info area to define settings for this node. All available settings for the selected node are displayed in the right part of the page:
- general settings for the selected node. For further details, see Info Area Settings.
- settings configuring the appearance and behavior of the node. For further details, see Node Settings.
- settings for the records listed for the node. For further details, see Record Settings.
- Arrange the sub-info areas of your tree:
- Use the Decrease/Increase Indent buttons to move nodes to another hierarchy level, i.e. change the parent info area. Example: Create a node for the Activity info area below the Person in Company info area to display person-related activity records.
- To reorder nodes, click
 (Drag&Drop) in the respective row and drag it to the
desired position. Child nodes of the selected node are automatically moved as
well.
(Drag&Drop) in the respective row and drag it to the
desired position. Child nodes of the selected node are automatically moved as
well.While dragging the selected node, valid drop locations are displayed in blue. Nodes can only be dragged to the same hierarchy level. To change the indentation, use the Decrease/Increase Indent buttons as described above.
The topmost node (i.e. the tree's parent) is displayed in bold and cannot be moved or deleted.
- Click
 (Delete) to delete a node. Child nodes are deleted as well.
- If a sub-info area has no valid link to its parent, a message is displayed on mouse-over and the info area ID is displayed with a wavy red underline. You can still save the definition. Drag the info area to a valid position or create the required link in the data model.
- For sub-info areas with no valid link to their parent node the tree displays all available records in Aurea CRM.Web.
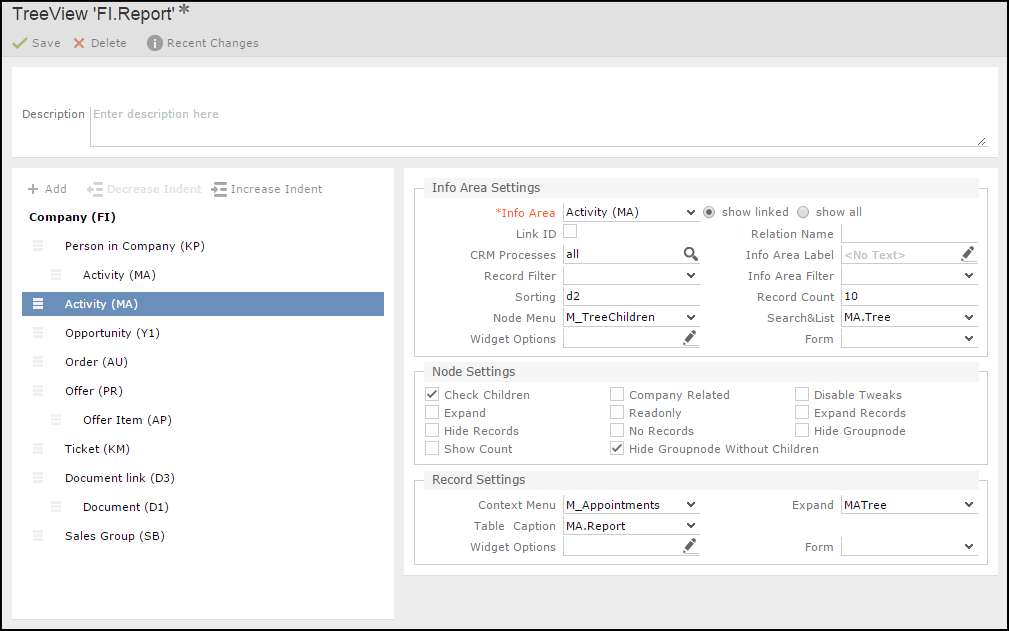
Info Area Settings
The general definition of a tree node (i.e. sub-info area) consists of the following settings:
-
Info Area: Select the info area you want to define as a tree
node. For further details, see TreeView Configuration.
With the tree view you can also navigate up and down hierarchies. For further details, see walkUpToRootRecord. Hierarchy trees are implemented for the info areas A1, OJ, KM, IB, and MA. Select "Special: Parent" as child info area to navigate up the hierarchy, and "Special: Children" to navigate down. The configured table caption and menu settings for this node are ignored for the "Special" settings, they are taken from the parent instead.
- Link ID: Enable the Link ID check box and enter the link ID, if you want to use another than the default link. For further details, see Link IDs.
- Relation Name: If you have defined a custom link between two info areas, you can enter the name of this virtual relation, which is then displayed in the tree.
- CRM Processes: Assign one or more CRM processes to the tree node. For further details, see Roles & CRM Processes.
-
Info Area Label: You can specify a label for the node
(default: the plural of info area's name).
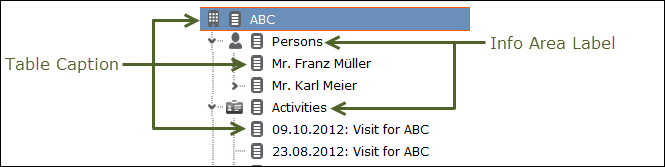
Table captions for the records listed in the tree are defined in the Record Settings area. For further details, see Record Settings.
- Record Filter: Select a filter to filter the records displayed under this node.
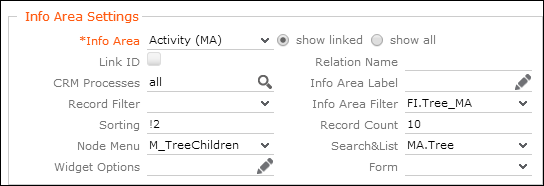
-
Info Area Filter: Select a filter to hide tree nodes based on
field values from the parent record. Example: Define and select a filter to only show
the Activity (MA) node if the parent company meets the condition
(RepID='$curRep' OR Rep2ID='$curRep') AND ABC='A'.All filters defined for the parent info area are listed.Note: Filters with more than one info area and parameterized filters (i.e. filters requiring user input) are not supported. If such a filter is used, it is ignored and a message is written to the client log.Note: If the value of a criteria field is changed by the user, he has to manually refresh the page in order to see the refreshed tree.
-
Sorting: Defines the sort order for the records in the node.
Use the following syntax:
- Sort ascending:
<field name or number>example -Datefor the Starts on field of an activity (MA) - Sort descending:
!<field name or number>example -!Datefor the Starts on field of an activity (MA) - Comma-separate multiple sort fields: example -
!Date,Contact
- Sort ascending:
-
Record Count: Defines the number of records displayed for the
node, i.e. how many records are displayed when initially expanding an info area node.
If more records exist, an additional node "…" is shown below. Clicking on "…"
displays the next
<Record Count>records. -
Node Menu: Defines the info area node's context menu. The
following menus and menu actions are available:
M_TreeChildren: Contains all three menu actions,A_ShowALL,A_TreeListandA_TreeNew.-
M_TreeChildrenNoNew: ContainsA_ShowAllandA_TreeList. -
M_TreeChildrenNewOrEdit: ContainsA_TreeNewOrEdit. This is used for 1:1 children analogous to an Expand view withmode=NewOrShow. For further details, see mode. Example in UPDATE_DEFAULT: AD node in TreeViewAK. -
A_ShowAll: Expands the info area node, thus displaying all child records. -
A_TreeList: Leaves the tree view to display the node's child records on a Search&List page. -
A_TreeNew: Allows users to add new records as children of that node linked to the parent record without leaving the tree view. TheSearchResultsheader contains aNewCommandbutton doing the same. For further details, see NewCommand.
- Search&List: Defines the Search&List configuration to be used when clicking on the info area node. For further details, see Search&List Configuration.By default, the search area is collapsed, only the actual results are visible. Clicking a list item displays the corresponding sub-list.
-
Widget Options: Use this field to pass additional parameters
to the displayed widget (
SearchViewor the form specified under Form).All properties for the selected widget as available in the Form Designer can be used. Define the widget with all desired properties in the Form Designer and copy the properties from the source view to this field.
Examples:{"viewOptions": {"list": {"grid": { "showMenu": true, "showMiniDetails": false }}}} {"form": { "useAutoSearch": false }, "showSearchForm": true} -
Form: Allows you to provide the name of a custom widget or
form to be displayed when clicking on the node (with
$Recordrepresenting the current record).
Node Settings
This setting is for appearance and behavior of a tree node.

Use the following settings to configure the appearance and behavior of a tree node:
-
Check Children: The
 symbol for expanding a node is only
displayed if the branch actually contains records. (To gather this information, the
tree view tries to load the first record of the branch).
symbol for expanding a node is only
displayed if the branch actually contains records. (To gather this information, the
tree view tries to load the first record of the branch). - Company-related: Only company-related records are displayed for this node. For example, use this flag to show only activities linked directly to the company instead of appointments linked to persons of that company.
- Disable Tweaks: This flag is only relevant when listing activities (MA) for a company or person: If checked, only MA records linked directly to the parent record are displayed but activities linked via the Activity Participants info area (MB) are ignored.
-
Expand: When the tree is loaded, all branches with this flag
are automatically expanded (i.e.
<Record Count>records are read and displayed). - Expand Records: When the tree is loaded, all branches with this flag plus the records within are automatically expanded (i.e. their sub-info areas are displayed).
- Hide Group Node: The group node is hidden, and records contained in this node are displayed directly under the parent node.
- Hide Records: The records of this node are not displayed.
- No Records: Allows you to define group nodes that contain group nodes themselves it is recommended to assign no menu if this flag is set.
- Readonly: Defines whether the details mask of a tree's record is editable or not. For further details, see viewMode.
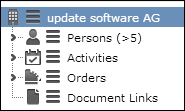
-
Show Count: Displays the number of records for that node. If
more than
<Record Count>records are found, the user is only informed that there are more than<Record Count>records. - Hide GroupNode Without Children: Hides this group node in the tree view, if the group node does not have any child record to display. For example, a Ticket, Sales Group, or Activity node is hidden if it does not have any records to display.
Examples
|
Flag |
Result |
Flag |
Result |
|---|---|---|---|
|
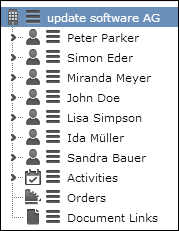
Expand for persons |
|
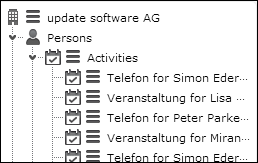
Expand Records for persons |

|
|
Show Count for persons |
|
Check Children example - for orders |
|
|
Hide Groupnode for persons |
|
No Records for persons |
|
|
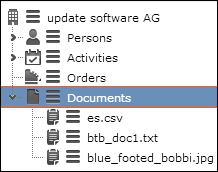
Hide Records and Hide Groupnode Use this combination to show documents linked to a record via D3 as if they were directly associated with the record. Example in UPDATE_DEFAULT: Treeview D3: Parent: FI | Link-ID: 127 | Flags: Hide Records D1: Parent: D3 | Flags: Hide Groupnode You can define an InfoArea Label Text for the D3 node renaming Document Link example - to "Documents". |
 |
Record Settings

Use the following settings to configure the appearance and behavior of the records listed under the selected node:
-
Context Menu: Defines the menu displayed for each record of
this info area. You can use the same menu as specified in the Expand configuration
for that info area. Alternatively, you can use
M_DefaultTreeor define a special menu e.g. to avoid leaving the tree view. If undefined, the user can only view or edit a record depending on the node settings. For further details, see Node Settings. -
Expand: Defines which Expand configuration is used for
displaying a record. If undefined, the default Expand configuration
<infoAreaId>is used. -
Table Caption: Select the table caption to be used for all
records of this info area and this branch (Default =
<InfoAreaID>).You can use any table caption defined for the info area – this allows you to use another than the default table caption, e.g. if the default table caption is too long or contains redundant information already visible in the tree like the name of the company in a KP table caption.
-
Widget Options: Use this field to pass additional parameters
to the displayed widget,
ExpandViewor the form specified under Form.All properties for the selected widget as available in the Form Designer can be used. (Hint: Define the widget with all desired properties in the Form Designer and copy the properties from the source view to this field.)
Example:
{ "viewMode": "Edit" } -
Form: Allows you to provide the name of a custom widget or
form to be displayed when clicking on the node (with
$Recordrepresenting the current record). The Form parameter allows to configure the tree view e.g. to open an external website in the area next to the tree.