Community Setup Page
To access community setup page, go to the Admin tab of a community and click the Go To Setup link at the top of the Admin Links section:

Click Go To Setup
If there are no tabs in your community, you can access the Admin tab by opening the Site Actions menu, choosing Site Settings, and clicking the Community Administration link.
This displays the following page:
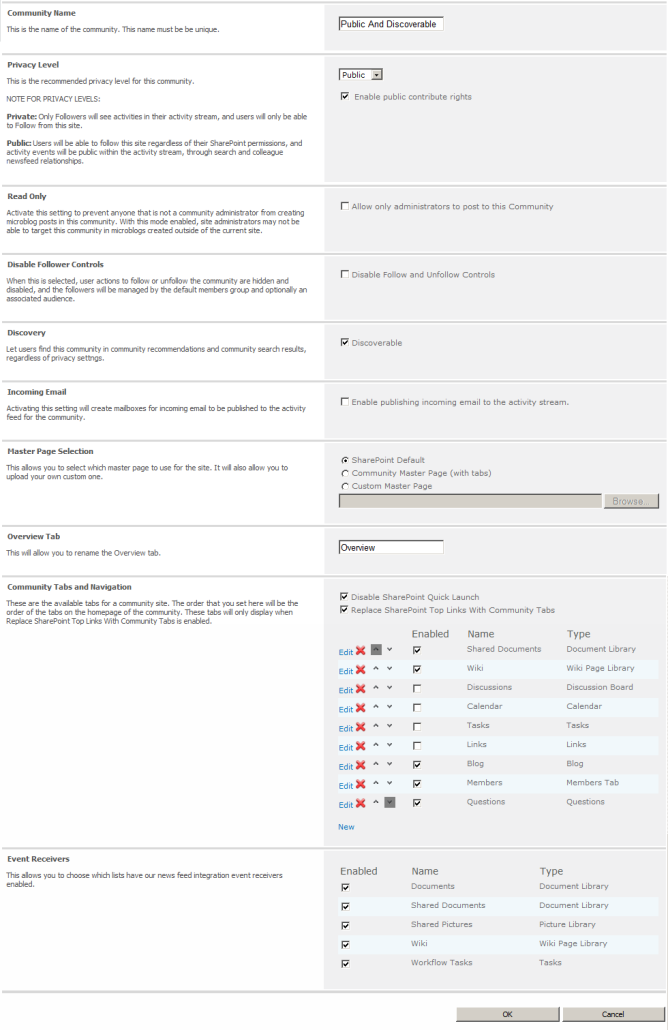
Community Administration
Make entry on this according to the instructions below and click OK at the bottom of the page to commit all your selections, and to create any tabs/lists you added in the Community Tabs and Navigation section.
You can return to this page later to reconfigure any choices you made.
The following sections explain each setting on this page in the order in which they appear, top to bottom:
When creating a public community the privacy level is pre-set to Public, and this results in the Public Community Members group being automatically added to the community, if it would not have otherwise inherited this group from a parent site with at least read privileges.
For further details, see Public Community Members section under Section-by-section description of the NewsGator Social Platform Management page.
The Public Community Members group is not added to private communities.
Checking the Add public contribute rights box ensures Public Community Members gets contribute permissions instead of just read permissions.
If you change the privacy level from Public to Private, upon completion of this page you are redirected to a security page on which you can define which users has Visitor, Member, or Owner permissions in the community.
An action that a user takes in a Public community shows to all members of that community AND all people who are following that user as a colleague. An action taken in a Private community ONLY shows to followers of that community.
People who have access to that Private community’s site can view the events for that community on the community activity stream without following.
Some communities are established primarily to get a message out. When communities have very broad lists of followers (for example communities which have everyone in the “all company” distribution list), companies may choose to prevent end users from sending microblogs or questions to everyone in the community.
Communities have a setting to only allow community admins to post messages. This setting (Read Only) is on the community's Setup page (accessible via the Go To Setup link on the Admin tab).
When this setting is enabled, community administrators can still post to the community. However, non-admins see no input box on the community overview page.
Also, users who are not administrators cannot send messages to the community by using the @ from the activity feed. If a non-admin types in “@[DemoForDocsJan29]”, that is simply treated as text, not sent to the community, and not linked in the activity stream.
This setting does not affect SharePoint permissions on the lists and libraries in a community. If users are still able to contribute to them, activity stream events is created when new documents, wikis, blogs, etc. are created.
Similarly, enabling features such as inbound email or ideas created means for users to add events to the stream.
In some cases, a company may need users to follow a particular community and not have the option to unfollow. Also, in some cases, the followership of a particular community is exactly defined by something like a distribution list. In this case, it doesn’t make sense for other users to follow even if the community is public.
A setting on the Setup page for a community (accessible via the Go To Setup link on the Admin tab) allows a community administrator to implement this choice.
Enabling this setting removes the Follow Community control. Here is the community with the control visible.
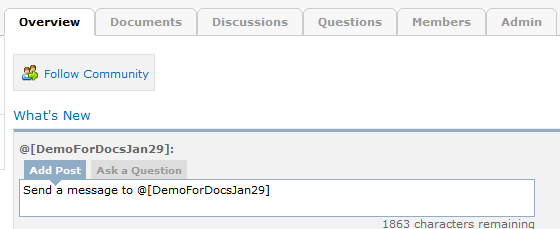
Follow Community control is visible
This screenshot shows what the community looks like with the control disabled.

Follow Community control is not visible
Turning this setting on also removes follow and unfollow options from other displays.
For example, here is the view in the Recently Created Communities web part when follow/unfollow is disabled for the demo community.

Recently Created Communities web part
The Discoverable setting lets you control whether this community is displayed in recommendations, search results and on the My Profile page if the My Discoverable Communities page is deployed.
This setting does not affect SharePoint search indexing the site nor does it affect which users will see actions performed within the community.
In addition to global emails (see Global Email Addresses for microblogging and asking questions), individual community owners can enable inbound microblog and question addresses for their specific community.
The setting for this is in the Incoming Email section of the community's Setup page:

Incoming Email section
When this is enabled by checking the Enable publishing incoming email to the activity stream checkbox, announcement lists are created within the community and given specific email addresses.
The community admin can make these addresses easily available to users by adding the Vcard web part to the community site. This part presents the addresses for the community.

VCard web part
Users can click the links to add the addresses to their contact lists like any other Vcard.
Click the link to add address
To email the community, the user simply selects the address and sends the email.

Select address and send email
The result is just like sending to the global address, but the message targets this specific community.
In the Master Page Selection section, you can choose a default SharePoint master page, the tabbed master page provided with Aurea Social (Community Master Page) or your own master page.
In the Overview Tab section, you can rename the landing tab for the community (the default tab displayed when navigating to the community site).
You can change the post control in any community so that when a user first arrives at the community site, it shows them the option for posting a question instead of defaulting to the option for making a microblog post.
This is a potential benefit to users who do not understand that Aurea Social has special support for getting their questions answered, and that they’re more likely to get a high quality timely answer when creating a question post than when creating a regular micro-blog post.
To change to post control to default to question posts, do the following:
- Go to the Admin tab of the community
- Click the Go to Setup link to get to the community Setup page.
- Find the Default Post Control Action section (pictured here) and
- Select Ask a Question.
- Click Save at the bottom of the Setup page to commit your change.
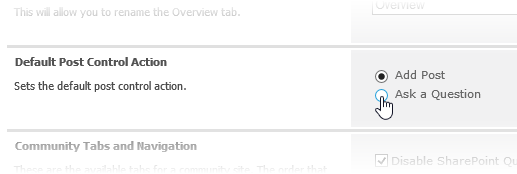
Select Ask a question
Having done this, the community’s post control should now look like this, with the question option on the left:
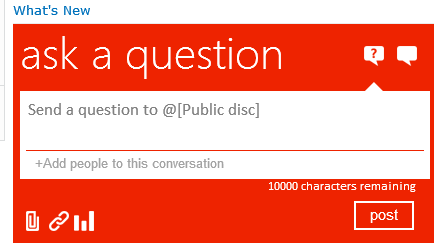
Community's post control
Users can still post a regular microblog post by first clicking the speech balloon icon to the right of the question balloon icon.
The top option in the Community Tabs and Navigation section allows you to disable the quick launch links that appear on the leftmost side of the community page.

Community Tabs and Navigation
Below pictures shows what the community looks like when these are not suppressed and when Disable SharePoint Quick Launch is checked.
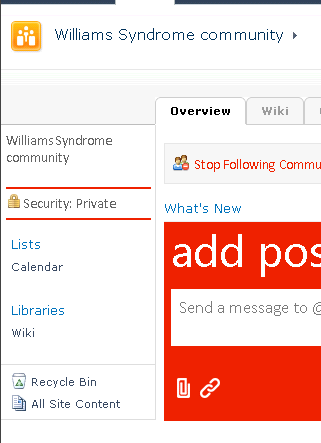
Disable SharePoint Quick Launch is not checked.
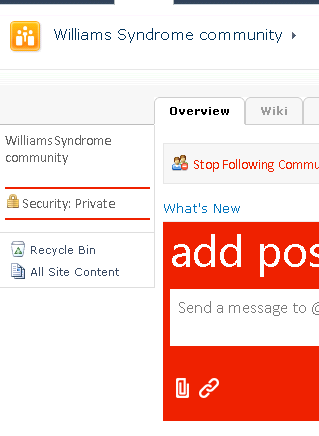
Disable SharePoint Quick Launch is checked.
As part of the work to make Aurea Social work well for both SharePoint 2010 and SharePoint 2013, Aurea Social version 3.5 introduced a navigation option for communities that puts the links to the site contents horizontally across the top of the community site without requiring the use of the Aurea Social master page.

Enable Replace SharePoint Top Links With Community Tabs
With Replace SharePoint Top Links With Community Tabs checked and the SharePoint master page in use, you’ll see links to the different pages in the community site in the upper SharePoint navigation:
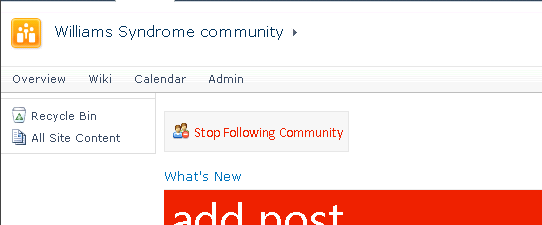
With Replace SharePoint Top Links With Community Tabs unchecked and the SharePoint master page in use, you’ll see the normal SharePoint navigation links:
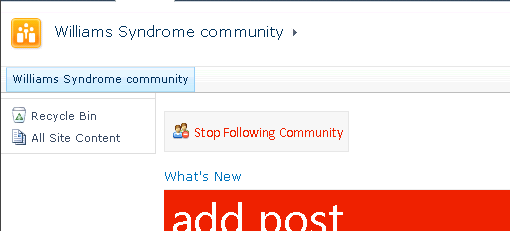
To see the regular Aurea Social community tabs, you must have the master page set to Community Master Page and also Replace SharePoint Top Links With Community Tabs must be checked.
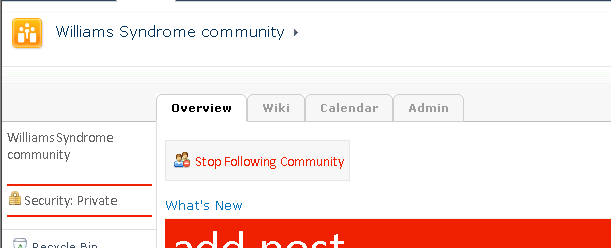
Regular Aurea Social community tabs
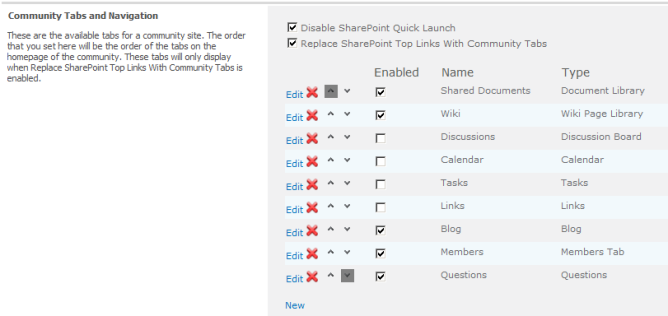
Community Tabs enablement and positioning
Checking an Enabled box next to any tab in the Community Tabs and Navigation section means that tab is included in your community. The typical tab corresponds to a single list or library in the community.
The up and down arrow controls only apply if the Community Master Page has been selected. Tabs appear in the order chosen here.
If something other than the Community Master Page has been selected, checking the Enabled box next to a tab results only in the corresponding list or library being created (no tab results).
The exceptions are the Members and Questions tabs, which are custom Aurea Social tab types that do not result in any list being created.
Additional tabs can be added during creation (or after the community has been established) by clicking the New link at the bottom of this section.
Alternatively you can just modify one of the existing tab options by clicking the Edit link next to it. Either one of these actions changes the view to appear as follows:

Community Tabs
There are four tab type options: List, Link, Member, and Questions.
List - With List selected, you'll see the Available List Types dropdown, pictured here. If you choose any of the specific list or library types shown here, that list is created upon completion of this page (when you click OK at the bottom of the entire page; not when you click Save here, which just saves your configuration choices). The tab displays the new list.
If you choose Select Existing List, another dropdown appears, displaying only those lists that already exist in the community.
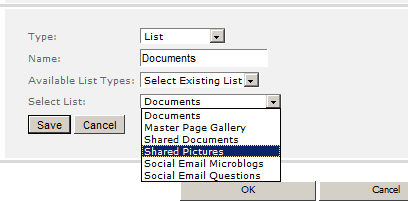
The tab displays the list you select here.
Link - With this selected, you are prompted for an URL. Clicking the resulting tab redirects your browser to whichever URL you provide here.
Member - With this selected, the resulting tab is a community members tab (see Using and administering your new community, below, for more on this tab type).
Questions - With this selected, the resulting tab has an input for questions and present a compact display of all the questions (and only the questions) asked in the community.
When your selections are done, click Save. This does not create the tab; it does return you the view that lists all the tabs you've configured.
In the Event Receivers section of the community’s Setup page, a community owner can choose whether each list or library in her community creates events when users add new items:
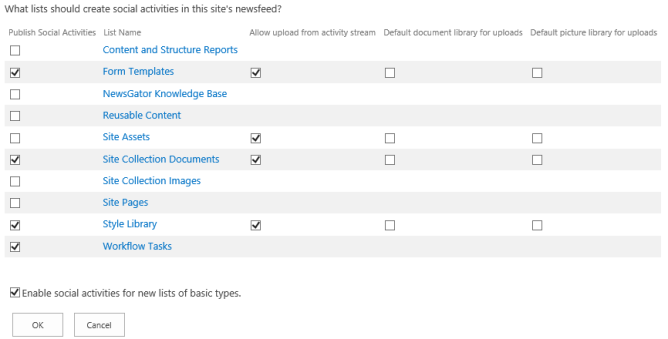
Receivers section of the community’s Setup page
The lists and libraries in that community are shown, and the community owner can choose to enable or disable event creation for each of them. This is helpful if a particular library has tons of activity that is overwhelming the stream.
This page is now called Social List Settings (see section below on file upload control).
This page also check for lists that have more restricted access. The intent is to provide community administrators with a warning so that they do not inadvertently select a list for social activities to which not all members can access resulting in confusion among the community members.

Warning message
However, in some very large communities with complex list permission configurations, this permission check can cause the page request to timeout.
As a workaround for these special situations, the community administrator can append the query string parameter ?unsafe=true to the end of the request (eg: /_layouts/15/ng/listsettings.aspx?unsafe=true). This bypasses this security check.
A status message on the list itself lets site owners know that events will not be created from the list:


This message is useful if a list has different security than the rest of the community or if the event receivers have been unexpectedly deactivated for some reason. It also gives easy access to turn on or off event creation on the list via a Change Settings link.
Events from custom lists and other standard list types can also be enabled. Below is an example of a custom list in the Social List Settings:
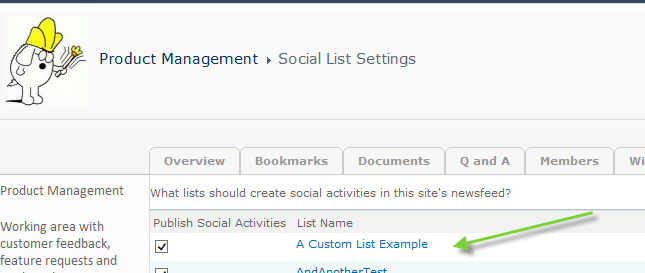
Custom list in the Social List Settings
Once the publish social activities setting is on, activity stream items are created for new entries in the list. These events have the normal consolidation behavior for new list events in a community, so they may not appear in the stream for 30 seconds.
This also means that if multiple list items are created in a short period, they are consolidated into a single event.
Here is an example of an event from a custom list:

An event from a custom list