Exchange Settings page

Exchange Settings
To configure the optional email, calendar and task tiles in Lookout or to enable the ability for “follow-up” items to automatically become tasks, the connection to Exchange must be configured in the “Exchange Settings” portion of the Email and Notifications administration section.
Social Sites’ Exchange integration features will only work for users that have a SIP in their user profile. For this reason, these features won’t work in Forms-Base Auth (FBA) environments, but should work in ADFS environments.
Preparatory steps for Exchange Integration
Prior to configuring Aurea Social’s connection to Exchange, you may need to complete the following two preparatory steps to allow SharePoint the access it needs to Exchange:
- If SSL is configured on the Exchange server for web service access, install into SharePoint the root authority certificate(s) for the issuer of the Exchange server SSL certificate.
- Provide SharePoint with credentials needed for making web service calls to Exchange.
Here are the specific steps necessary to accomplish these two preparatory tasks:
By default, SharePoint has no root authority certificates installed. If SSL is configured on the Exchange server for web service access, the root authority certificate for the issuer of the Exchange server SSL certificate must be installed into SharePoint. The steps for this are broken down into two parts here: get the certificates, and install the certificates into SharePoint.
Get the Certificates:
- On the SharePoint server, open Internet Explorer and browse to the Exchange Webmail URL.
- Near the Address Bar, click the Lock icon and click View Certificates.
- In the Certificate window, go to the Details tab.
- On the Details tab, click Copy to File…..
- Export the certificate in the DER encoded binary X.509 (.CER) format to somewhere easily accessible.
- Click the Certification Path tab.
- You’ve already exported the one listed on the bottom here. Click each of the other certificates in turn, clicking the View Certificate button for each when selected. New versions of the Certificate dialog should open for each.
- Repeat steps C through E in each of the other certificate windows. You now have all the certificates required to install to SharePoint.
- Close all your certificate windows when done.
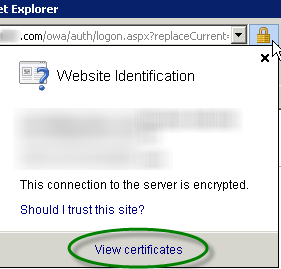
Click View Certificates

Go to Details tab
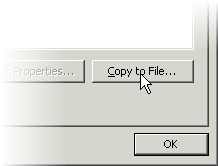
Click Copy to File...
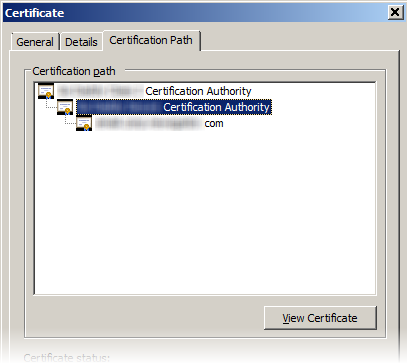
Certificate Path
Install the Certificates:
- Open SharePoint Central Administration
- Goto Security > General Security and click Manage Trust.
- In the Ribbon, select New. The Establish Trust Relationship dialog appears.
- At the top, give the relationship a name.
- In the next section, browse to the root certificate you exported above.
- Leave the rest as is, and click OK.
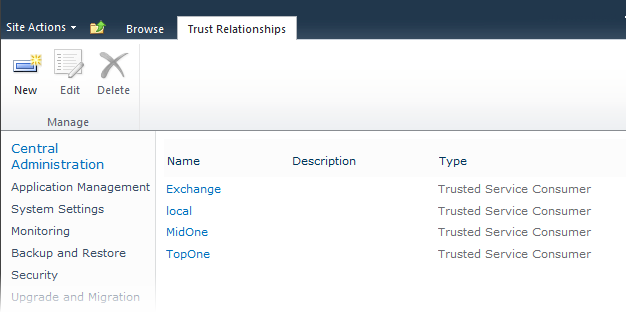
- Do this as well for all the other certificates you exported above. When finished, it should look similar to this.
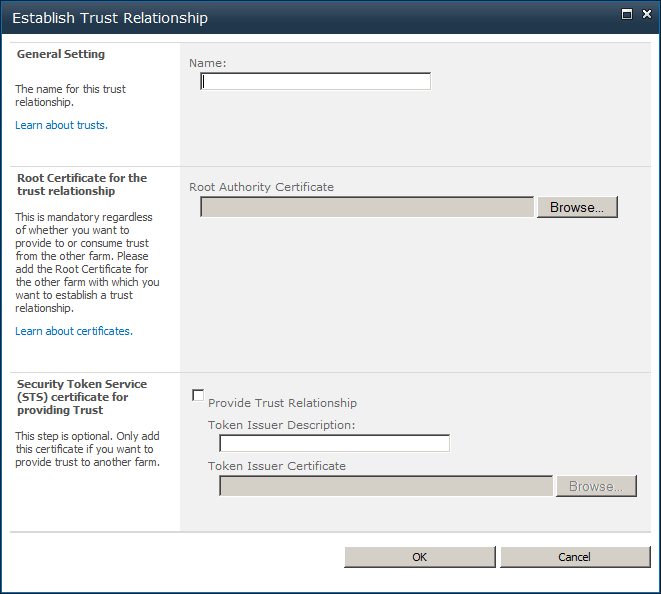
Establish Trust Relationship diaglog
Since the Exchange Managed API is making web service calls from the SharePoint backend, credentials must be explicitly provided when needed (they cannot be passed through from the current user’s credentials), and therefore must be stored in the Secure Store.
In order for these credentials to work in production, the account provided must have Exchange Impersonation rights. It is recommended that you create a new Active Directory service account to be used exclusively for this purpose.
Set up service account:
- A domain administrator will need to create a service account in Active Directory.
- An Exchange administrator will need to open either the Exchange Management Console or the Exchange Control Panel (if your organization uses Exchange Server 2010) or the Exchange Administration Center (if your organization uses Exchange Server 2013).
- Add the Application Impersonation role to the service account. One way to do this is by creating a role group with the Application Impersonation role, and with the service account as a member of the group.
Install the Certificates:
- Open Central Administration.
- Go to Application Management >Manage Service Applications and click the link for Secure Store Service (or whatever custom name you may have given yours).
- If you have not yet generated an encryption key, it will ask you to Generate New Key on the ribbon.
- Select New on the ribbon.
- Enter a Target Application ID, something like “MyCompanyExchange”. Take note of this because you will use this later when configuring the Exchange integration.
- Set the Target Application Type to “Group”.
- On the fields page, leave Windows User Name and Windows Password as they are and click Add Field. For the new field set the name to “Windows Domain” and type to “Generic”. (The field names must be like this and are case sensitive).
- On the next page, set the Administrator to an account (usually the farm administrator) that will have the ability to change the credentials of the service account you’ll use for Exchange impersonation, which you set up in the previous section. Set as the Members a group representing your Aurea Social users … or at least those users who are to be able to use any of the Exchange integration features available in Aurea Social.
- After the Target Application is created, select the drop down menu on your target application and select Set Credentials.
- Set the user name, password, and domain of the service account you created for Exchange Impersonation.
- Select OK.