List Control
You can define which fields of a record are displayed in lists and the sort order of the records displayed.
Lists are displayed in CRM.pad as follows:
- As search result list:
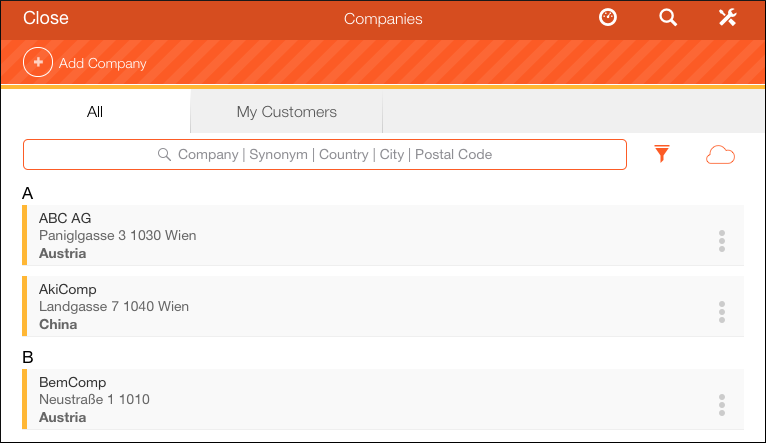
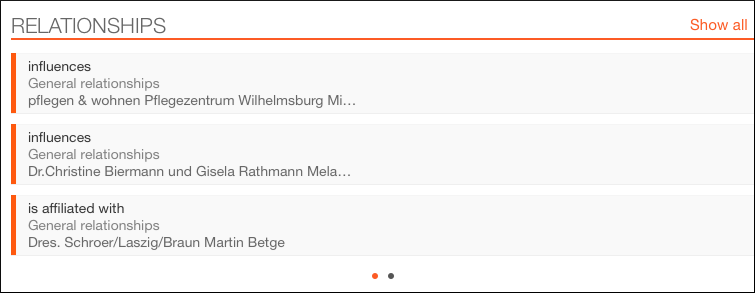
- As a list containing child info area that are displayed in the parent info area's
Details page: (e. g. all relationships of a company or person).
Both lists use the (same) List control.
The fields you selected are displayed in the following order by default, but you can change this order, see Defining the Fields' Order. The first selected field is formatted in bold. The order how they are displayed is shown by the direction of the arrows in the following example:

- You can also define that an image is displayed on the left in the corresponding Expand configuration.
- You can combine the content of several fields with the
ColSpanoption, see Combining Field Values. You can also define whether a field is defined in bold or in a specific Field Color, see Field Attributes. - You can change the displayed text (YES/NO) for Boolean fields, see Boolean Fields in the List and MiniDetails Control.
Defining the Fields' Order
In CRM.pad, the fields displayed in lists are not displayed in columns. Therefore, the Column Width attributes are used to define how data is displayed in lists.
By default, the fields are displayed in the order they were added to the Fields panel in two columns within a row:
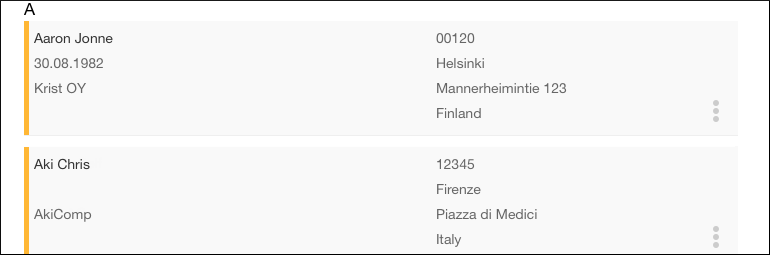
In this example, the person's first and last name were combined with the Colspan
attribute, see Colspan.
However, you can also use the Column Width attributes to define how the fields are displayed. You can enter order numbers, for example:
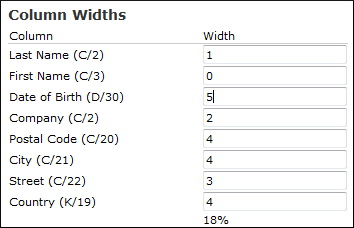
This results in the data being displayed as follows:

- Data is sorted according to the sort numbers.
- Fields with the same sort number are combined (in the order they were added to the panel), separated by a space.
Grouping Lists by a Specific Field
You can define that a list is grouped by a specific field, e. g. the appointments list can be grouped by date.
Select the desired field in the List control, enable the Extended
Options check box and enter {"SectionField":"true"}
Displaying a Map in a List containing Search Results
You can define that a map showing the search results is displayed in the result list, e.g. a rep searches for the appointments of the day, and the location of the companies to be visited are marked in the map.
To display a search result in the map:
- Add the GPS fields (Longitude and Latitude) to the desired List control (e.g., FI field group's List control).
- If you do not want them to be displayed in the list, set the Hide Field attribute for these fields.
- Assign the
RecordListViewaction to the desired item (e. g. to theLIST_FIapplication menu action of theSMARTBOOKapplication menu) and set theMapViewinput argument totrue: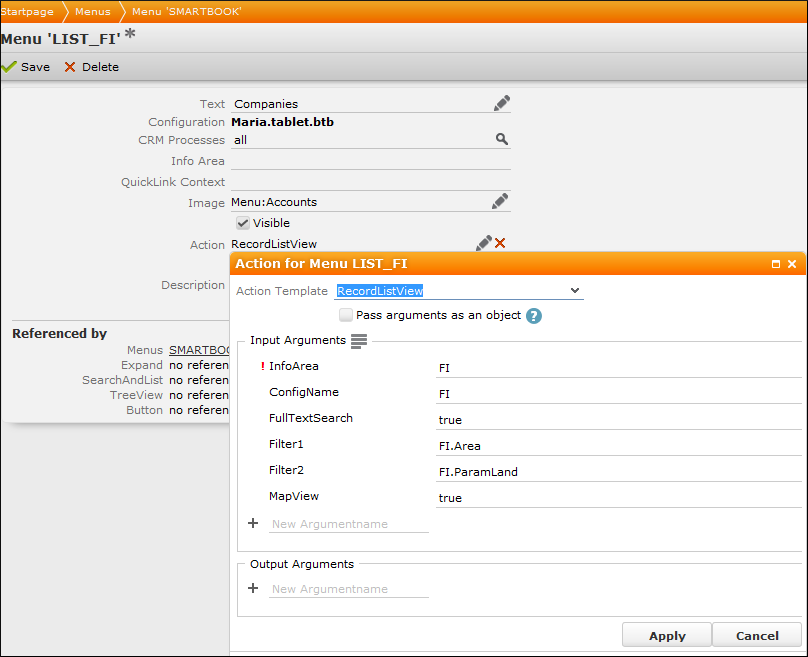
- You can limit the displayed items with the (numeric)
MaxCountMapViewWeb-Configuration Parameter, see MaxCountMapView.