Documents
Documents can be stored in the Aurea CRM database (as binary data) and a record in the D1 or D3 info area is created for each document.
Downloading Documents
You can define how the documents are available in CRM.pad:
- In the default configuration, only the document info areas (D1
and/or D3 records) are transferred (i.e. the D1 and D3 info areas are included in the
offline data set, see Offline Record Set / Offline Data Set).
Users can see that a document exists and can download the document if a connection to the server exists.
- If both, the link and the document, are transferred to the device the user can
access the document in offline mode as well. Note: The volume of the data transferred during synchronization increases and can cause performance problems.
You need to define the record set for the D1 and D3 offline data set. Switch to the data set and add a new Recordset of TYPE
Documentsand enter the NAME in the following syntax:[InfoareaID]DocData, e.g.D3DocDataorD1DocData: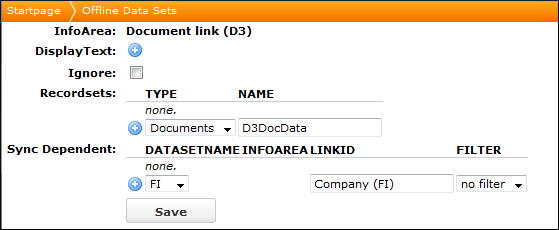
You can define, how documents are transferred using the
Sync.DocumentSyncWeb Configuration parameter, see Sync.DocumentSync. - You can also add documents to the quick add, see Displaying Documents in the Quick Add.
Displaying a Documents List
You can define that a list of documents is displayed. This list can be called with an application menu or as a tab in an info area listing all related documents.
To define that a document list is displayed:
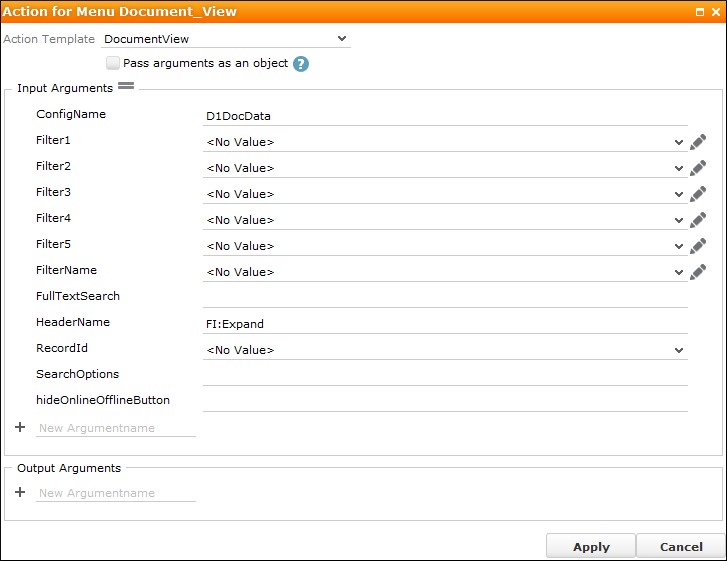
- Assign
DocumentViewas action template to the application menu action or to the tab.For a description of the parameters see Search.
- You can group the documents. Add a field to the field group that is referenced in
the List control and enter
groupingKeyin the Function field. For example, if you assign thegroupingKeyfunction to the Mime Type field, the documents are grouped by extension (e. g .jpg or .doc files). - If you want to display a different header, define the desired header by specifying
the
HeaderNameinput argument.The following graphic shows how to assign the action template to an application menu item:
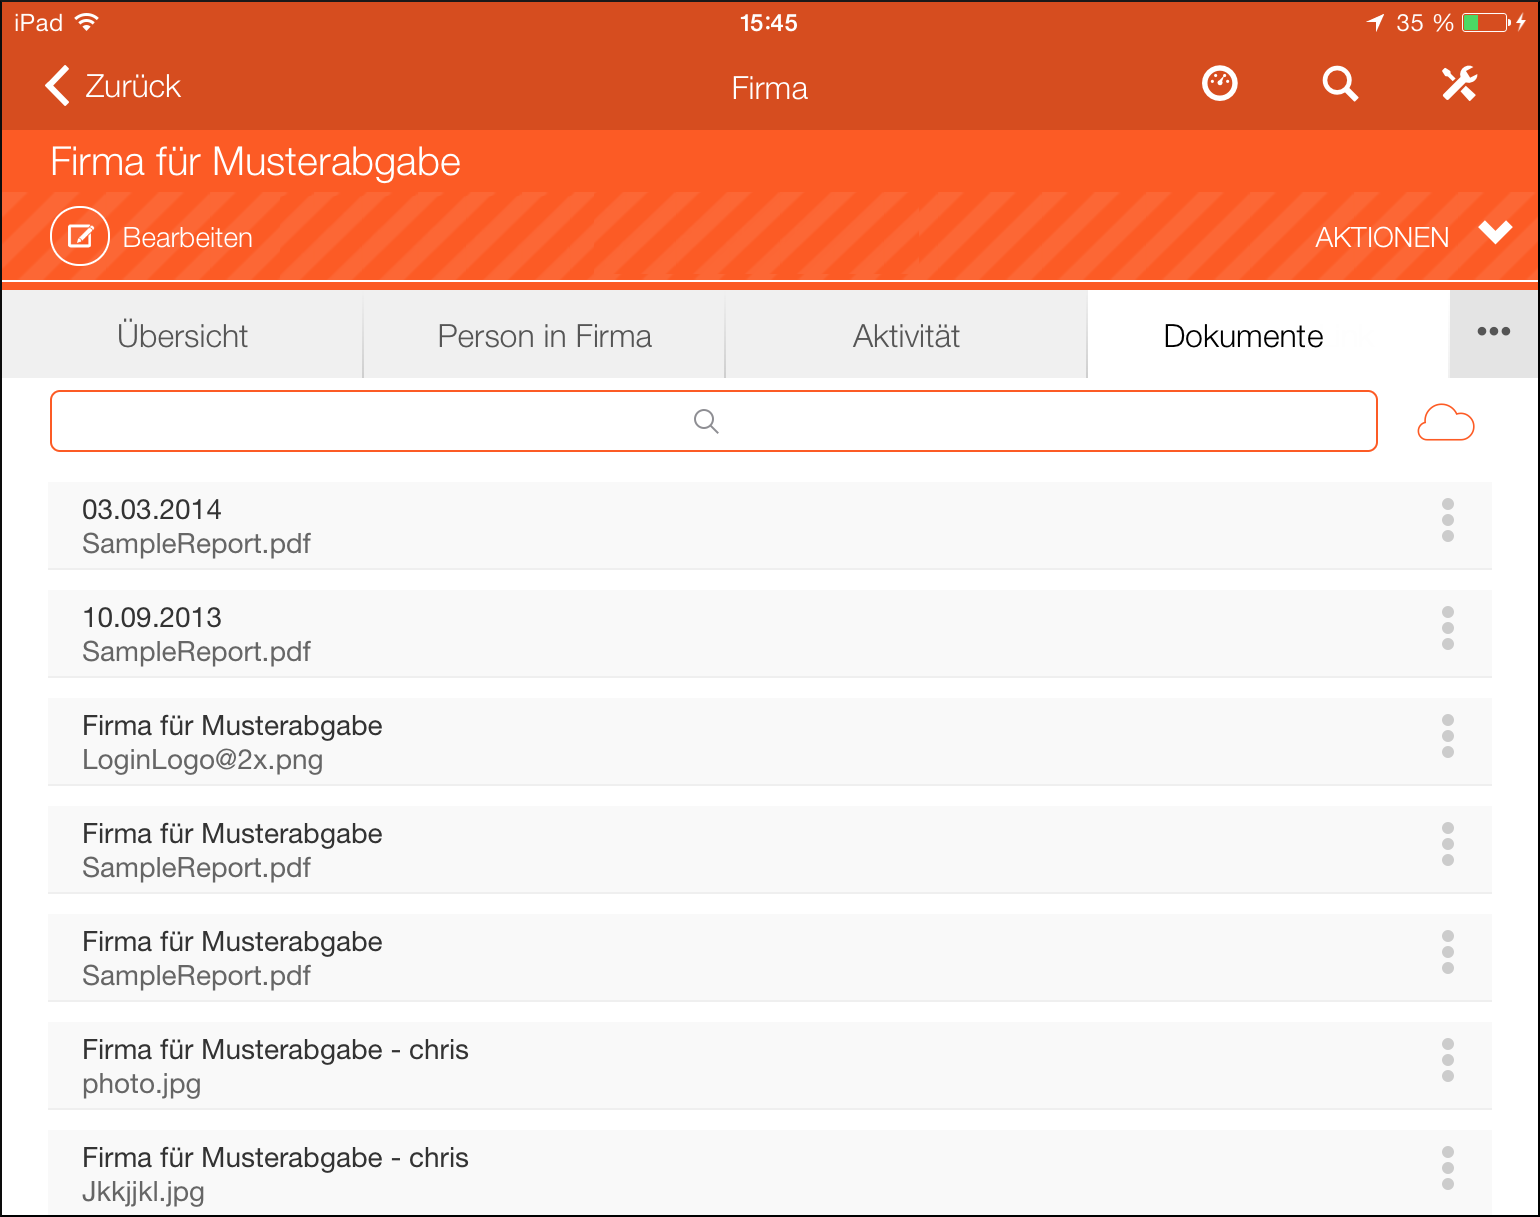
This definition results in a document list being displayed for the user:
Displaying Documents in the Quick Add
You can also add documents to the quick add edit pane to display, e.g. the description or a photo of a product.
To add documents to the quick add edit panel:
- Switch to the
SerialEntryaction call and enter the desired documents and filters in theDocumentsDefinitioninput parameter field in JSON syntax:"[{"name":"<infoarea>","filter":"<filtername>"}]"Example:
"[{"name":"D1","filter":"D1.Brand"}]"The following JSON string parameters are also available:
-
Style(optional): Defines the document type and can contain the following values:-
IMG(only images) -
NOIMG(all files except images) -
DEFAULT(all files)
-
-
addPhotoDirectButtonName: The name of a button that has thePhotoUploadActionassigned, >> Uploading Pictures. If set, the user can upload photos in the Quick Add.
-
- Switch to the List control of the Quick Add's field group (e.g.
ARSerialEntry) and assign the required Function that you need for the filter, for example$parBrandfor theBrandfield:
- Define a filter (e.g.
D1.Brand) and add the function name from the previous step to use the field's content as filter criterion:
Document Inbox
You can define that the user is able to upload documents to the Document Inbox (that is available in the Control Center). The user can then link these documents to a record.
To configure the Document Inbox and linking contained documents to records:
- Define the
DocumentInboxWeb Configuration parameter, see DocumentInbox. This parameter controls, whether the Document Inbox is displayed and the document types that can be added. - If you want the user to be able to edit data (e. g. specifying a file name, entering
a description) when they link a document with a record, define an Edit control in the
D3 info area containing the desired fields .
If you assign
Filenameas Function to a field, the file's name is automatically entered into this field. - Add a button and assign the
FileUploadActionaction, see FileUploadAction. - Add the button the desired info area.