Queries and Analyses
Learn how to include queries and analyses in CRM.pad.
Analysis and query names as well as button and menu names must not contain underscores, as underscores are used as delimiters.
Configuring Analyses
This chapter only describes how to configure an analyses to be displayed in CRM.pad. See the Aurea CRM web Administrator Guide on defining an analyses (e.g. the included values and categories).
Analyses are executed locally on your iPad.
To add an analysis:
- Define a configuration unit that calls the analysis:
- Button, see Buttons.
- Menu action or context menu action, see Menus.
- A panel in the Details control, see ANALYSES_<AnalysisName>.
Users cannot manipulate the analysis in this panel. However, you can add a button to the page's header allowing the users to switch to the analysis page where the available options like drill-down, drill-up, etc. are available.
- Assign the
Analysisaction template to the desired configuration unit, see Analysis. - Add the configuration unit to the desired info area.
Configuring Queries
See the Aurea CRM web Administrator Guide on defining a query.
Queries can be executed on- and offline. However, if a query was not explicitly set to
RequestOption = online:
- Multiple child relations are not supported.
-
SUMMEDrelations are not available.
To add a query:
- Define a configuration unit that calls the analysis:
- Button, see Buttons.
- Menu or context menu action, see Menus.
- A panel in the Details control, see QUERY_<QueryName>_<No>.
- Assign the
Queryaction template to the desired configuration unit, see Query. - Add the configuration unit to the desired info area.
Adding pre-defined Analyses and Queries to CRM.pad Dashboard
To add Analysis and Queries to a CRM.pad application dashboard, perform the following steps in the CRM.designer:
- Click Legacy Forms on the Start page of the CRM.designer.
- Enter a name for the legacy form that displays the Queries and Analysis in the CRM.pad.
- Use the copy from drop-down list to select an existing legacy form as a template to create the new form. Click the plus button to add the new form.
- Click the Edit button to edit the new form and add the pre-defined Queries and Analyses to the form.
- Select the Mask Type and enter the required details for the Legacy forms. For more information on working with Legacy forms, see Legacy Forms.
- Click on New Tab and provide the Text for the tab in the CRM.pad.
- Click New Row to add a new record to the tab, this record
describes the information that needs to be displayed in the Tab for the Start page of the
CRM.pad. For more information on configuring a row, see Analysis and Query Types.
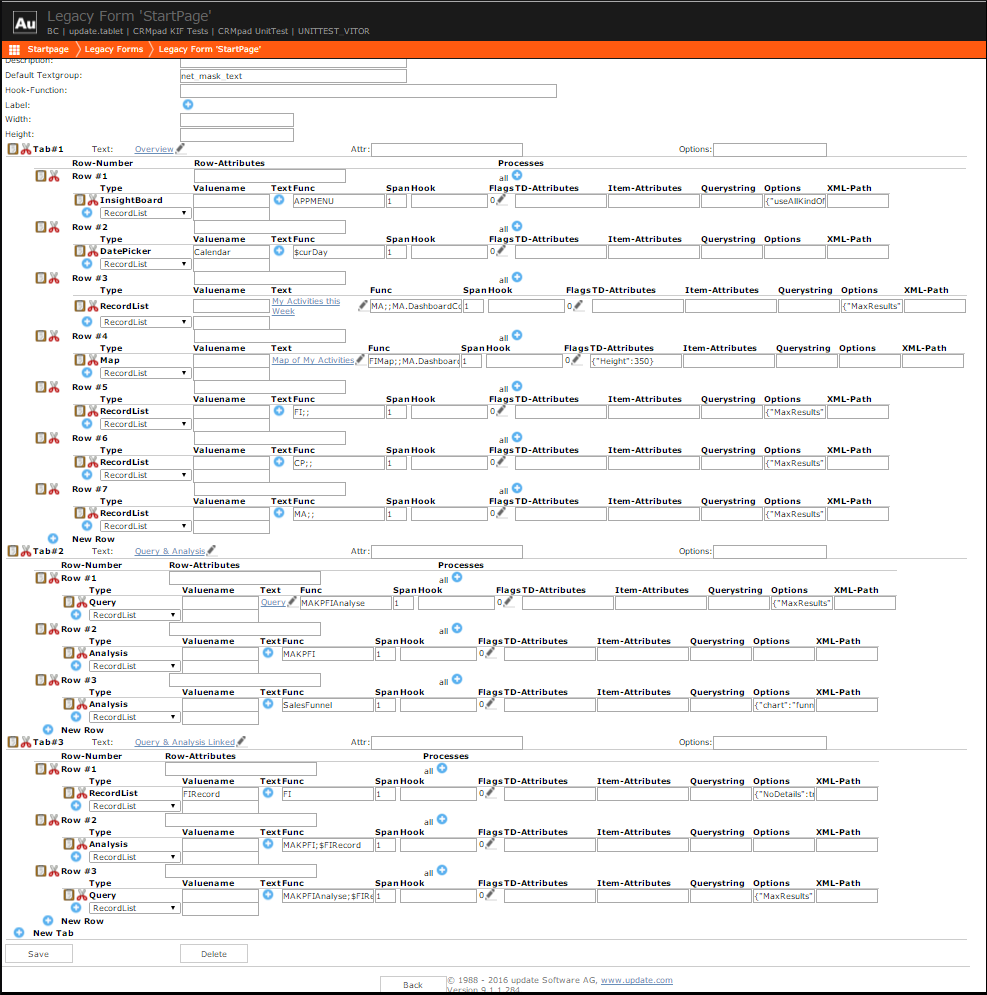
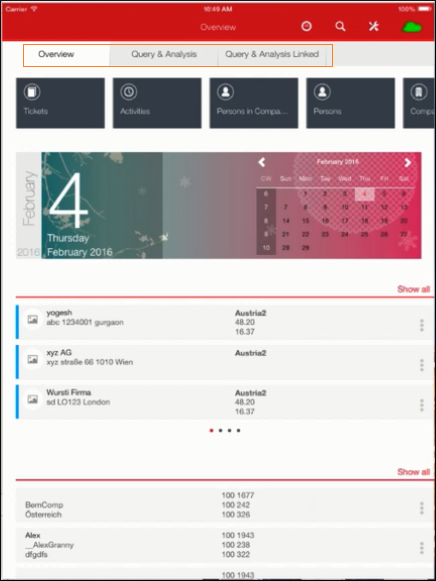
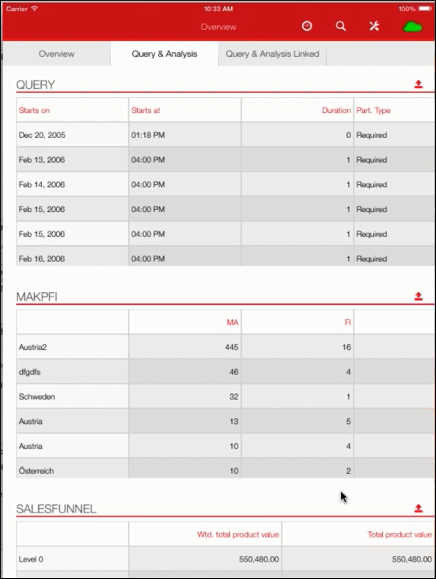
The following screenshot shows a fully configured legacy form called start page for the CRM.pad application. Three tabs are defined in this configuration: Overview; Queries and Analyses; and Queries and Analyses Linked. The subsequent screenshots shows the corresponding start page with the corresponding tabs open, in the CRM.pad application running on an iPad.