Installing by GUI
To install Aurea Social for the first time, or to upgrade an existing installation from an earlier version to a newer version, or to repair an existing installation using the setup files for the version you already have, click Install or Upgrade Aurea Social in the Aurea Social Launcher.
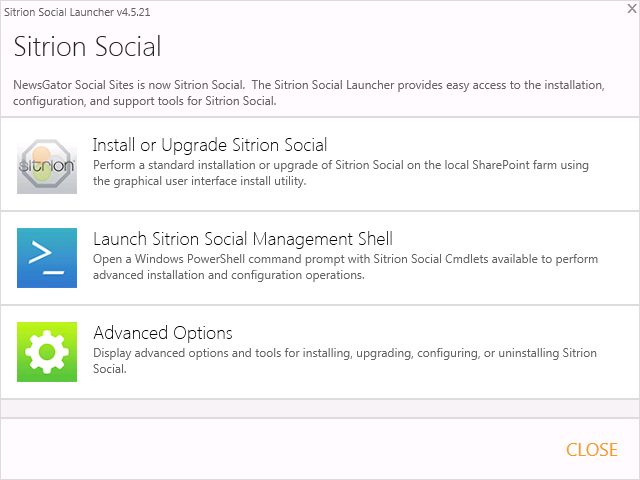
Aurea Social launcher
The first screen presents the Aurea Social license agreement. After reading the agreement, if you agree to the terms, click Accept to declare your agreement to the terms and to proceed with install, upgrade, or repair. Setup does not allow you to proceed to the next screen if you have not agreed to the terms of the license agreement.
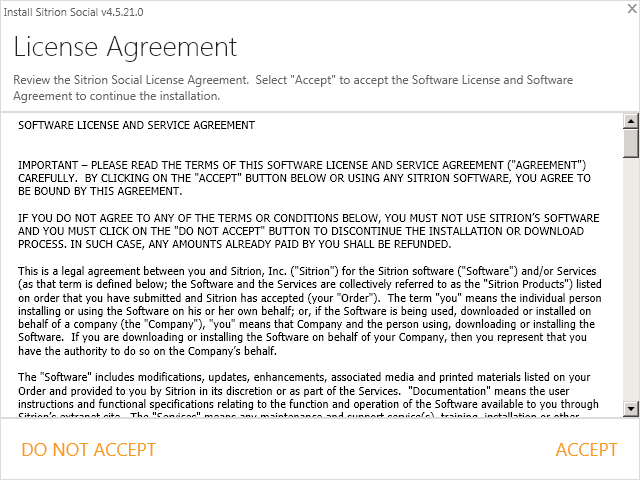
License agreement
Prerequisites check screen
Next comes the Check Prerequisites screen. Here the same checks are performed as in checking prerequisites before installation, repair, or upgrade and you can check it for help on addressing any prerequisites that this screen reports as not met.
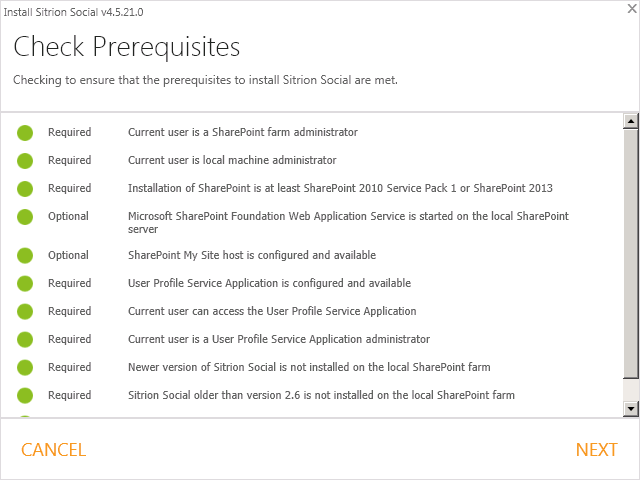
Check prerequisites screen
Click Next to proceed to the Installed Components screen.
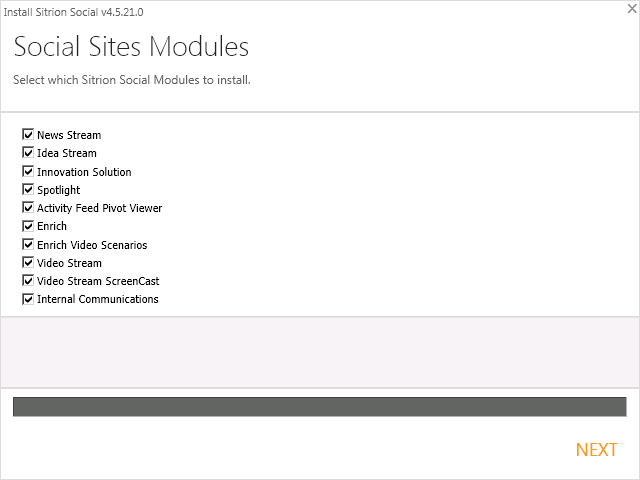
Social sites module
The Modules selection screen lists all optional modules that are represented in your solutions folder. Activity Stream Pivot Viewer is part of the core Aurea Social offering and always appear here.
Although part of the core offering, they are not mandatory for Aurea Social to function and may be left out by unchecking them.
Normally you would not uncheck any of these non-core modules here, as all non-core modules come at an extra charge (depending on how and when the product was purchased).
When upgrading or repairing, the already installed modules appears greyed out, and cannot be unchecked. Only the modules that are not installed are editable (can be checked or unchecked).

Uncheck modules that are not required
To help you decide whether you wish to include a certain option, select it and the Details pane on the right provides a description of it.
Any optional modules, that you purchased, are presented at the bottom of the options list. Any optional modules you leave unchecked here is not installed.
Click Next.
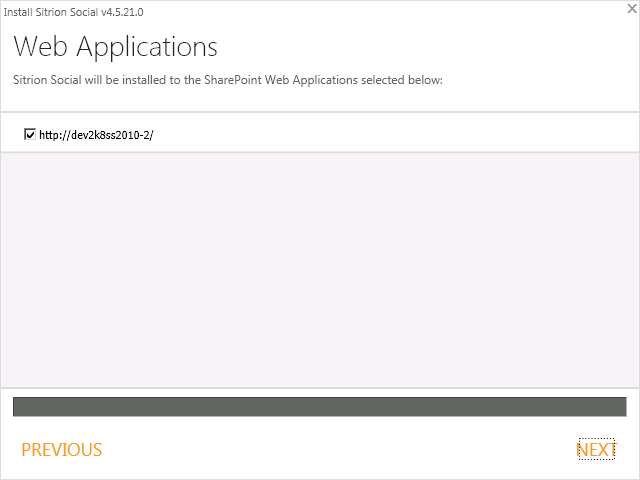
Web applications
The Web Applications screen appears only for new installations of Aurea Social, and not for upgrades or repairs.
It lists all the web applications in your farm except for the Central Administration web application. Specify only those web applications to which you want Aurea Social deployed by checking the corresponding boxes.
Click Next.
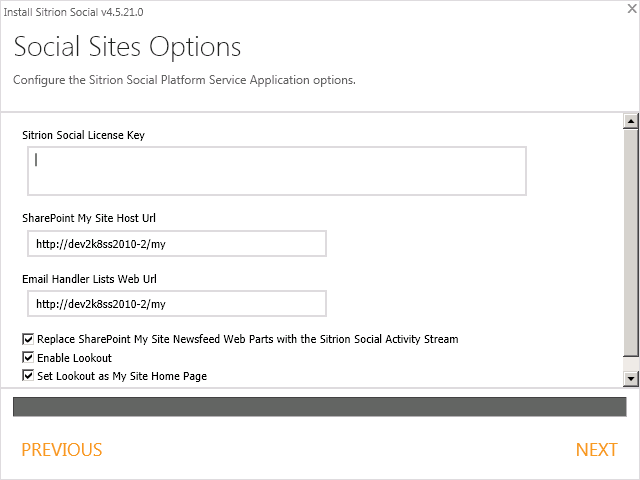
Social sites option
This screen only appears for new installations of Aurea Social, and not for upgrades or repairs.
Make the following entries on this screen:
| Field | Description |
|---|---|
| Sitiron Social License Key | Copy and paste the license key provided to you by NewsGator Support. |
| Sharepoint Mysite Host Url | This field is specified for alert email replying to work. This is the feature that allows you to add a comment to a conversation or event you have been involved in by simply replying to the email that alerts you to someone commenting on or liking it. |
| Email handler list web Url |
This field uses a SharePoint list which may be located anywhere you desire within SharePoint. Simply add the URL of the site you choose here. If you have a site specified in the My Site Location text box above this, a common practice is to simply use that same site. Visitors’ experience when viewing the site is unaffected by adding this list to it. |
| Replace SharePoint My Site Newsfeed Web Parts with NewsGator Activity Stream | This option deploys UI elements that provide the full benefits of Aurea Social. It is recommended to check this as part a of any Aurea Social installation. This option removes the SharePoint My Newsfeed web part and replace it with the NewsGator Activity Stream web part, and add additional NewsGator web parts. |
| Enable lockout |
This option adds the Aurea Social Lookout page to SharePoint, at Select Set Lookout as My Site Home Page if you’d like the My Site link in users’ top navigation bars to redirect users to the Lookout page. The regular newsfeed page is still available at the My Newsfeed link. |
Click Next.
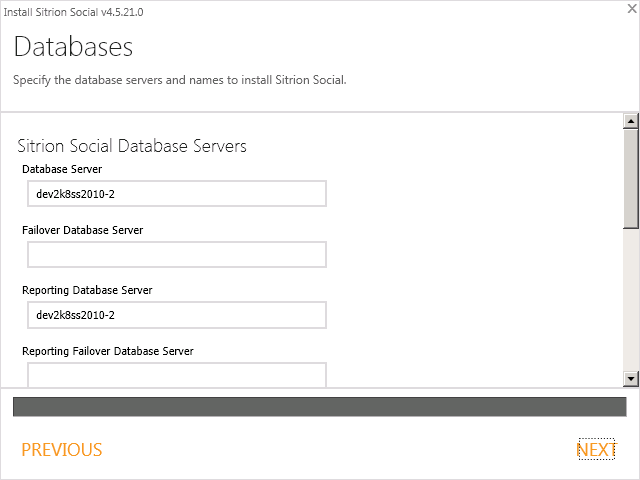
Databse servers
This screen appears for all new installations of Aurea Social, but only appears for upgrades or repairs if new modules are being added that require extra information.
This screen can have many options depending on which modules are part of the installation.
On the Databases window, specify the following:
| Fields | Description |
|---|---|
| Database Server | Specify which SQL Servers hosts the main Aurea Social database. |
| Reporting Database Server |
Specify the Aurea Social Reporting database. |
| Failover Database Server | If you use failover databases in your SharePoint installation as part of a high-availability strategy, you can specify servers that host the failover databases for these as well. For more information on failover database see Plan for availability (SharePoint Server 2010). |
The Aurea Social Reporting database replicates some of the data in the NewsGator Social database each day in an overnight job.
This data is useful for creating custom reports using your own reporting tools, and by doing so against the reporting database instead of against the social database, your reporting tools does not adversely impact users’ social computing experience.
This database is also used by the Spotlight module, for the Top News filter, and for the admin reports web parts.
Click Next.
Another Database window is displayed.
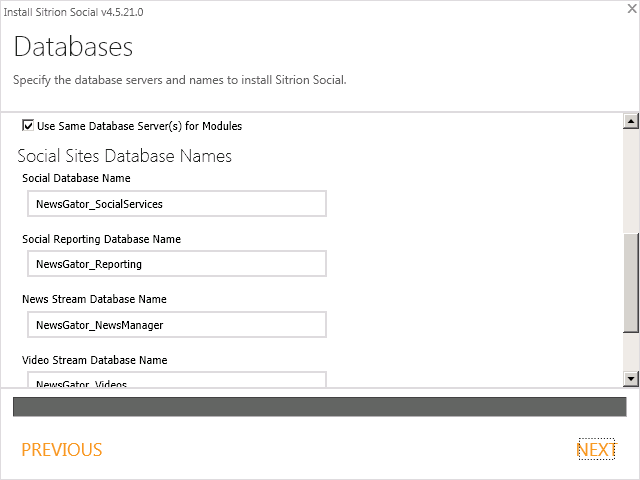
Set database name
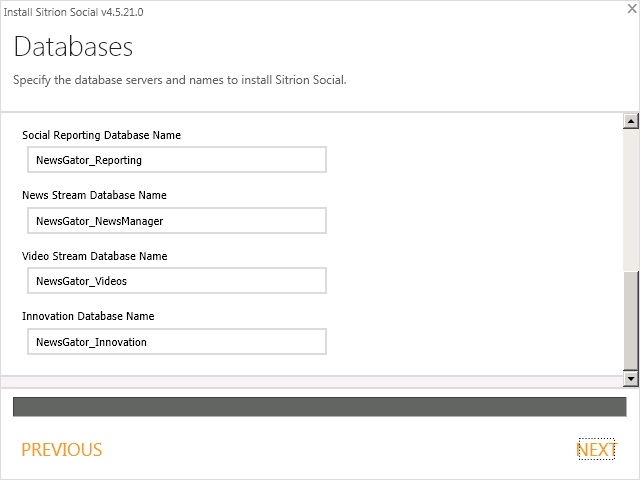
Set database for the individual module
Specify the following fields on the Database window:
| Fields | Description |
|---|---|
| Use Same Database Server(s) for Modules |
By default this is checked, and causes the News Stream Module, Video Module, and Enrich module to use the same host for their databases as is used for the main Aurea Social database. Note:
Check this checkbox If you want the modules to use the main database. Uncheck it if you want the modules to use the database of their own. Doing so causes new host entry boxes to appear below it, one host server and one failover server for each module you’re installing that has its own database. |
| Section for specifying database host servers (Scroll down to see all fields) | Alter the default name options for each of the databases to be installed. |
Click Next.
In multi-farm environments, the "Provision Social Service Application", "Provision News Stream Service Application", and “Provision Enrich Service Application” options should only be selected when installing to the parent farm, and must be left unchecked in the child farms.
In multi-farm environments, the "Provision Video Stream Service" option should only be selected when installing to farms which has Video Stream enabled communities.
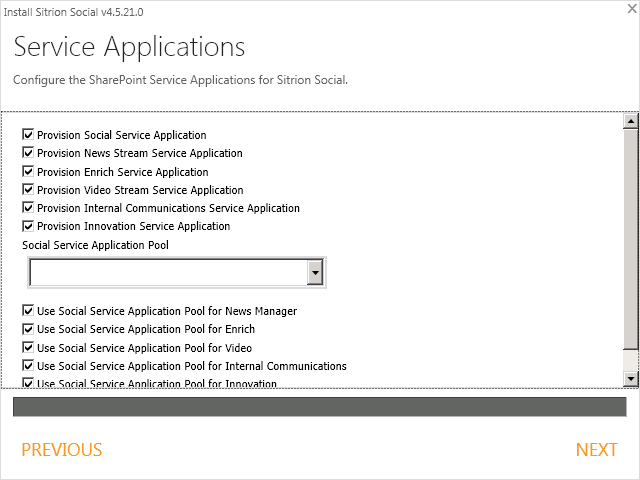
Service Applications
Check the checkboxes on the Service Applications window as per the below table:
| Checkboxes | Description |
|---|---|
| Provision Social Service Application |
This allows Aurea Social to keep the data it needs to function, and to add value by exposing additional data in the SharePoint Activity Stream and in other parts of SharePoint. Without this option, there is little to no value added in installing Aurea Social. In a multi-farm environments, this checkbox should only be selected when installing to the parent farm, and must be left unchecked in the child farms. |
|
Provision News Stream Service Application Provision Video Stream Application Provision Enrich Service Application |
Check these checkbox to provision the services of the News Stream Module, the Video Stream module, or the Enrich module . (if these are installed) In multi-farm environments, the options to provision these services should only be selected for some of the farms. |
|
Provision News Stream Service Application Provision Enrich Service Application |
Check these checkboxes only when installing to the parent farm, and must be left unchecked in the child farms. |
| Provision Video Stream service Application | Check this checkbox only when installing to farms which has video enabled communities. |
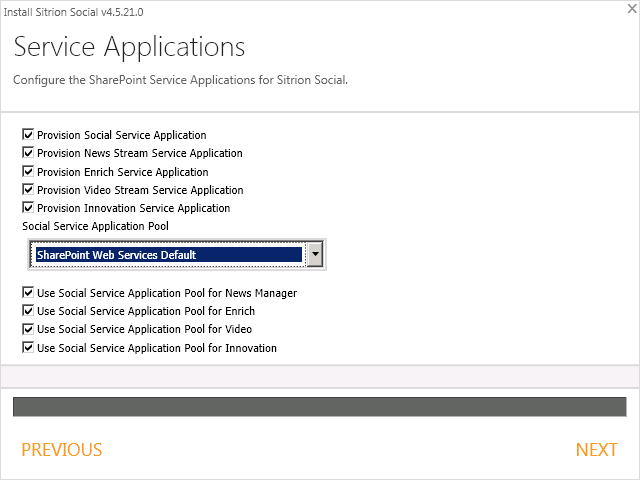
Select social service application pool
Each service application needs to have an application pool to run in, so for each service application you choose to provision on this screen, you are prompted to specify an application pool.
You may choose an existing application pool for it, or create a new one. SharePoint Web Services System is a safe choice.
Do not choose the Security Token Service Application Pool.
Click Next
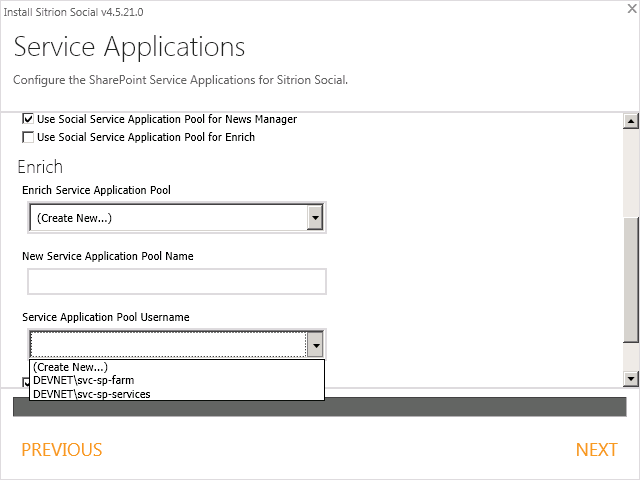
Select SharePoint Web Services System
If you choose to create a new application pool, you need to provide a name for it, and an account that the application pool uses as its security credentials. You are provided the list of available accounts for this purpose.
If you don’t see the account you want to use listed, go into SharePoint Central Administration, open the Managed Accounts screen, and register the account you want to use there.
You should then be able to select it in the Service Applications screen of the installer.
The Service Application service account is used by SharePoint to access the databases used by the service application.
In the case of the Social Service Application, the databases are the NewsGator Social Database and the NewsGator Reporting Database.
In the case of the News Stream Service Application, the database is the News Stream database; it goes similarly with the Video Stream and Enrich modules.
Regardless of which choices you make here, the account running the NewsGator Social Platform service application needs to be a farm administrator. Otherwise there will be numerous farm properties and persisted objects that it is not able to update.
For each service application connected to a module, you have the option of using the same application pool as is used for the Social Service Application by leaving checked the box labeled “Use Social Service Application Pool for <ModuleName>”.
If you’d rather use a different application pool for one of the service applications, uncheck this box, and a control for specifying an application pool for that service application appears.
Click Next.
If you are installing either the Enrich or the Video Stream optional modules for the first time, you’ll now be presented with an Options screen.
The installation of the Video Stream module is an involved process that requires several preparation steps.
If this an upgrade please read the section below “Instructions regarding Video Stream and Enrich Upgrades”.
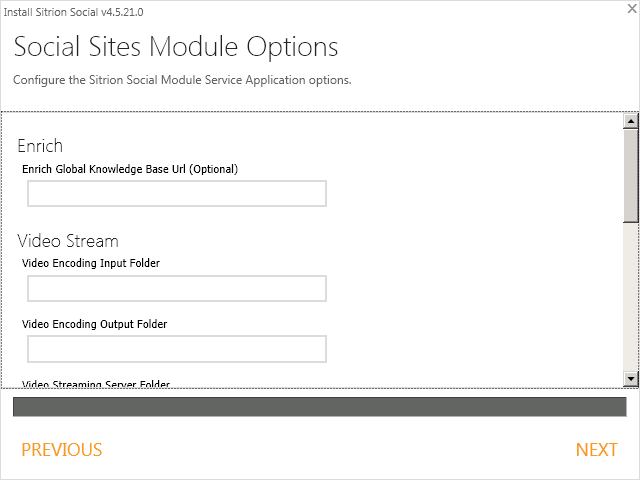
Social Sites Module Options window
Specify the following fields in the Social Sites Module Option window:
| Fields | Description |
|---|---|
| Enrich Global Knowledge Base Url | Enter the URL where the global knowledge base for Enrich is to be located. |
|
Video Encoding Input Folder
|
Enter the name of the folder to store videos that are awaiting encoding. |
|
Video Encoding Output Folder |
Enter the name of the folder to store videos that have completed encoding. |
|
Video Streaming Server Folder |
Enter the name of the folder to store videos that is streamed. |
| Video Upload Folder | Enter the name of the folder that stores the uploaded files. |
| Video Streaming Server Url Default Zone | Enter the streaming server address. |
Optionally enter details in the other alternate access mapping zones.
Folders can be specified as local folders or as UNC paths.
Take note of these folder names as they need to be specified in the Encoding Service and Streaming Server install process in the Video Stream Additional Components Installation section.
To change any of the above settings after the install, go to Central Administration > Application Management > Manage Service Applications. Click on NewsGator Video Stream Service Application and select Properties in the ribbon area.
To store the video files for the streaming server on another server or a SAN, specify these locations accordingly in the “Video Streaming Server Folder” entry box.
Then, create a virtual folder in IIS mapping it against the physical location of the streaming server folder stored on the server or SAN. This virtual folder then needs to be specified in the Streaming Server Address.
For example, if the Streaming server folder to store videos is \\OurSan\streamedvideos\ and it’s mapped to “videos”, then the Streaming Server Address specified above may have “/videos” appended to it.
To change the streaming server address to reflect a virtual folder for the streaming videos folder, for example, change the entries in the Enter addresses… section of the console accordingly. In the screen shot below, the “Videos” folder in the streaming server specification could well be a virtual folder.
Configuring a virtual server also means updating the Video Streaming Server Folder field to reflect the physical location of the files that reside on another machine or SAN. This physical location should correspond to the virtual folder specified in IIS.
Below is an example of the various folders that are specified.
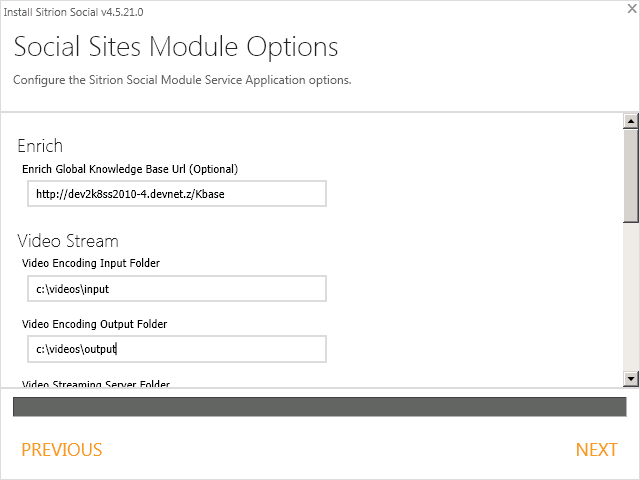
Various folders that are specified
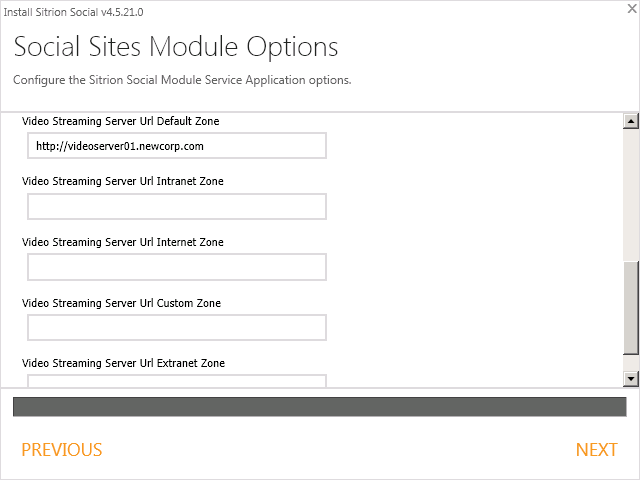
Various folders that are specified
Click Next.
After all necessary information are provided, the Installation Summary screen appears so that you can review your choices.
Upgrades of Aurea Social shows much less information than the install screen shown here in fresh install process.
If you haven’t already turned off antivirus software on the server, do so now.
Use Previous if you want to change any of the listed options; otherwise, click Install to begin the installation process, or Upgrade to begin the upgrade process.
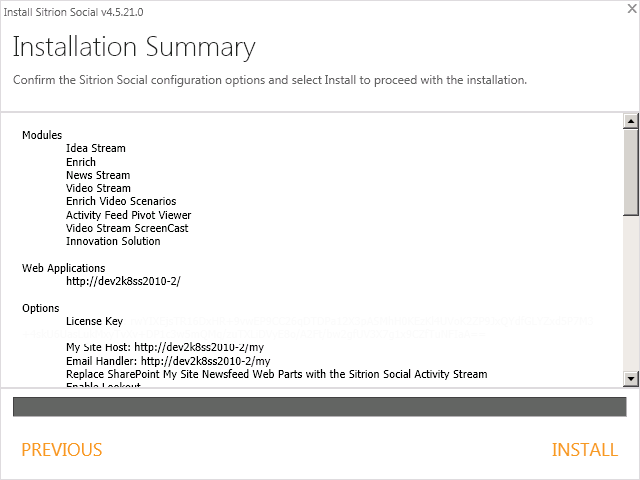
Installation Summary screen
With installation underway, the Installing Aurea Social screen appears. Each task in the installation, upgrade or repair is listed with an indication of whether it has been started or completed yet. A progress bar indicates progress through the entire installation.
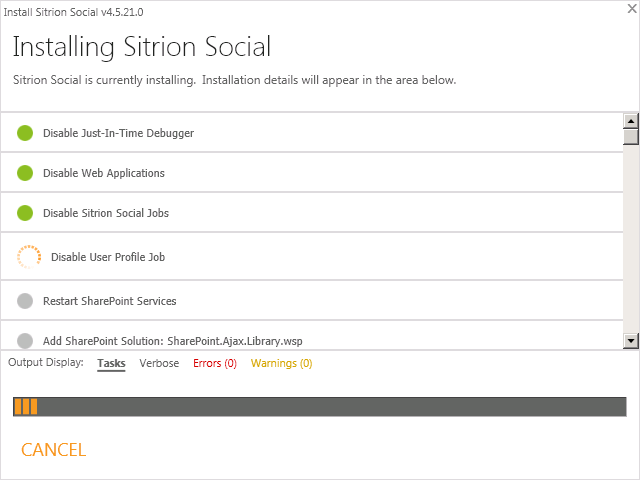
Installation status
If you are installing/upgrading the Video Stream Module please remember to run the Additional Components installer, once the primary installer finishes.
For further information, see Video Stream Additional Components Installation.