Setting up Aurea Social Spheres

Spheres allow conversations around a particular topic or with a particular group of people without the need for a community site to be created.
You can choose to allow all users to create spheres on their own, which gives users a way to determine exactly who does and who does not get to be part of the conversation. Or you can opt to limit Sphere creation to a group of people whom you specify individually.
Spheres are much like communities without sites - they consist basically of a group of people and a topic.
Like communities,
- they can be followed and unfollowed
- they can be made public or private
- they can be found the same way communities are found, listed among them in the Communities web part, or selected from the drop-down filter in the Activity Stream web part
They are listed among the @-target autocomplete options for those who follow them. Clicking the name of the sphere in an activity stream item displays a sphere view, where users can target new microblogs or questions to the sphere, respond to existing microblogs or questions, view the people following this sphere, choose to receive notifications for that Sphere, and choose to follow or stop following the sphere.
An example of what the sphere view looks like:
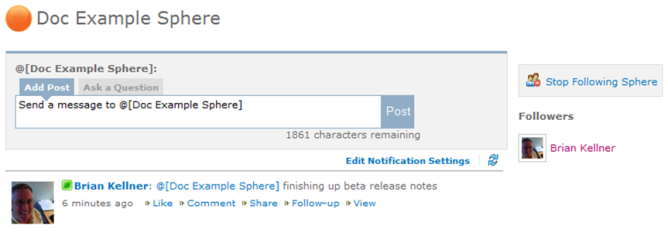
A sphere
To enable the Spheres feature, do the following
- Go to NewsGator Social Platform Management > Community and Spheres > Configure Sphere Settings. Enable Social Sites Sphere
- Check Allow internal spheres to enable use of spheres in your organization.
- A People picker control appears, as pictured below. Use it to identify to Aurea Social which users will have the right to create spheres.
- Click Save to commit all changes.

Enable Social Sites Sphere page
By default, all users can create spheres. To restrict Sphere creation to a group of people you specify, uncheck All users can create spheres.

People picker control
Glassboard integration is no longer supported. It is unlikely any of your users were using Glassboard integration, but you can choose to display a message to them to let them know it is no longer an option.
When Spheres are allowed, the Communities web part gets a new link in addition to the sphere icon being added to the Activity Stream web part.

Communities web part
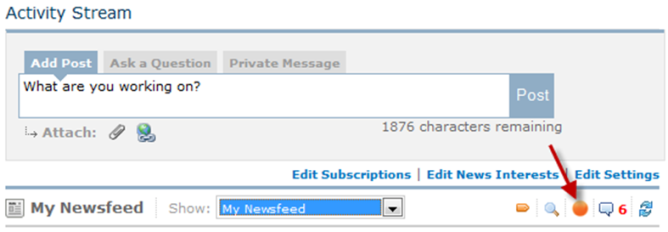
Activity Stream
Clicking either the link or the icon in the Activity Stream web part displays a tabbed screen to allow management, discovery and potentially creation of spheres.
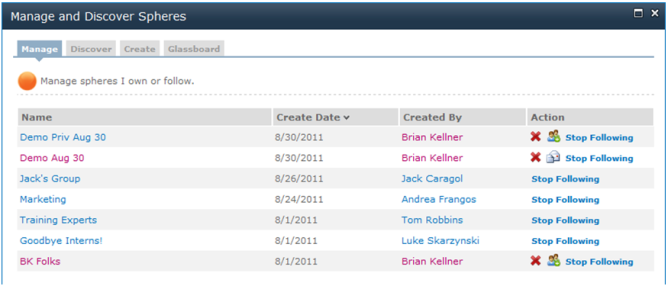
Manage and Discover Sphere
The Manage tab allows user to stop following a sphere they have previously chosen to follow. If a user owns (created) any spheres, additional options are shown. The  icon allows the owner to delete a sphere. This causes it to stop displaying in any menu and stop letting users target messages to it. The data created in that sphere is not removed from the system. The
  icon allows an owner to edit the membership of a private sphere.

Edit members of a group
The  icon allows the admin to invite others to follow a sphere by creating an email like the one shown below.
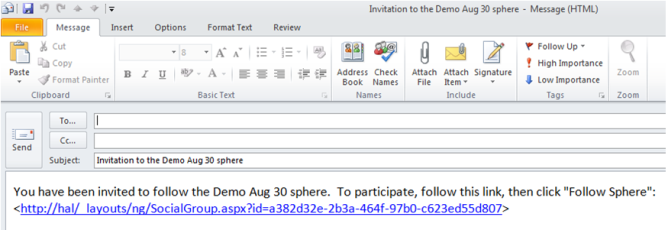
Invitation follow a sphere
The Discover tab allows users view the Public spheres and choose to follow or stop following them. It also provides a search tool so users can find them by name.
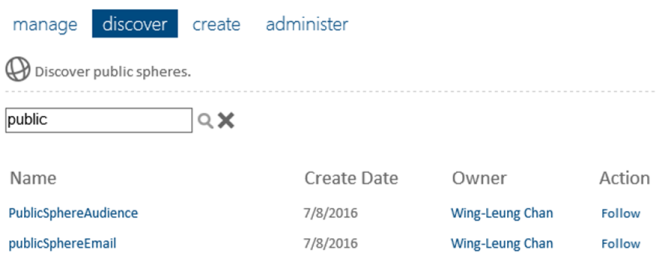
Discover tab
The Create tab display for users who have the right to create to new spheres.
To create a public sphere, the user only needs to enter a name and click Create.
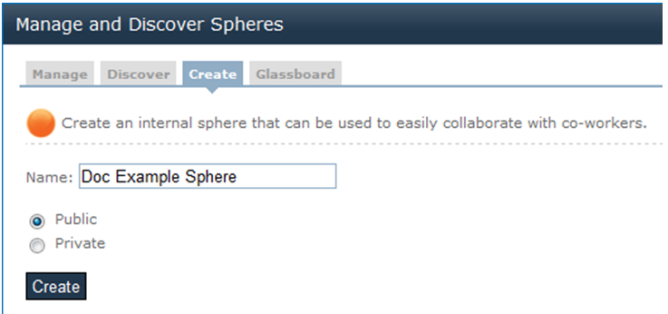
Create public sphere
The screen responds with a successful creation message and the option to send email invitations.

Click OK to send invitation
Clicking OK opens an email that makes it easy to invite others to join the Sphere.

Send email to invitees
Creating a private sphere starts in exactly the same way as public sphere.

Click Create
In this case, however, the screen prompts you to add members to the sphere. Only the owner can add members to a private sphere.
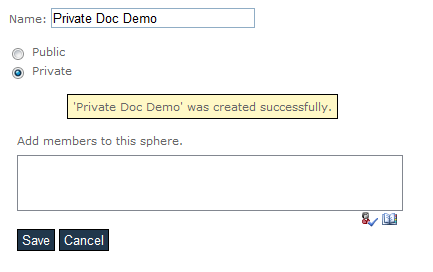
Add members to sphere
After you have added the members you want, click the Save button. Private spheres is visible in the Manage tab.

Click Save after adding members