Creating Community badges and badge rules
Community admins can create badges and badge rules by following the Spotlight Administration link on the Admin tab of any community:
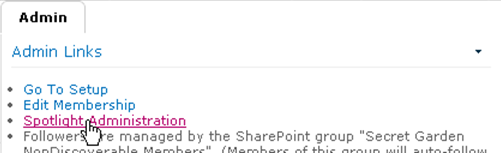
Click Spotlight Administration
This opens an administration page which is a limited version of the global Spotlight Administration page:
An administrative page is opened
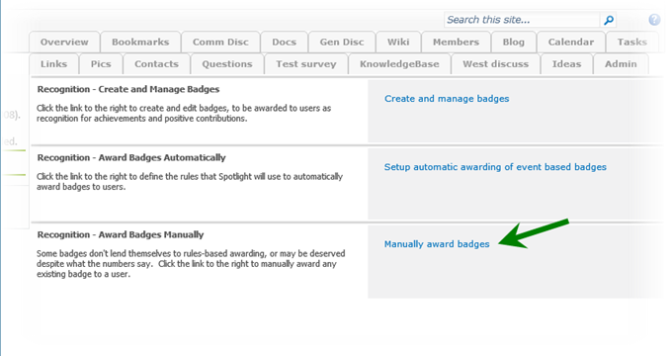
Click Create and manage badges to view a page much like the global page for managing badge icons and their default names. It will be pre-populated with any global badges that a global Spotlight Administrator has designated for re-use in communities.
This is intended as a labor-saving feature for setting up the more universally-popular badges. (None of the global badge rules can be made available in communities, however - each community must create its own rules.) See Creating a new badge below for full details on how to set up new badges.
When you've defined all the badge icons and default names/descriptions that you feel you'll need for your community badges, click the Setup automatic awarding of event-based badges link to setup the rules that will award badges in the community.
This works as in the global page for the same (see Awarding badges by automatic rule, below). Only actions of that type that occur within the community will be counted toward the badge rule.
Because the following event types are always global in nature (and so never associated with a particular community), they are not available to select for community badge rules:
- Birthday
- Job title
- Kudos
- Manager change
- New colleague
- New membership
- Profile update
- Sent kudos
- Status message
- Upcoming birthday
- Upcoming workplace anniversary
- Workplace anniversary
These are also not available in community badge rules, because they do not properly associate themselves to a community:
- Blog comments
- Blog posts
Community admins are not able to define external events that can be used in badge rules. To add external events, they must have a global Spotlight administrator create the external rule.
Click Manually award badges to bring up the Manual Badge Awarding screen which works the same way as the global Spotlight page for manually awarding a badge. Begin by selecting a badge from the dropdown at the top. This should show both badges configured just for that community, and badges configured centrally but with the option selected for making these available for use as community badges.
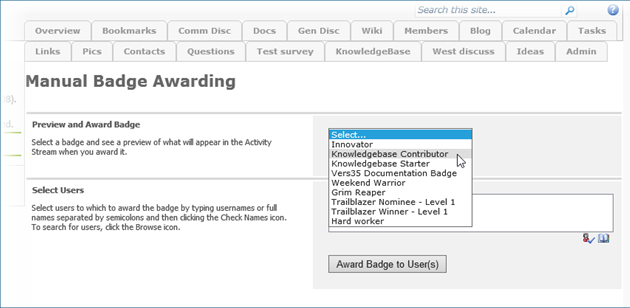
Manual Badge Awarding
Once you’ve selected a badge and moved onto the next section, a preview appears of what the badge event in the stream will look like.
In the next section, you select community members who are to receive the badge using SharePoint’s people picker control.
This control will not prevent you from specifying users who are not community members. However, if non-community members are specified, you will be prevented from completing the badge-awarding process.
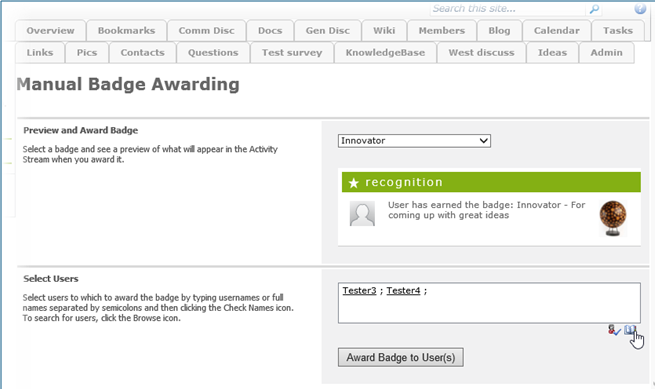
Select community members
When you have selected the correct recipients, click the Award Badge to User(s) button. If the award succeeds, you see the success message.
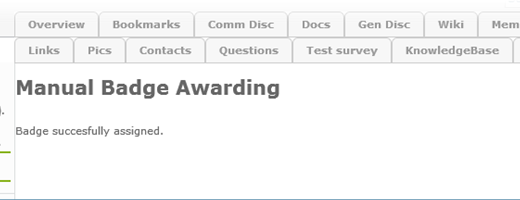
Success message
The badge award appears in the community stream, on the Members tab in the Community Badges column, on the user’s mini-profile, on the user’s stream, and in the user’s Earned Badges web part on their public profile page. If the community is private, the badge award is only visible to community members.
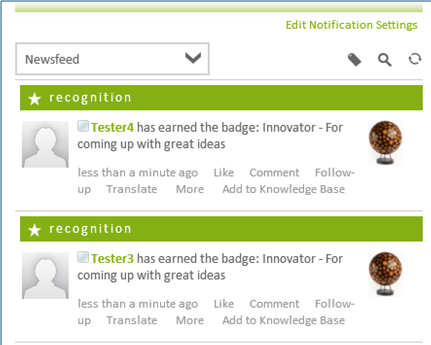
Badge awards appear in community stream
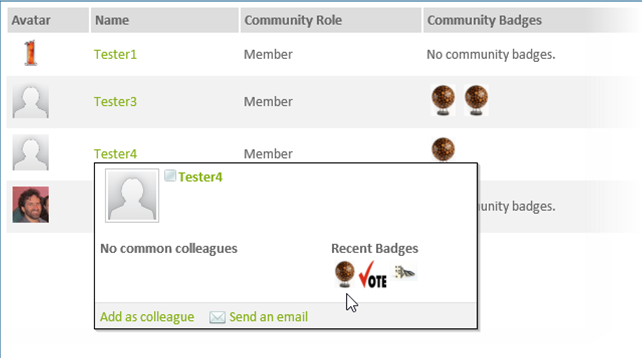
Private badges are visible to community members