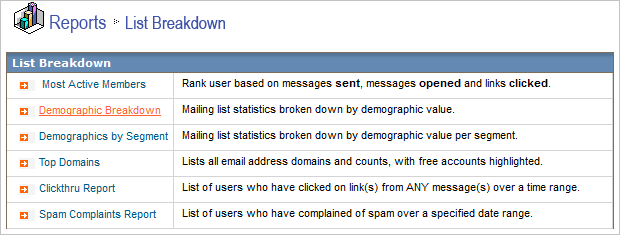
About the List Breakdown Report
List breakdown reports allows you to view information about your list, such as the types of email addresses that comprise your list, new subscribers, and most active members.
- To download, click on download list or the name of the list.
- To view List Breakdown Reports, click the List Breakdown link from the navigation bar.
Most Active Members
Most active members are the ones in your list that respond to most of your campaigns. These rankings are based on the messages that the member is sent, how many messages were opened, and how many links were clicked.
To view the Most Active Members report:
- In the EmailLabs interface, in the left navigation bar, under Reports, click List Breakdown.
- Click Most Active Members.
- In the boxes to the right of Messages Sent Between, type in the beginning and end dates for the report. You can also click the calendar buttons and then choose a date.
- Optionally, select Include Trigger Messages check-box if you want to identify active members for triggered messages along with scheduled messages.
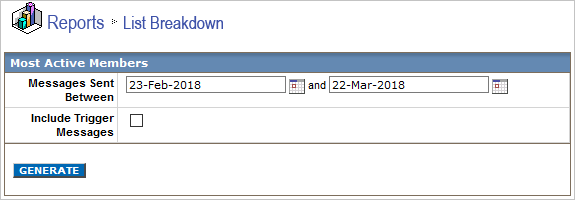
- Click GENERATE.
- To save your results in an Excel
.csvfile, click Download Results.
Demographic Breakdown
The demographic breakdown allows you to see your list separated by demographics. When you click Demographic Breakdown, a new window opens with all your enabled demographics. Your list breakdown shows the number and percentage of members in each demographic that comprise your list.
To view the Demographic Breakdown report:
- In the left navigation bar, click List Breakdown.
- Click Demographic Breakdown.
- In the Calculate Demographic Totals window, click the demographics you want to include and click Generate this breakdown.
Demographic by Segment
This section allows you to view your list in an even more descriptive way using a powerful cross-referencing tool. You can apply any previously created segment and see the breakdown of demographics of the members in your list. For example, if you have a segment that applies only to members who live in California, you can use this segment to modify your search and receive a demographic breakdown of all the members who match the segment.
To view the Demographics by Segment Report:
- On the List Breakdown page, click Demographics by Segment.
- Click View Results for the desired segment. Cached results are used for faster processing. If the segment does not have cached results, you must generate results before it can be used in the demographic breakdown report.
- Click GENERATE.
- In the Calculate Demographic Totals window, click the demographics you want to include, and then click Generate this breakdown.
Top Domains
Top Domains breaks down your list in terms of the domain of the email addresses. All domains are listed along with the percentage of your list that they comprise; a pie graph showing the domains that make up for more than five percent are displayed. Free email accounts are highlighted in red. You can search for specific domains using the search tool on this page.
To view the Top Domains report:
- On the List Breakdown page, click Top Domains.
- To search for a domain, in the Search for Domain box, type the desired domain.
- Click FIND.
Clickthru Report
This report allows you to specify a time range and find users that have clicked specific links or all links across messages.
To view the Clickthru report:
- On the List Breakdown page, click Clickthru Report.
- Click the desired message type and then click SAVE & NEXT.
- In the URLUniform Resource Locator. An Internet address, as well as a standard method of naming files on the Web. A URL begins with a protocol name (such as http), followed by a colon and two forward slashes(//). Next comes the name of the internet server that the file is stored on, followed by directories that hold the file, separated by forward slashes(/). The filename comes last, as shown in the following example: http://www.mycompany.com/whatsnew.htm box, type a link.
- To change the date range, select the dates in the Clicked Between boxes and insert the desired dates.
- Optionally, select the demograhics.
- Select the check-box for at least one message and click GENERATE.
- Do one of the following:
- To view a report about an individual message, click the Clickthrus command for that message.
- To view a cumulative report for all the messages you selected, click GENERATE, and then choose Generate report now – I will wait or Notify me when the download is complete.
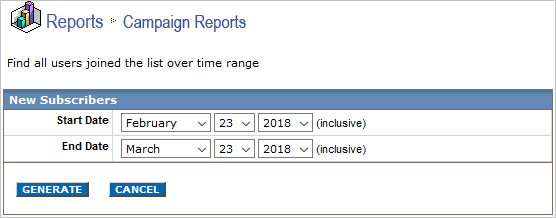
New Subscribers
New Subscribers gives you a detailed look at your newest subscribers and helps you keep track of how many new customers you are receiving. To view or download the report, click New Subscribers. Specify date range and click GENERATE.
To view the New Subscribers Report:
- In the left navigation bar, click List Breakdown.
- Click New Subscribers.

- Choose your start and end dates, and click GENERATE.
New Unsubscribers
New Unsubscribers gives you a detailed look at your newest unsubscribes that help you keep a running tally on how many customers are unsubscribing from your list. To view or download the report, click New Unsubscribers. Specify a date range and click GENERATE. To see when a specific member unsubscribed, you can click their user profile and view their complete activity report. To view or download the report, click View.
To view the New Unsubscribers Report:
- In the left navigation bar, click List Breakdown.
- Click New Unsubscribers.

- Choose your start and end dates, and click GENERATE.