Create a View
To create a view:
- Access the library you wish to customize.
- Click on Library to open the Library ribbon.
- Select Create View from the Manage Views group on the ribbon.

- On the Create View screen, select the view format on which you would like to base your view. You can elect to base your view on an existing view, such as All Document, or you can select an alternate view, such as Calendar, Datasheet or Gantt. All Documents is based on the Standard View and is the default that is displayed when you create a list or library.
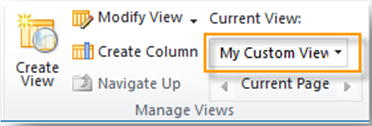
- Enter a name that will identify your view. This name will appear in the menu display under Current View.
- Select the audience. A personal view is one that you create for your use only. A public view is available to anyone using the library.
- Select or deselect the columns that you wish to see in your view by checking or unchecking the Display checkbox next to it.
- Modify the positioning from the left of the screen by changing the numerical values.
- In the Sort section, you can select one or two columns from the menus and identify if they should be in ascending or descending order.
- In the Filter section, you can select one or two columns to filter on from the menus.
- In the Group By section, you can elect to create an expandable/collapsible view based on one or two columns.
- Click on the "OK" button to save your view.