Create an Overlay Template
- To Create an Overlay Template, open the Site Actions menu and select Site Settings.
- On the Site Settings screen select Watermarking and Overlay from the NextDocs Administration group.
- Click on the “Create New Overlay Template” link to access the NextDocs Overlay Setup screen.
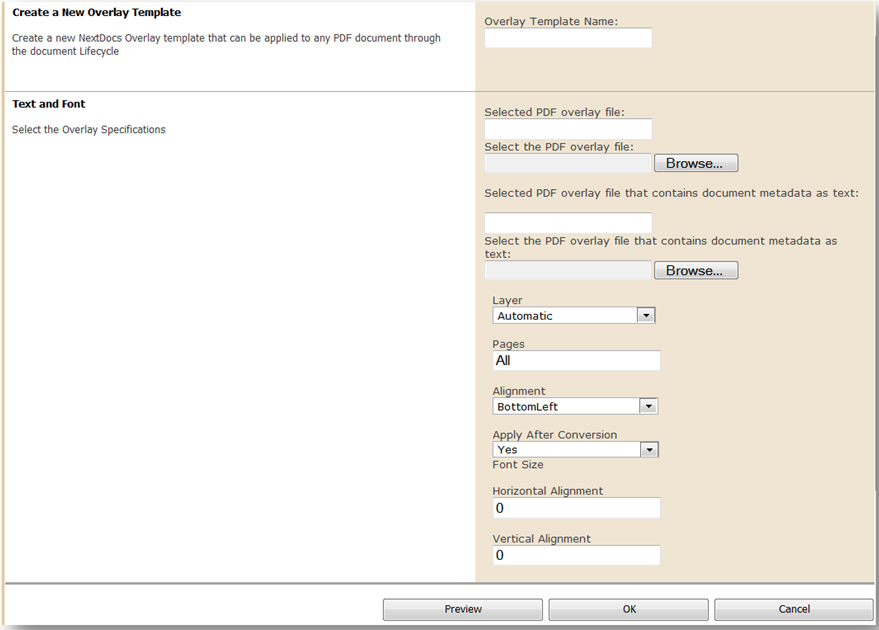
- The NextDocs Overlay Setup screen contains Two (2) sections: Create a New Overlay Template; and Text and Font.
- Create a New Overlay Template:
Enter a short, descriptive name in the Overlay Template Name textbox. This name will appear in the selection list when you add the Overlay operation to a lifecycle stage.
- Text and Font:
Click on the first Browse button to navigate to and select the PDF document that will be used as a standard overlay in the first selection box.
Click on the second Browse button to navigate to and select the PDF document that has been configured to contain document metadata fields. The document metadata is updatable through the lifecycle options.
Note: You can apply two overlays to a document with the proviso that only one has updatable metadata. - Select a layer option from the Layer menu to designate how the overlay will be applied.
- Specify which pages will contain the overlay.
- Select the alignment from the Alignment menu.
- Designate whether the overlay will be applied after conversion.
- Modify the Horizontal Alignment.
- Modify the Vertical Alignment.
- Create a New Overlay Template:
- To preview the Overlay template click on the Preview button. The system will present a template with the Overlay(s) applied. You can continue to adjust the settings and preview until you see the desired results.
- To save the template, click OK.