Step 5: Review and Enable
This final step enables you to check the triggered message before enabling it. This is the Review & Enable screen.

Review Settings
The Review Settings list is for quickly reviewing the configurations set once the trigger message is created. The message can then either be reconfigured if something is incorrect, or enabled if it is ready.
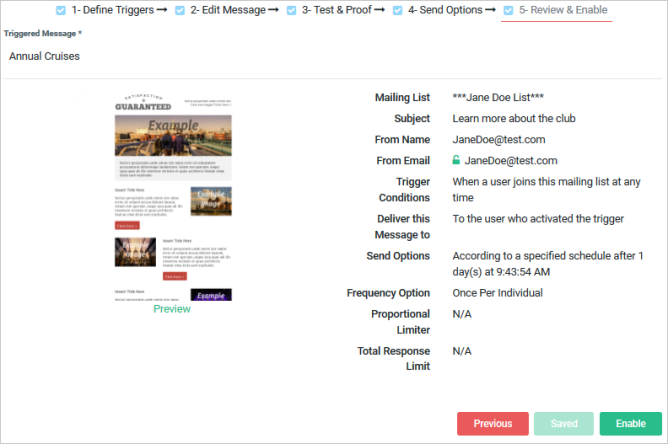
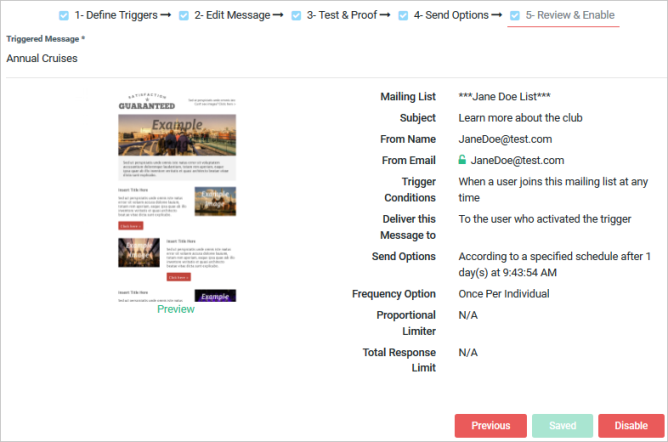
When you click on the Enable button, the button is turned into Disable.
Click on Disable if you want to troubleshoot and enable the triggered message again, or just stop the triggered message from being sent.
You can also disable the Triggered message from the inline action under the Triggered Message in the Message List.
Reports
Monitoring triggered message performance can be performed easily in Aurea Campaign Manager. You can generate several reports to understand the current state of the triggered messages.
General Overview
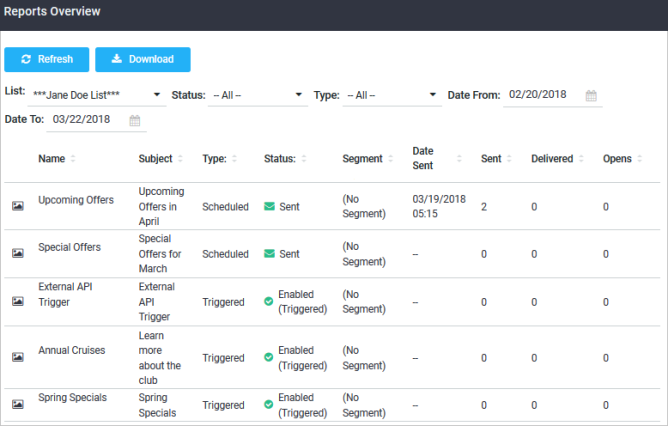
Navigate to Email Marketing > Reports > Reports Overview screen. This report displays each triggered message you have enabled and what the current status is. Four filters above the message columns function the same way as the Message List table:
| Filter | Description |
|---|---|
| List | Enables you to filter the message list by All mailing lists or any one specific mailing list. |
| Status | Enables you to filter the message list by the message states, such as Unsent, Draft, Paused, and Processing. |
| Type | Allows you to filter the message list by All, Scheduled or Triggered Messages. |
| Last Edited | Provides you the ability to choose dates within the range of which you want to view messages. |
The Reports Overview displays list of all messages that have been created so far.
Point to the desired message and click More.

A quick summary of the message metrics such as, Unique Opens, Unique Clicks, Bounces and Unsubscribes is displayed. In addition to the engagement metrics, the preview displays a thumbnail of your message and key information linked to subject, sender and send date.
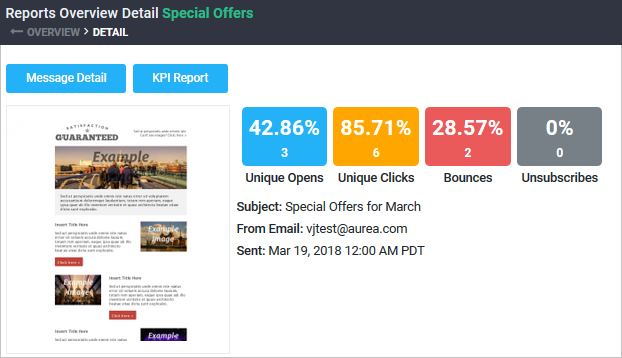
Unique Opens and Unique Clicks represent the first time a contact opens or clicks on a message. Opens and Clicks signify the first and additional times that a contact opens or clicks on a message.
You can also get a visual preview of the message you have selected. Click on Detail and a Standard Message Report is displayed.
Standard Message Report
The Standard Message Report gives you a detailed breakdown of the message you have selected. You can change the report’s date range by clicking on the Date Range and making your selection in the calendar boxes that are displayed. The Message Totals display key engagement metrics used throughout Aurea Campaign Manager repeatedly, but also includes conversions. For example, a conversion can be when you send out a campaign, the user opens the message, clicks on an offer on the website, and then purchases something. This trigger could then send a message that says something like "Thank you for purchasing these items".
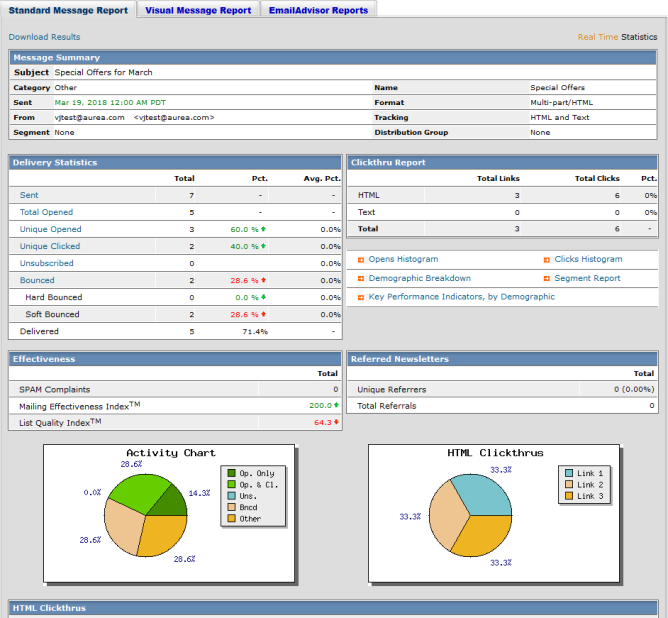
The report also provides various metrics such as how many Website visitors, Revenue generated, List Quality IndexA list of keywords the user may view to find topics within a Help system. and Links. Revenue reports on how much currency has been generated from successful purchases from the selected message. The List Quality Index looks at how well your message succeeded with your recipients. It does this by looking at:
- Sent to number
- Number of opens
- Number of clickthroughs
- Unsubscribes, bounces, and spam complaints
From this data, it creates a range of 0 - 200, where 200 is the best and 0 is the worst. The middle of the range is 100.
Links records click metrics, where recipients have clicked on the messages HTMLHypertext Markup Language. A set of tags used to mark the structural elements of text files. HTML files include tags that create hyperlinks to other documents on the Internet. or Text links. It also records if the recipient converts and how much revenue is generated from that action.
You can also download the report summary in a .csv format by clicking on Download Report.
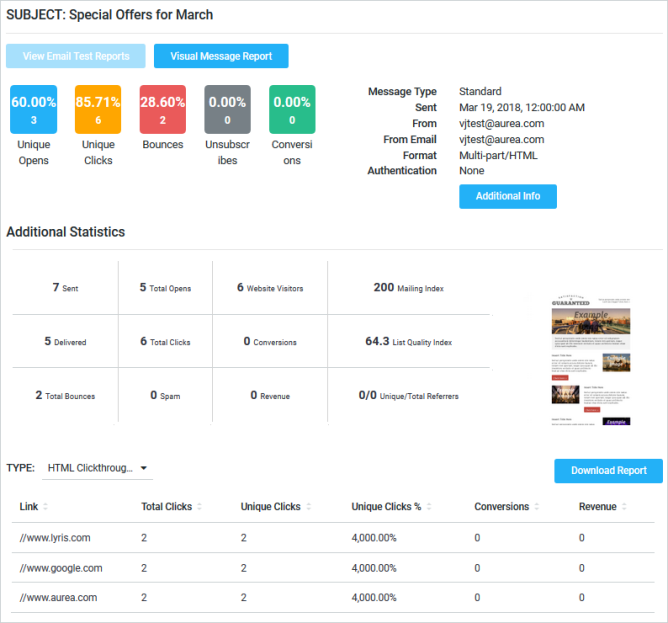
If you need histograms, click on Visual Message Report button. Within the Visual Report, click on Standard Message Report tab.
Adding Contacts
This section describes how to initiate triggered messages when adding contacts.
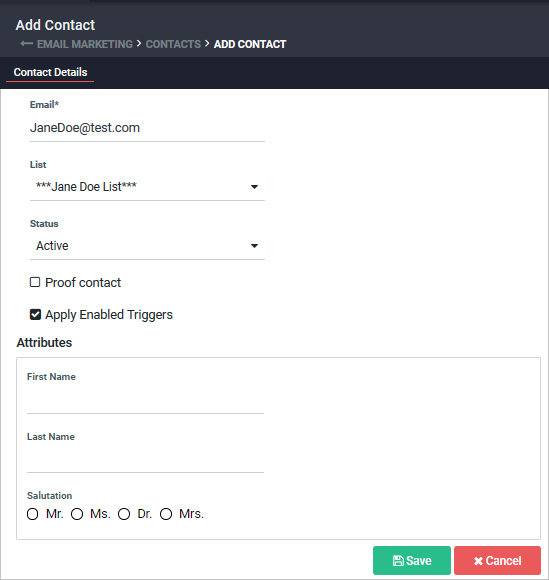
To add contacts individually:
- Navigate to Email Marketing > Contacts.
- Click on the Add Contact button.
- Click on Apply Enabled Triggers for this contact to receive any enabled triggered messages.
Importing Multiple Contacts from a .csv File
This section describes how to initiate triggered messages when uploading contacts by using a .csv file.
- Click on the More Actions drop-down button next to the Add Contact button.
- Select Upload Contacts. This brings up the Upload Contacts dialog.
- Click on Browse next to the Upload Source text box. This enables you to select the
.csvfile that you have prepared. - Click on Apply enabled triggers to uploaded contacts check-box.
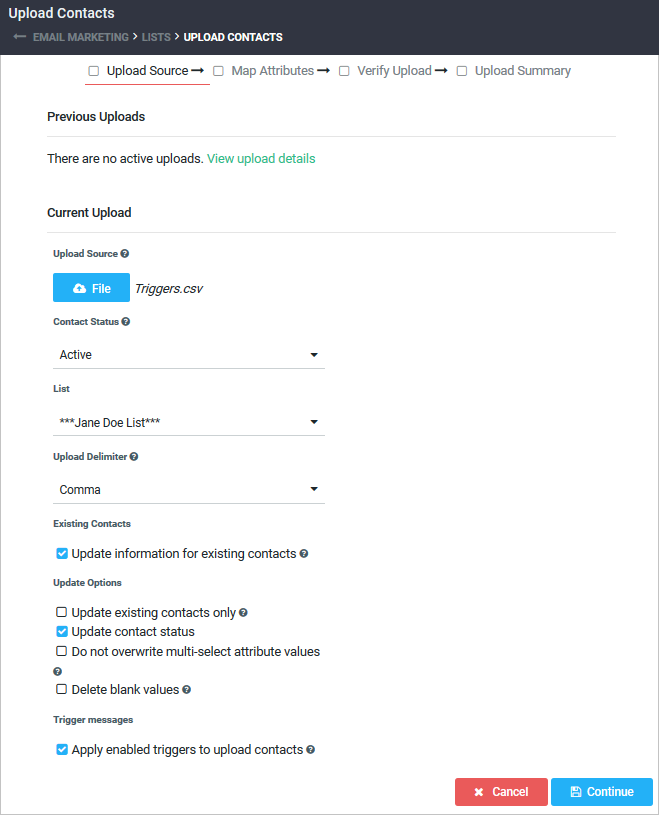
- Click on Continue to go to the next screen in the dialog. This screen shows the mapping that is automatically set up from reading the
.csvfile. - Click on Continue again to see how your data fields are mapped to the contact attributes.
- Once you have verified the mapping, click on Import to begin uploading your file.