Managing Segments
This section includes the following procedures:
About the Segments Screen
Use the Segments screen to view all segments for a given list. From the Segments screen, you can:
Creating a Segment
Create a segment to specify a subset of contacts to send a campaign.
To create a segment:
- From the Aurea Campaign Manager interface, click Email Marketing > Segments. The Segments List screen appears.
- Click Add. The Add Segment screen appears.
- Enter a segment name in the Segment Name field.
- Choose the contacts list that is segmented from the List drop-down menu.
Adding a Condition
- Click Add condition on the left side of the row. A drop-down list appears with two options: Attribute and Activity.
- Select an Attribute or Activity.
- Click this value and then set value to "Female." The newly created condition now reads “Whose Gender is equal toFemale”.

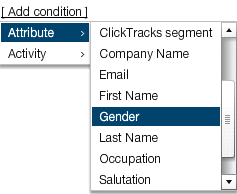
The preceding example chooses the Gender attribute. This presents the following condition:

Refer to Attributes-based Conditions and Activity-based Conditions for more information on the different types of conditions.
As soon as you create more than one condition, you must define a logical operator for that condition.
Setting the Logical Operator for a Condition
- Click AND on the right side of the condition's row.
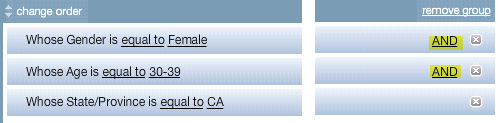
- Select the desired logical operator. Refer to Logical Operators for more information on AND/OR logical operators.
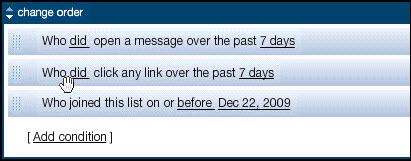
- To add a condition group, click the Add condition group link. A new condition group is added:

- To drag and drop conditions, simply click on the condition statement and move it up or down in the condition group.
By default, the AND logical operator is assigned to newly created conditions.
A user may want to drag and drop a condition statement if they have several condition statements in a group and they want to arrange them in a certain logical order.
You can drag a condition from one condition group to another condition group. You can also drag and drop conditions inside a group.
Copying a Segment
Once you have created a segment and want to reuse its logic in a different segment, you can copy it at any time.
To copy a segment:
- Select a Segment from the Segment List. The selected Segment is highlighted.
- Click Copy. The Edit Segment screen appears and the default name for the copied segment name is Copy of SegmentName.
- Add further conditions to the Segment and click OK to save the segment. A copy of the Segment appears in the Segments List screen with the newly added conditions.
Editing a Segment
You can modify created segments at any time. To edit a segment:
- Select a segment from the Segment List. The selected Segment is highlighted.
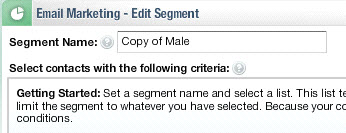
- Click Edit. The Edit Segment screen appears with the selected Segment in the Segment Name field.
![]()
- Add further conditions or condition groups to the selected Segment and click OK to save the segment. The edited Segment appears highlighted in the Segments List screen with the newly added conditions.
Deleting a Segment
You can delete a segment at any time.
Once deleted, a segment cannot be restored.
To delete a segment:
- Select a Segment from the Segment List. The selected Segment is highlighted.
- Click Delete. A warning message appears asking you to confirm if you want to delete the segment.
- Click OK.
The segment is removed from the Segments List and is no longer accessible.
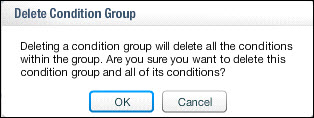
Removing a Condition Group
- Click the remove group button to remove a group of conditions. A Delete Condition Group dialog box appears warning that removing this condition group will delete all of its conditions.
- Click OK to confirm that you want to remove the condition group.
Generating a Segment
Once the logic of a segment is set, you must generate it to create the data set on the Aurea Campaign Manager back-end systems. Depending on how much data is involved, this can be a time-consuming task.
Segment data is generated at the time you request the segment generation. If you add contacts to that list later, update your segment by generating it again.
To generate a segment:
- Select a segment from the Segment List. The selected Segment is highlighted.
- Click Generate. A Segment Generation successfully submitted dialog appears.
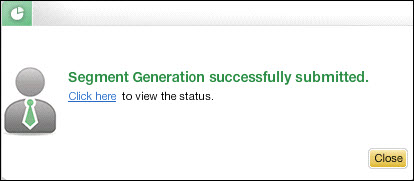
To check the progress of a segment being generated, in Segment Generation successfully submitted dialog, select Click here to view the status of the segment generation. The System Tasks screen appears.
