Editing the Landing Page
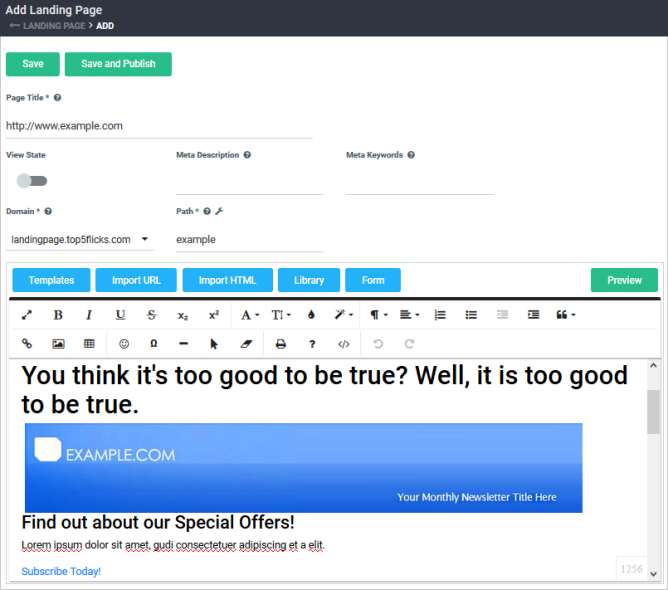
Add a page title and edit the content of your page. You can also insert images from the Asset Library.

The Page Title
This is what appears at the top of each landing page in your browser. Limit your name to 200 characters or less. To create a page title, click the PageAn individual topic within a Help system. Title field and type a title.

Inserting Images from the Asset Library
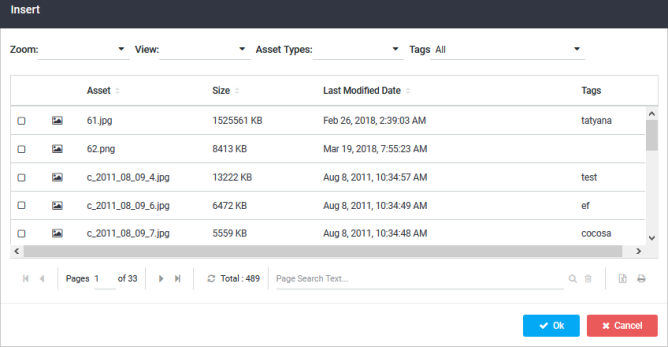
To insert images from the Asset Library, click on  . The Insert page is displayed with a list of assets. Select the desired asset and click OK. You can also insert external images by supplying the URLUniform Resource Locator. An Internet address, as well as a standard method of naming files on the Web. A URL begins with a protocol name (such as http), followed by a colon and two forward slashes(//). Next comes the name of the internet server that the file is stored on, followed by directories that hold the file, separated by forward slashes(/). The filename comes last, as shown in the following example: http://www.mycompany.com/whatsnew.htm of the image. For information, see Using HTML Editor Toolbar and Image Properties.

Forms
One of the most important features of landing pages is the ability to create a form. Click the  button. For more information, see Adding and Editing Forms.
Making the Landing Page Viewable by Search Engines
By default, landing pages are not viewable by search engines. You can make them viewable, and add a description and keywords to help them achieve a higher ranking in search engine results.

- Select View State.
- In the Meta Description box, type a description of your page (approximately 50 words or less). This is the description that appears on a search engine page.
- In the Meta Keywords box, type words or phrases that represent your page (approximately 25 or less words or phrases works best).
To learn more about the Meta Description or Meta Keywords sections, move your pointer over the question mark (tooltip) button.
The HTML Editor
In the HTMLHypertext Markup Language. A set of tags used to mark the structural elements of text files. HTML files include tags that create hyperlinks to other documents on the Internet. Editor, you can create new content or edit the content you added when you chose a source on the Select Template page. The Editor works much like a word processor; you type text and then change its format by selecting it and choosing various commands. The difference, however, is that the Editor produces HTML code.
To learn more how to work with the HTML Editor, see the following topics:
The HTML Editor consists of two main sections:
- Toolbar: The toolbar contains features that are similar to those found in word-processing or web design programs. You can also do things like add images and create web links.

Your browser may have security settings that prevent you from using some of these buttons. You can use keyboard shortcuts instead (for example, to copy text, press Ctrl+C keys).
- Workspace: The workspace is the space below the toolbar where you make changes to the template (if you chose one) and/or add new content.
Choosing a Template
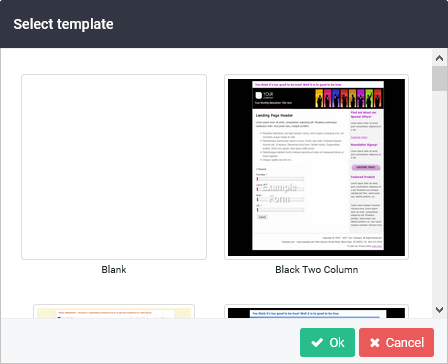
- Click one of the thumbnails that appear in the right side of the panel. To see more thumbnails, scroll down the Select template pop-up window.

- Upon completion, click either
 (to save and edit later) or
  (to save and publish the page).
The URL of your published page will be http://<domain>/ps/<path>.
Special characters are not allowed in the path.