Creating a Split Test Overview
Split-testing gives you the ability to send different versions of a message to random subsets of your mailing list, and then compare the results to see which version is most effective. This type of testing eliminates any demographic or action-based bias that could alter your results.
After you determine which version of the message gives the best results, you can send it to the rest of your list.
Creating a Message
To create a split test message, first, you have to create a message or edit an existing one. For information on creating a message, see New Message Creation Workflow, which covers all five steps of preparing and sending a message:
- Creating a Message
- Selecting recipients
- Edit Content
- Testing and proofing a message
- Send or Schedule a Message
Creating and Editing Split Test Messages
Creating Split Test Versions of a Message
- Click Add a Message > Scheduled Message or edit an existing message to open the Scheduled Message Detail wizard.
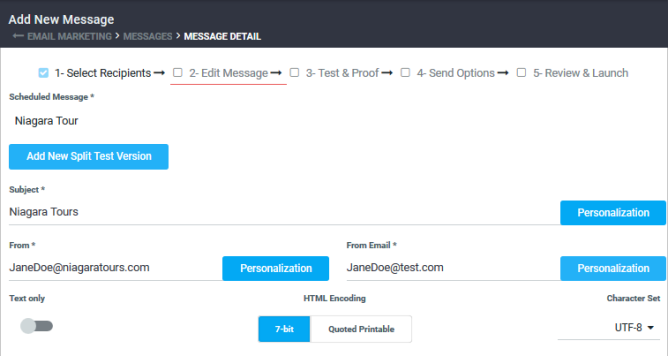
- On the Edit Message page of the wizard, enter or edit the details of the original version of the message:
- Add details in the Subject and From fields.
- Fill in the message itself; you can also use a template by clicking on Templates.
-
To add a new version of the original message:
-
Click on Add New Split Test Version in the upper-left corner of the Edit Message page to open the Add Split Test Version pop up.
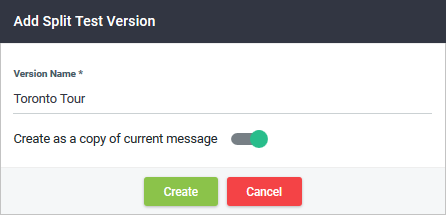
- In Version Name, type a name for the new version or keep the default, as in Version A, B, or C. The name may help you distinguish the difference between the versions. You are limited to creating four versions of a split test message.
- Click on Create as a copy of current message to create the new version as a direct copy of the current message. This version can then be edited to have different attributes than the original message. For example, this can be helpful, if you are only testing the subject line.
- Click on Create to save the new version. Once you create the new version, you will be taken to the edit option for the new version.
-
You can choose to provide a Version Name, Description, and Subject for the new version. You can also insert a new template and edit the content in the Design or Code view. For more information on editing a message, see Selecting a Template in Creating and Editing Message Content.
You can create up to four versions of your message by repeating the above steps. When you have completed these steps, you will have a group of messages that are essentially different versions of your original message.
Accessing and Editing Each Version

-
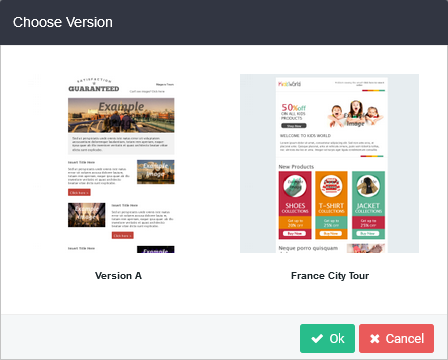
Click Switch Version to view and select different versions of your message. Your messages are presented with thumbnails. You can click on whichever message you want to open in the full-screen WYSIWYG(What You See Is What You Get). A development option that allows you to view items in the editor as they will display for end-users. editor.
Once you've selected a version, you can also display a full preview window by clicking on the Preview button, on the right side of the screen above the display section.

Running a Quick Test
You can run a quick test of a selected version by clicking on the Quick Test button, to the right of the Preview button. This will bring up a dialog that will prompt you to put in the recipients you would like to send the test to. Aurea Campaign Manager will not send the test messages to your contacts; it will simply use the contact's profile data and send the messages to the addresses you specify. For more information, see Creating and Editing Message Content.
Removing a Version
-
Click Delete Version to delete any split test version that you have added. If you delete all versions except one, the message will revert to a standard message.
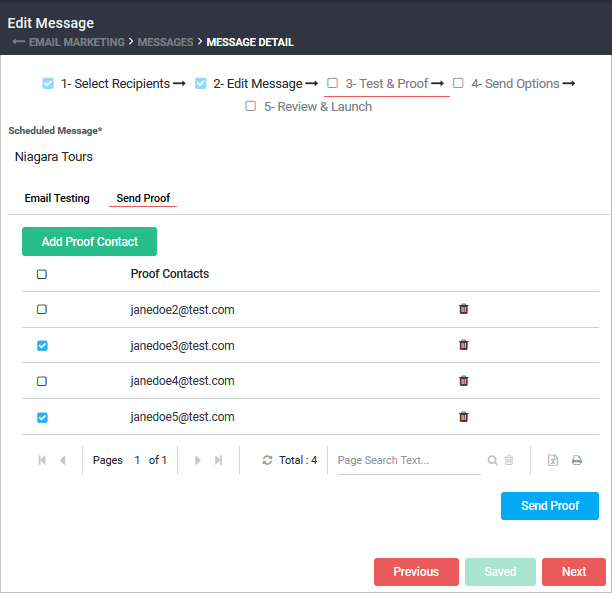
Test & Proof
From the Scheduled Message Detail > Test & Proof page of the wizard, you can test your split test versions through a list of parameters and send proof to see how they will be rendered.
Running a Test
-
Select the radio button in the column of the version you want to test. Each message can be tested independently.
NOTEIf you have a Premium Email preview, each version is its own test.
- Click on Run Tests to generate View Results for each test.
- Access the results by clicking on View Results for each test, under the selected message.
Click on Run All Tests if you have not already upgraded to the Premium Email Preview and Spam Filter Test. This will enable you to run these two new tests and choose to upgrade.
For more information, see Upgrading to Premium Email Preview and Spam Filter.
For more information on testing, see Testing a Message
Sending a Proof
Choosing the Send Proof option sends a test copy of each version using your proof contact profiles. This gives a more accurate result than a Quick Test because it uses your proof recipient's actual data instead of random test data. For more information, see About Proof Contacts.
Setting Delivery
To open the Scheduled Message Detail > Send Options page:
- Click Next on the Test & Proof page.
Version Distribution
From the Scheduled Message Detail > Send Options, you set the percentage of the list you want each version to be sent to.
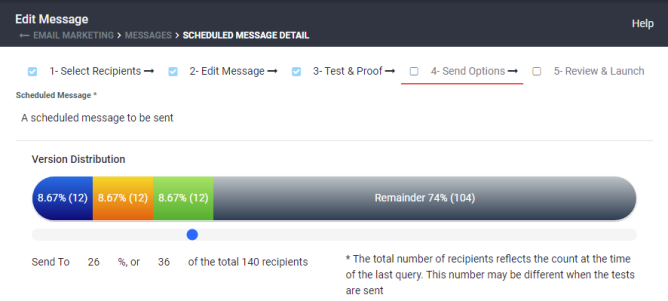
Use the slider underneath the Version Distribution bar or type in the percentage or number in the Send to box. The total number of recipients is rounded up if the number of contacts cannot be evenly distributed.
For example, if you designate that four versions of the message should be sent to ninety percent total of eleven recipients, then the first two versions of the message will be sent to three each, the third and fourth versions will be sent to two each, and the remainder will be 1 (or 9%). The individual recipients are selected randomly.
Scheduling Test Versions
You can schedule when the test versions are sent. You do this individually or by setting all versions to be sent at the same time as Version A, by clicking on Apply this schedule to all versions.
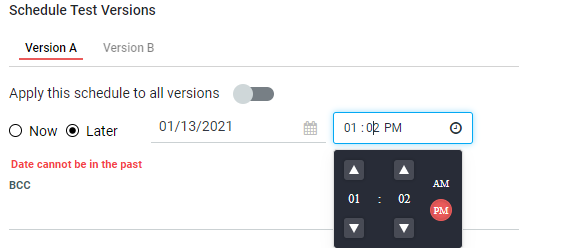
- Click on the first version. By default, it's Version A.
- Select when you want to have the version sent:
- To have the version of the message sent immediately, select Now.
- To schedule the message, select Later and select the date and time when the message should be sent.
-
Select Apply this schedule to all versions to apply the selected sending time to all versions or remove the selection and repeat Steps 1 and 2 for every version.
- Click on Delivery Monitor if you want to get a detailed information report showing which ISPs accepted or rejected the message, and if accepted, whether it was received in the inbox or bulk folder. For details, see Delivery Monitor.
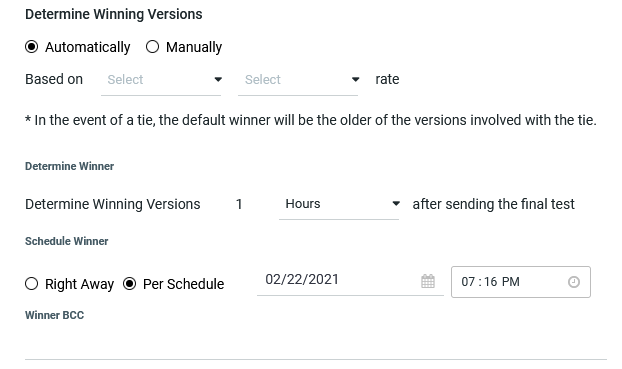
Determining Winning Version
You can set the winning version of your test messages to be selected automatically or manually.
Automatically
- The meaning of Based on Opens Rate is based on choosing Total Open or Unique Open.
Select Automatically for the winning message to automatically be selected using a specific set of criteria. You can choose Based on Open Rate or Based on Click Through Rate with two sub-choices each.
- Total Open refers to how many times a message is opened, including a customer opening the same message multiple times.
- Unique Open represents the initial time a message is opened.
- The meaning of Based on Click Through Rate is based on choosing Total Click or Unique Click.
- Total Click refers to how many times a message is clicked on, including a customer clicking multiple times.
- Unique Click represents the initial time a message is clicked on.
The selection of the above criteria determines the winner. If there is a tie between messages, the older version is picked.
Manually
Select Manually if you want the winning version to be selected by you, reviewing the final reports to make a decision.
Determining a Winner
You can set the time for the winning version to be sent, determined by the hour or day, after sending the final test.
Put in the number of hours or days in the Determine winning version text box and drop-down menu.

Scheduling a Winner
Schedule the time for the winner to be determined in the Schedule Winner section.
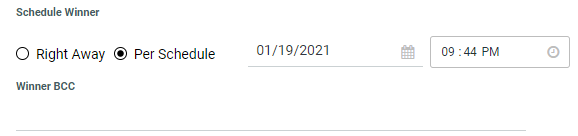
- Select Per Schedule to have the winner determined by the date and time you set.
- Click on Delivery Monitor if you want to get a detailed information report showing which ISPs accepted or rejected the message, and if accepted, whether it was received in the inbox or bulk folder. For details see Delivery Monitor.
- Type one or more email addresses in the BCC box to send them outgoing test messages without being seen by other recipients.
Review & Launch
You can preview each message before sending it to the recipients from the Scheduled Message Detail> Review and Launch page to ensure that your messages are accurate before sending.
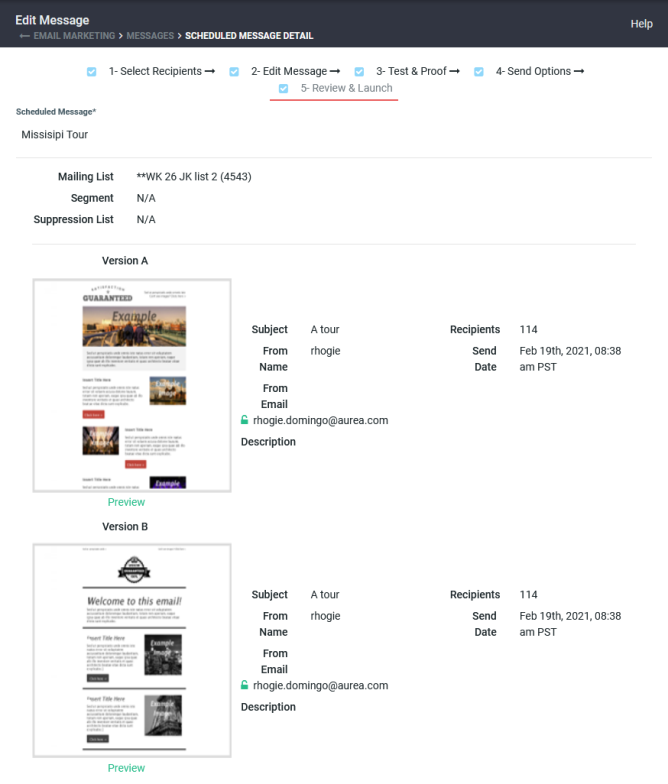
- Click on the preview display of any message to launch a full-size preview window.
- Click on the bottom text links, HTMLHypertext Markup Language. A set of tags used to mark the structural elements of text files. HTML files include tags that create hyperlinks to other documents on the Internet., and Text to view the full-sized preview in either format.
- If you have set your test and message versions to be sent automatically, click on Send to deliver different groups of messages to the randomly selected recipients.
- If you have scheduled the delivery of your test and message versions, click on Schedule to start the process of launching the test and random messages at the time you have determined.
If you have not scheduled the delivery correctly, the Send button will not allow you to go forward, and force you to return to the Set Delivery page.
Message Statuses
Viewing Message Status
Once your messages have been created, you can view them on the Email Marketing > Messages page.
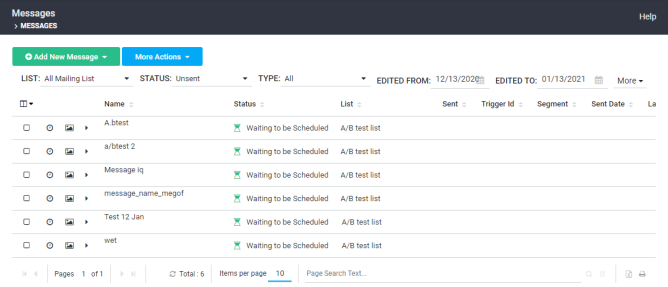
Status Filter
The Status menu includes the following processing stages when testing and sending single or split test messages. Selecting one of the following choices filters the message view to match your selection.
- Test pending
- In test
- Testing complete
- Winner scheduled

Split Test Message Preview
In the Message Name column, the split test messages have an arrow for collapsing and expanding a view of the different message versions. The default for the arrow is in the collapsed state.
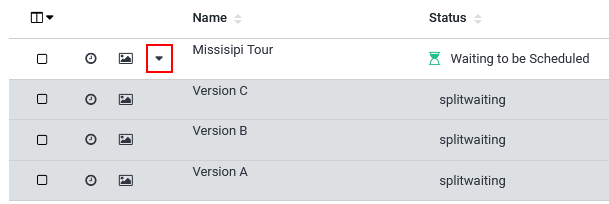
There are hover-over icons available on the split test messages to display previews for the multiple versions. Each version in the drop-down list displays the visual message, subject, From Name, From Email, Sent Date/Time, Format, and Description.
To display the Split Test Preview:
- Go to Email Marketing > Messages preview page.
- Hover over the line of a split test message (if you have created one) and click Preview in the Name column.
- Review the preview for all the versions that are part of the Split Test message.
Status Icons
The Status column displays eight icons that represent which stage the split test messages are currently at in the message workflow. The following table lists the icons with titles and definitions.
| IconA picture or symbol that represents an object, task, command, or choice users can select by pointing and clicking with a mouse. | Title | Description |
|---|---|---|

|
Split Test | The message has multiple versions set for split testing. |

|
Test Pending | The split test has been scheduled and is ready to be delivered. |

|
In Test | The split test is in the test process. |

|
Testing Complete | The split testing has been completed. |

|
Winner | The message has a winning version set automatically. |

|
Winner Scheduled | The winning version is scheduled. |

|
Draft | The message has been created but has not been completed. |

|
Waiting to be Scheduled | The message has been sent and is waiting to be scheduled. |
Reports
After sending a message, the automatic and manual split test reports give you the necessary feedback about your split-report mailings.
To access the split test reports:
- Select Email Marketing > Reports > Overview to open the Reports Overview page.
- Click Detail under a listed split test report in the Reports Overview page to display the Email Marketing – Split Test Report.
Automatic and Manual
The two kinds of split test reports provided are automatic and manual.
- The manual report displays statistics on each message with a prompt to choose the winning version after reviewing the statistics.
- The automatic report displays the winning version with statistics that show how the selection was made.
Split Test Reports – Automatic Selection
The automatic split test report automatically picks a winning version by matching the statistics of each message, before sending it.
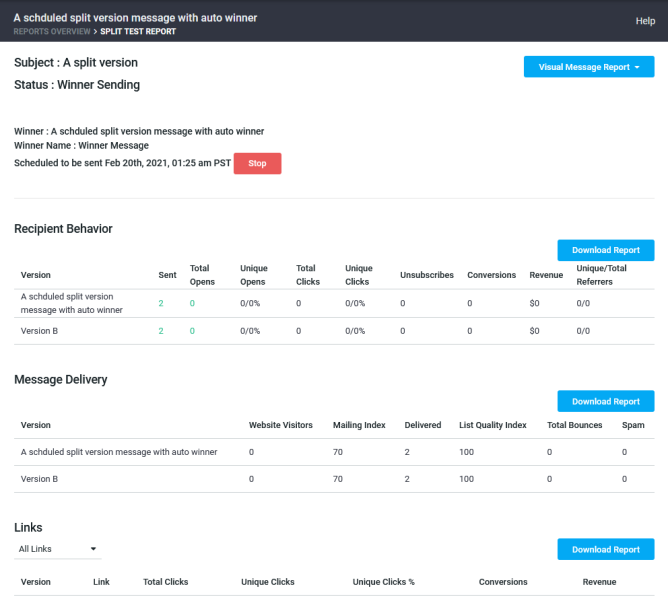
- Click on View Email test Reports in the upper-right corner to select any of the messages to generate a Report Card. For more information, see Report Card.
- Click on View Message Report to select a message and generate an EmailLabs visual report.
- Click on Download Report to download a .csv report for each section, for example, Recipient Behavior or Message Delivery.
The following report shows that the winning split message has been sent and tracks all the relevant data, as in how many unique opens, clicks, unsubscribes, and more.
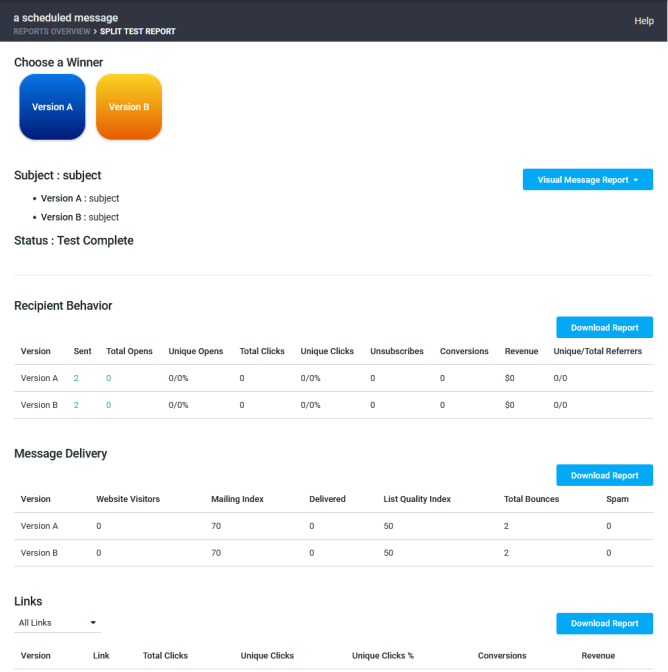
Split Test Report – Manual Selection
The manual split test report shows different versions that were tested.
Select which version you want from the top Choose a Winner row, to use as the winning version after reviewing the test results.
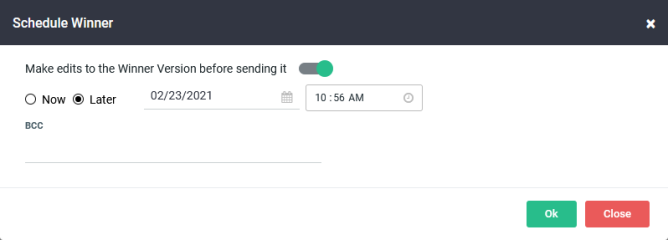
After selecting the winner, a Schedule Winner dialog will pop up. Perform the following steps:
- Click on Make edits to the Winner Version before sending it if you want to edit the message before sending.
- Schedule the winning version of the message by clicking on Later or Now.
- Select date and time in the drop-downs if you selected Later.
- Click on Delivery Monitor if you want the message deliverability to be tracked in this report.
- Type in an email address that you want the message to be sent to, next to BCC. This will send a blind copy to that address for checking the success of the mailing.
- Click OK to send.
The following report shows that the winning split message has been sent and tracks all the relevant data, as in how many unique opens, clicks, unsubscribes, and more.
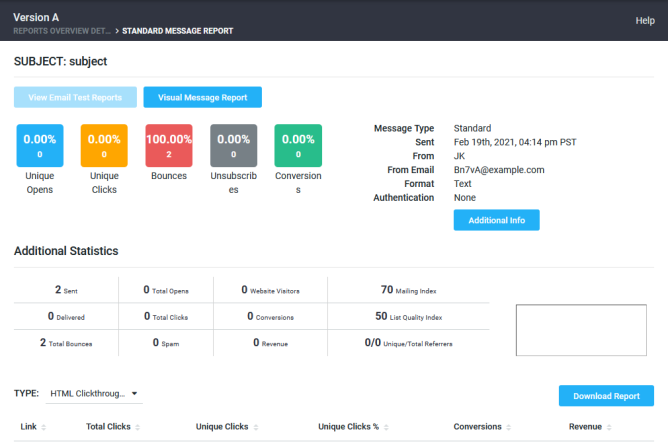
On each report, there are two drop-down buttons:
- View AE Reports: Click on the View AE Reports drop down to select which version of the split test message that you want to view. Once you select a message, the report will be displayed as an EmailAdvisor – MyEA Report Card.
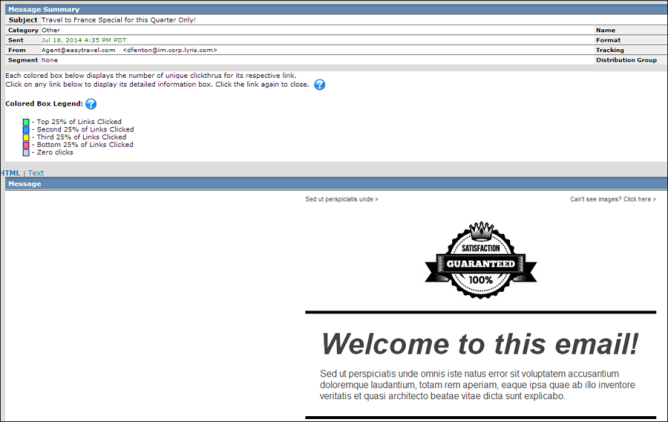
- Visual Message Report: Click on the Visual Message Report to select which version of the split test message that you want to view within EmailLabs.
The Visual Message Report enables you to click on links in the graphic view to see what percentage each link was clicked on. You can do the same actions in text mode. For more information, see EmailLabs > Message Summary.