Selecting Message Recipients
Selecting message recipients and naming the message is the first step of creating a message.
Selecting Recipients and Creating the Message
- On the navigation bar, click Email Marketing > Messages. The Messages page opens in a new tab displaying a list of all existing messages.
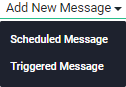
- Click Add New Message > Scheduled Message.
- In the Enter Message Name field, type a name for the message.
TIP
Your recipients will not see the message name, and you will be able to edit it at any time when creating or editing the message.
- In the Mailing Lists field, select or type the name of the list to which you want to send the message.
- Optionally, select the segment to which you want to send the message from the Segments drop down list.
NOTE
The Segments list is enabled only if the selected list has at least one segment. For information about segments, see Segments Overview.
- Optionally, select the suppression list you want to apply to the message from the Suppression Lists drop-down list.
NOTE
The Suppression Lists list is enabled only if you have previously created a suppression list. For information about suppression lists, see About Suppression Lists.
- Do one of the following:
- To continue creating the message, click
 .
. - To save the message, click
 . Your message is created and appears on the Messages page with the Draft status.