Uploading an Existing Mailing List
Setting up a mailing list is one of the most basic things you can do in Aurea Campaign Manager. Uploading an existing list is a much faster way of adding contacts to a mailing list than entering individual contacts, one by one. Uploading your existing list is not difficult, but there are a number of steps involved, and the more thorough your understanding of the process is, the better your chances of the smoothest upload possible.
You cannot upload a mailing list file larger than 50 MB. If your mailing list exceeds that limit, divide it into several smaller files and then upload each one individually.
Uploading a Mailing List
- On the navigation bar, click Email Marketing > Contacts.
- From the More Actions drop-down list, select Upload Contacts.
- The Upload Contacts wizard contains four different pages: Upload Source, Map Attributes, Verify Upload, and Confirmation. Click the Browse button next to the Upload Source field and navigate to your mailing list file.
- To choose which file type to view, click the Files of type drop-down list, select CSV files or Text files and click Open.
Reviewing a Mailing List
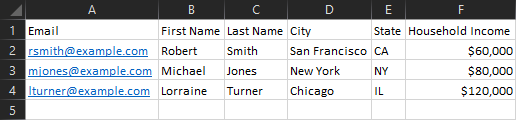
The following illustration shows a mailing list in an Excel spreadsheet. When saved in CSV format, this mailing list is well-prepared for uploading because it includes data organized into columns, and each column has a label.
Here is the same mailing list saved as a .TXT file:
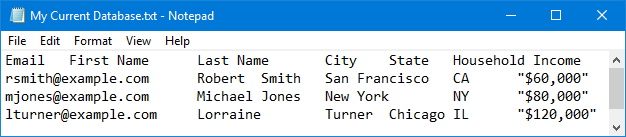
- One column in your mailing list (whether in CSV or text) must be labeled Email or email.
- In a text file, there should be no delimiter (such as a comma) at the end of a line because this application would assume you want an extra, empty data field.
Matching Attribute Names to the Column Names in an Existing Mailing List
The various columns in your existing mailing list that contain information about your customers—for example, last name, age, gender, location, marital status—are called "attributes" in this application. You can use attribute information for surveys, segments, opt-in forms, triggers, and user reports.
Knowing how attributes work is helpful, and in some cases may be crucial to successfully upload your existing mailing list. Click the following links to find out more about Attributes:
- Attributes Overview
- Creating an Attribute
- Enabling an Attribute
- Disabling an Attribute
- About Attribute types
For the purposes of our current example, consider that the following is the mailing list you are uploading:
It has six column names:
- First Name
- Last Name
- City
- State
- Household Income
For the smoothest upload possible, each column in your existing mailing list must have a corresponding attribute in the list to which you are uploading, with the spelling, spacing and capitalization of the column labels exactly matching those same characteristics for the attributes of the list to which you are uploading. If the column labels are similar to attribute names this application will suggest a mapping, otherwise you will have to manually map them.
If the list to which you are uploading has the attribute names as shown in the following image, your upload will work smoothly:
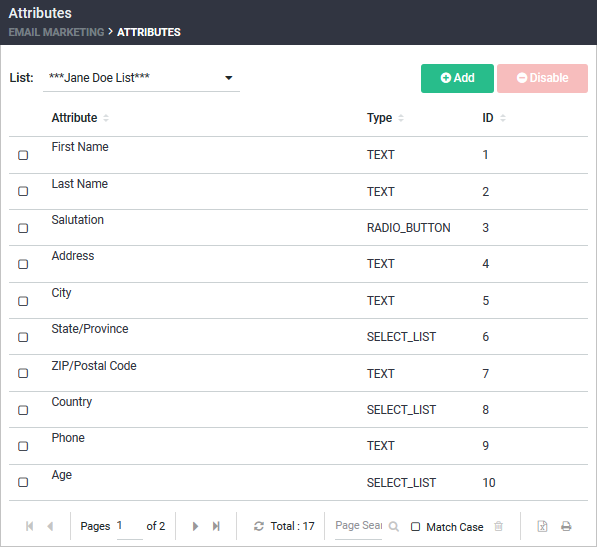
The Email attribute does not appear here but will be included automatically when you upload your mailing list. The other five attributes for your existing mailing list match the column names in the list to which you are uploading, though not necessarily in the same order.
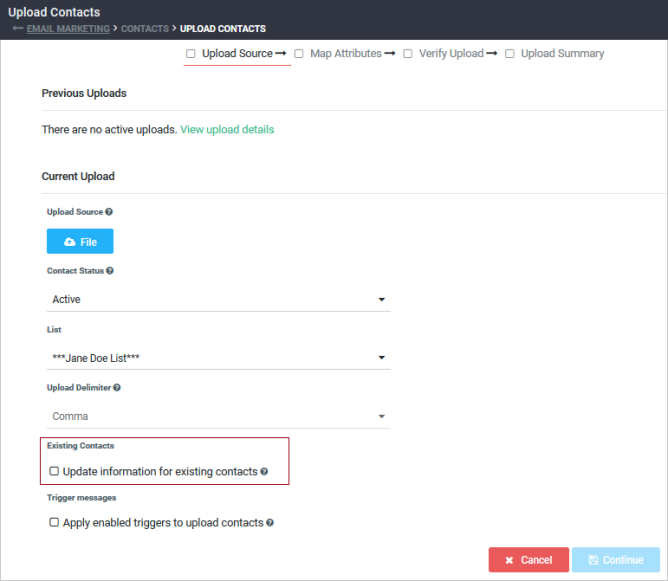
When selecting Contact Status, you can choose:
- Active
- Unsubscribed
- Bounced
- Trashed
The default Contact Status is Active, which means the application will send emails to contacts in your upload file. If you want a different status to be assigned to the contacts in your upload file, click the Contact Status drop-down list, and then select the status you want. The other status options are Unsubscribed, Bounced, and Trashed, each of these options means this application will not send emails to the contact.
The delimiter is the character used to separate fields in your existing mailing list. The default is a comma. In the Delimiter box, type the delimiter used in your mailing list if it is different from the default. If your file format is .CSV, leave this setting as is.
Updating Information for Existing Contacts
- On the Upload Contacts dialog, select the Existing Contacts check-box.
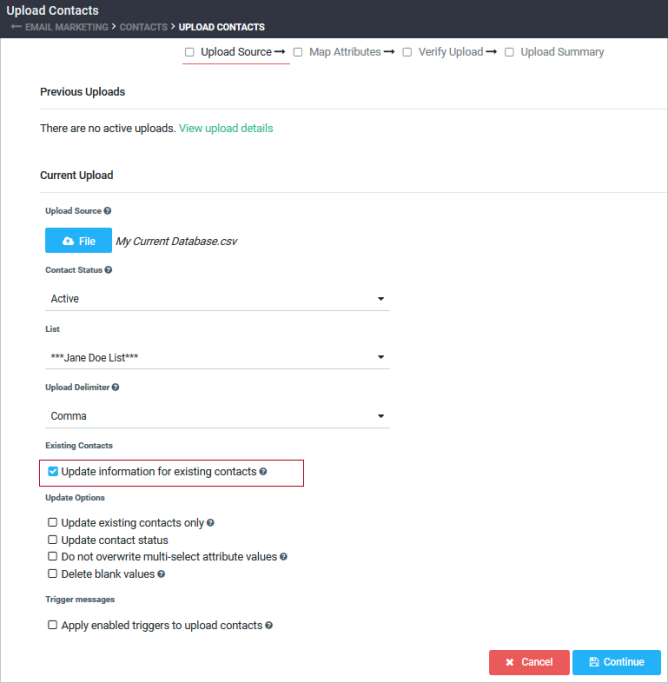
If you select Update information for existing contacts in the Existing Contacts field, the Update Options are:
| Options | Description |
|---|---|
| Update existing contacts only | If checked, no new contacts will be added to this application; the upload will serve the purpose of updating existing contacts only. |
| Update contact status | If checked, contact status will change to match your upload file. |
| Do not overwrite multi-select attribute values | If checked, this application will not update multi-select attribute values to match your upload file. |
| Delete blank values | If checked, this application will delete data when the upload file has a blank.
NOTE If you uncheck Update information for existing contacts in the Existing Contacts field, the Update Options, described above, disappears. |
| Trigger Messages | If checked, this application will review all newly uploaded contacts from you upload file against the trigger you created and checks whether an email should be sent to the newly updated contacts based on the trigger logic. NOTE Triggers must be enabled in your account. To enable triggers, contact your Account Representative. |
If you uncheck Update existing contacts only option, then, as shown in the following image, you will not see the remaining options listed in the above table.
- Configure your upload options and click Continue.
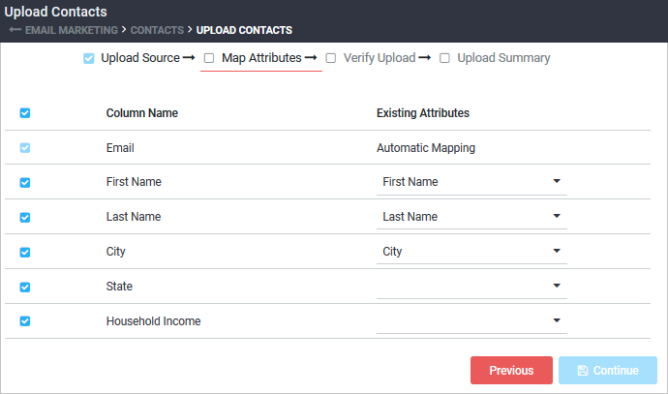
The Upload Contacts Map Attributes screen shows how the data from your upload file will be mapped into the system. The application reads your upload file and attempts to map data in your file to attributes within the system.
In the example above, the application was not able to find an attribute that matched the State and Household Income data in your existing mailing file. You must choose an existing attribute to which to map it, enable an attribute, or create this attribute, and then return to your upload.
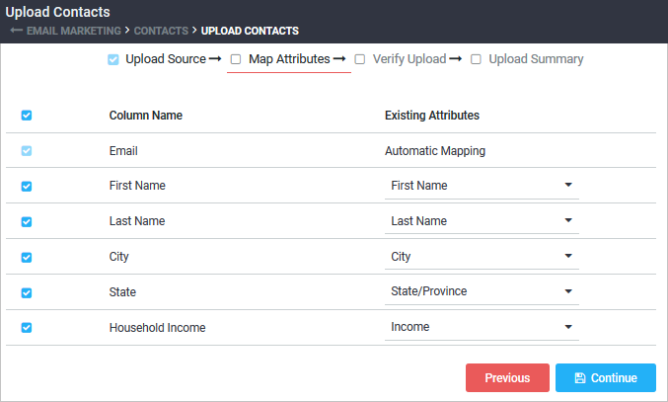
- Click Continue.
- If the mapping is not correct, click Previous and adjust the mapping.
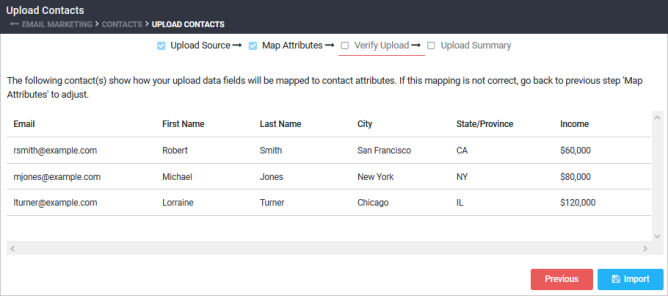
- Click Import to initiate the upload.
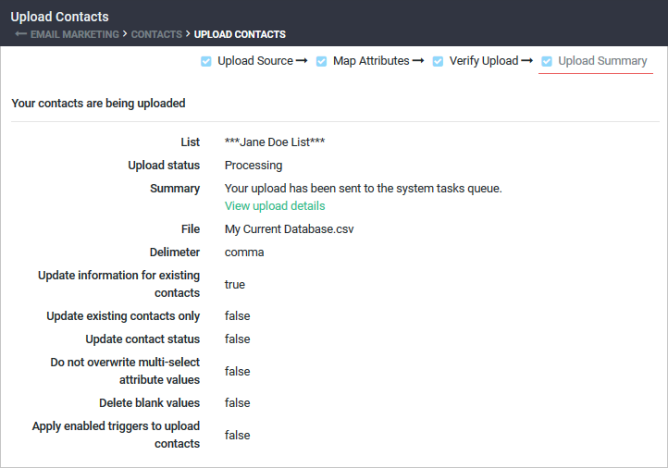
- To view details about your upload, such as how many contacts were added, click View upload details.
Return to the Getting Started With Email Marketing tutorial
If you reached this topic by clicking a link in the Getting Started with Email Marketing Tutorial and want to return to the tutorial, click here.