Importing an Exchange Mailbox
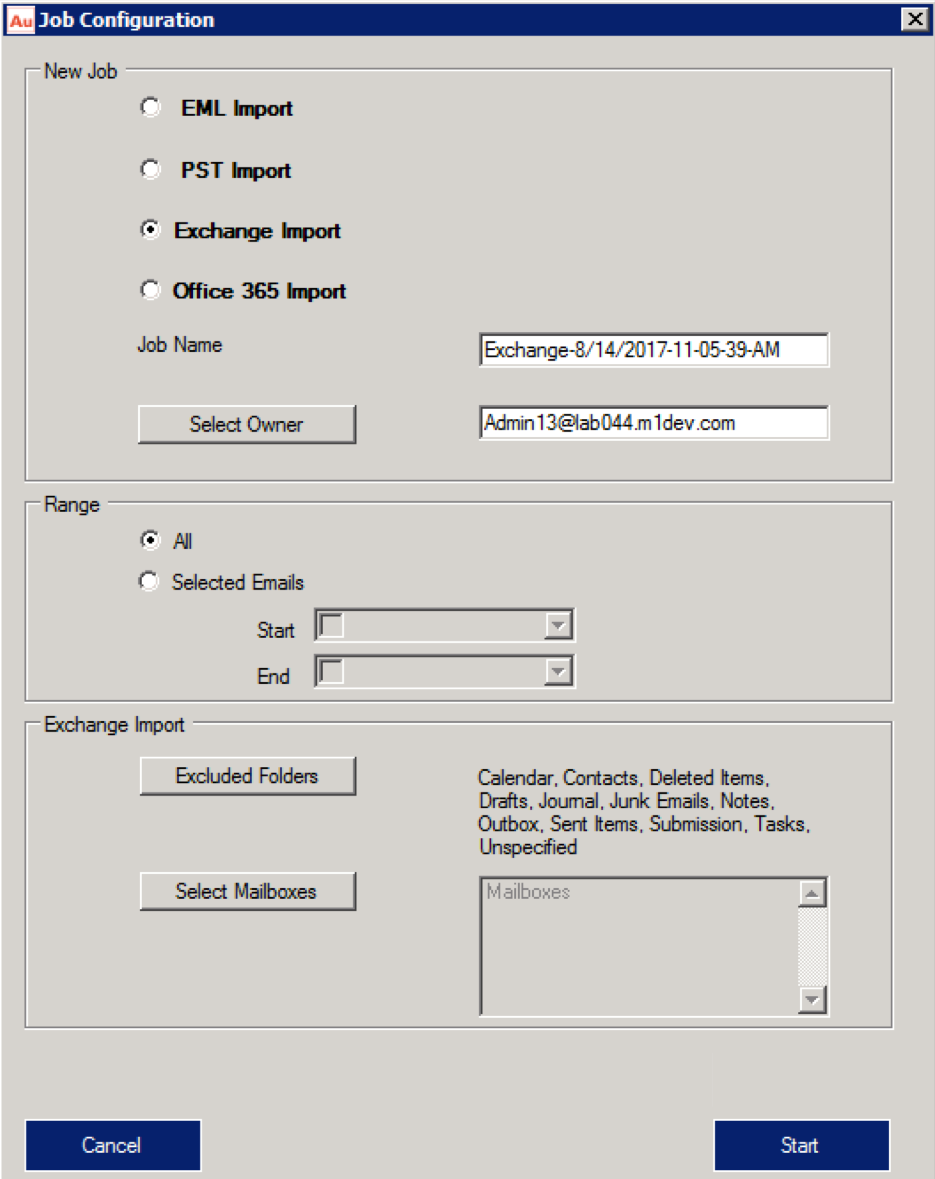
- From the Home page, click on the New Import button to launch Job Configuration Wizard.

AMS Import Manager Exchange Mailbox Options
- In the New Job section, select Exchange Import option. System shows Exchange Import specific options section at the bottom of the wizard.
- By default, system shows a job name in the Job Name field which includes the current system date and time. You can further edit the name.
- To manually select and assign owner, click Select Owner button. System launches New Exchange Import – Select Owner wizard.
- Select the job owner from the list. You can also manually enter the owner by typing in the email address.
- Click OK.
NOTE
If you checked the Auto Assign Owner check box in the setting, then the system will disable Select Owner field.

AMS Import Manager Exclude Folders
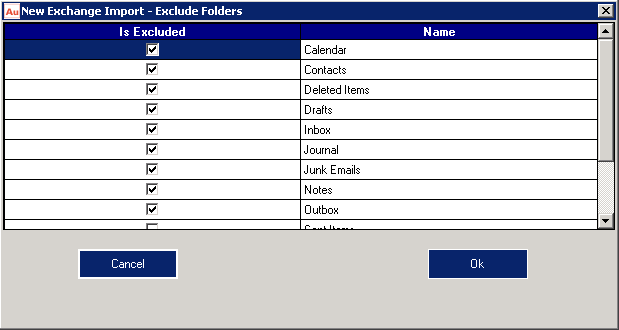
- You can further select the folders that you want to exclude from being imported. To exclude unwanted folders, click Exclude Folders button available in the Exchange Import section. System launches New Exchange Import-Exclude Folders wizard.
- Check the check boxes available in Is Excluded column to exclude those folders from being imported.
- Click OK.

AMS Import Manager Mailbox Selection
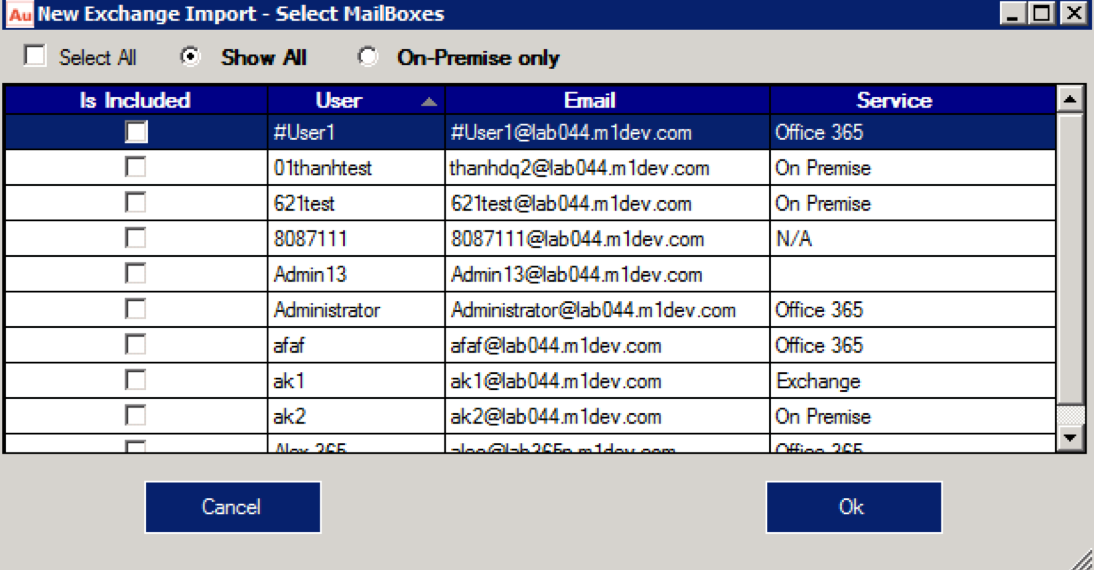
- Click Select Mailboxes button to select the mailboxes to be imported. System launches New Exchange Import – Select MailBoxes wizard.
- Check the check boxes available in Is Included column to include those mailboxes to be imported.
- Click OK.
- Choose All in Range to import all messages or set Selected Emails to import messages that fall in the selected date range.
- Click Start button. System imports the mailboxes and show the status in the Exchange tab.