Importing a PST file
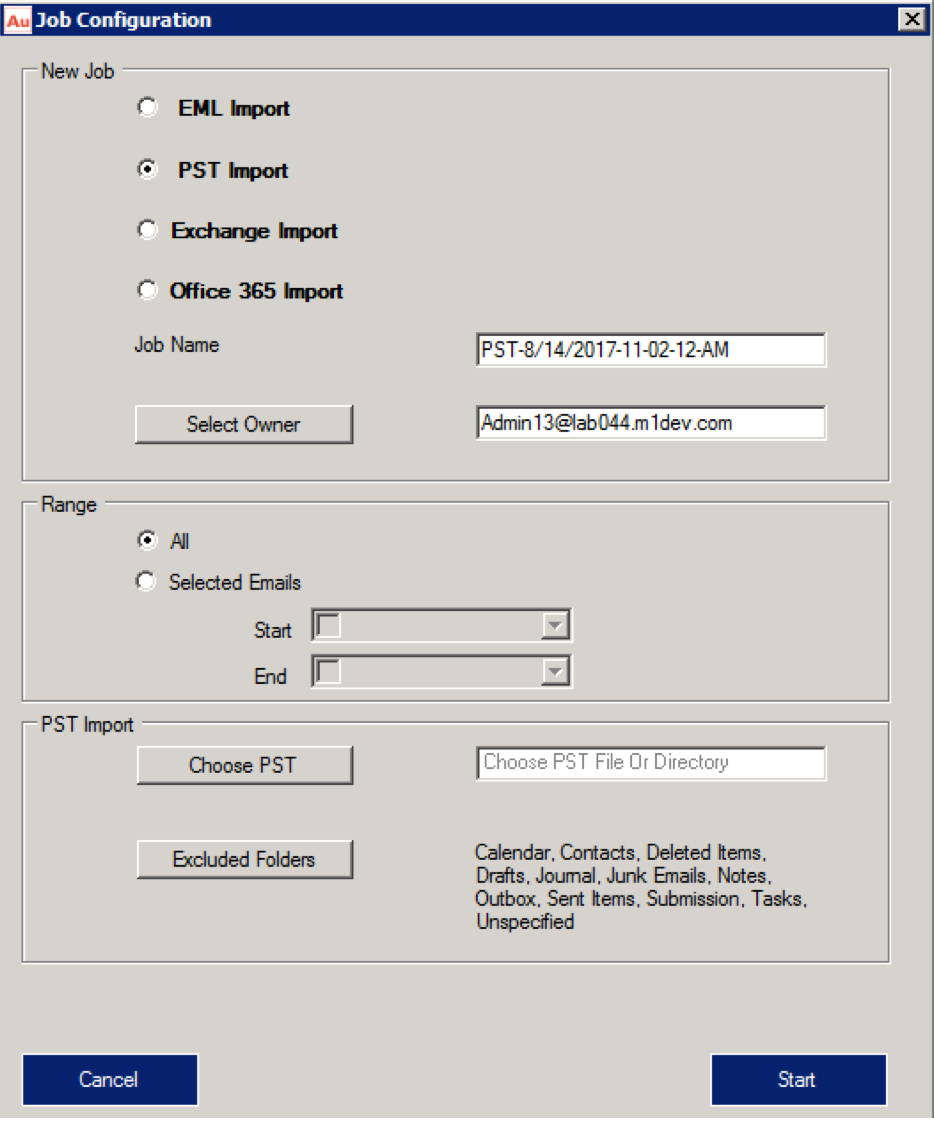
- From the Home page, click on the New Import button to launch Job Configuration Wizard.

AMS Import Manager PST Options
- In the New Job section, select PST Import option. System shows PST Import specific options section at the bottom of the wizard.
- By default, system shows a job name in the
Job Namefield which includes the current system date and time. You can further edit the name. - To manually select and assign owner, click Select Owner button. System launches New PST Import – Select Owner wizard.
NOTE
You can enter owner name in the Select Owner field. It should be a proper email address.
- Select the job owner from the list.
- Click OK.
- Click Choose PST button available in the PST Import section which will help you to browse and select the PST file or directory.
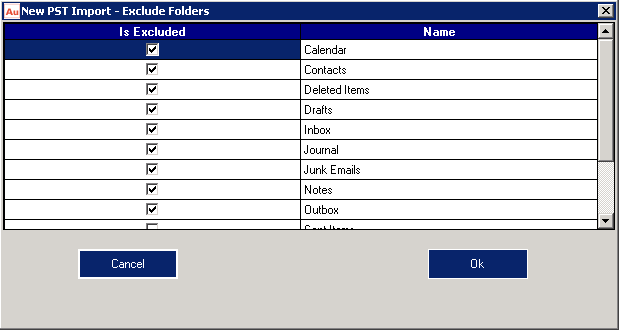
- You can further select folders that you want to exclude from being imported. To exclude unwanted folders, click Exclude Folders button. System launches New PST Import-Exclude Folders wizard.

AMS Import Manager Exclude Folders
- Check the check boxes available in Is Excluded column to exclude those folders from being imported.
- Click OK.
- Choose All in Range to import all messages or set Selected Emails to import messages that fall in the selected date range.
- Click Start button. System imports the file/directory and show the status in the PST tab.