Defining Reps
Learn how to define reps.
To define a rep:
- Open the Rights module and switch to the
Rep Info area.
- Click
 (New).
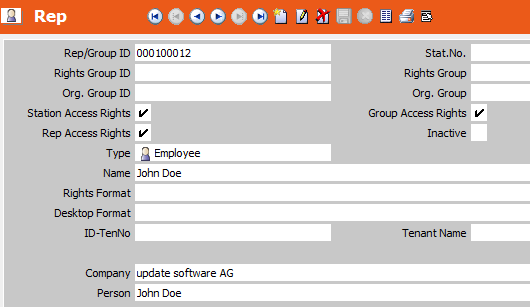
 - A unique ID number is generated in the Rep/Group ID field (composed of the station number and a serial number). This number is used to link the rep to the login name and to the specified access rights. The ID cannot be changed.
- Select "Employee" from the Type drop-down list.
- Enter the Name of the rep. The rep's name is displayed in the rep list, see Rep List in the Aurea CRM win User Manual.
- Enter the Rights Format you wish to assign to the rep, see Rights.
- Select a Desktop Format to assign to the rep. This desktop
format is loaded when Aurea CRM is started, see Desktop in the Aurea CRM
win Administrator Guide.Note: If desktop formats have also been assigned to the rep's group or station, the desktop format assigned to the rep takes precedence over the group and station settings; group settings take precedence over station settings, see Assigning Desktops in the Aurea CRM win Administrator Guide.
- Enter the Rights Group that the rep belongs to. The access rights defined for this group are applied to the rep.
- Enter the organizational group the rep belongs to in the Org. Group
field. Reps are grouped accordingly in the rep list. Whenever a rep is
entered in a record (e.g. an activity), the Org. Group and
Org Group ID are automatically entered in the corresponding
group fields.
The variable condition "Rep's extended group" is applied to the group entered in this field and groups directly allocated to the group in the Group Allocation area, see Defining Variable Conditions in the Aurea CRM win User Guide and Assigning Reps to a Group.
- If necessary, select the language to be assigned to the rep in the Language field (select View > All Mask Fields). Aurea CRM is then started in this language when the rep logs on.
- Enter the ID-TenNo to assign tenant rights to the rep, see Tenants.
- Enter further information (for details on the fields, refer to the online field help).
- Save the record.
- Define a login for the rep, see Configuring Logins.
- You can assign one or more login roles to the rep, see Login Roles.