Setting up the Twitter social media panel
Only users with the permission to edit Organization settings can set up the Social Media Panel.
For more information about setting up the Social Media Panel, see Setting Up the Social Media Panel.
Before you begin
Before setting up the Social Media Panel for Twitter, you need to:
- Make sure that the pop-up blocker is enabled in your browser.
- Log out of your personal Twitter account.
If you are logged into a personal account, the Social Media Panel will connect to your PERSONAL account, giving your organization’s users read access to your personal account.
For more information about how to set up the Twitter Social Media Panel, refer to Setting Up Social Media Panel.
Enabling a connection to Twitter
If you are not currently logged into your organization's Twitter account, you must enter your user name and password.
- On any page, click Settings.
- In the Organizations section, click the name of the organization you want.
- Click edit.
- Select the Social Media tab.
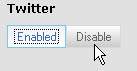
- Click Enable. The Twitter Authorization page opens.
- If you are not currently logged into your Twitter account, enter your user name and password.
If you recently disabled the connection but still have active cookies, the page will briefly open and close, automatically re-enabling the connection. In this case, skip step 7.
- Click Authorize app. The connection is enabled. All users in the organization now have read access to your organization's Twitter account.
- On the Dashboard, click your browser's Refresh button.
- Click OK. The connection is enabled.
Next step
Grant users write/delete permissions.
Disabling a connection
- On any page, click Settings.
- In the Organizations section, click the name of the organization you want.
- Click edit.
- Select the Social Media tab.
- Click the Twitter Disable button.
- On the Dashboard, click your browser's Refresh button.
- Click OK. The connection is disabled.