Adding and Deleting Assets to the Asset Library
Adding an Asset to the Asset Library
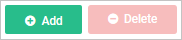
- Click the Add button.
- Navigate to the folder that contains the asset, select the asset and click Open.
NOTE
Make sure the asset is a file type that the Asset Library accepts.
- To view your uploaded asset(s), click the View Details command. To return to the main view, click the Return to Search command.
NOTE
- You can view all assets by clicking View: All.
- You can view any assets uploaded in the last seven days by clicking Recently Added.
- To view an asset you just uploaded in the main view, you must click the View: All command.
- You can assign one or more tags to the newly-uploaded asset.
- You can upload more than one asset at one time. While in the Open dialog, Ctrl-click the assets you want to upload and click Open.
- If you attempt to upload an asset that already exists, you will see an error message when you view the upload by clicking View Details or Recently Added. To delete the message, click the X in the lower-right corner of the message.
Deleting Assets
To delete an asset in the main view:
- Click the box in the lower-right corner of the thumbnail you want to delete.

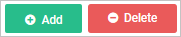
- Click the Delete button.
NOTE
You can delete more than one asset at a time using the same method by selecting the thumbnails and clicking the Delete button.