Invoicing Process Work Flow
In the CIS system, there are five major services running in the background to complete the Invoice Process Workflow.
Import Engine
This works with external tools to import consumption and TDSP charges from the Utility in the form of EDI files and then store the raw data into market database. The data is then imported to billing database for the Invoice Engine to pick up.
EDI sends electronic invoices for TDSP charges to Suppliers using EDI transaction 810. EDI also sends meter read information to the Suppliers through EDI data transfer. For more information see, Consumption Processing.
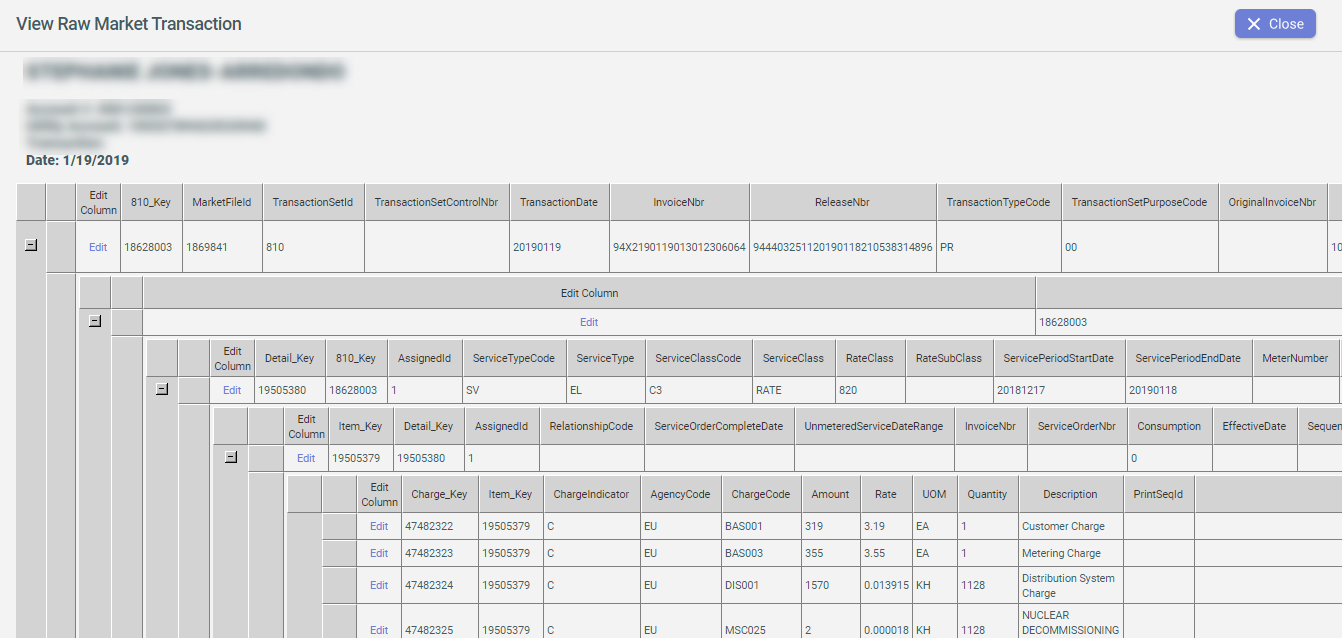
The EDI transaction details can be viewed in the Utility Accounts (ESI/LDC) tab on Customer Summary screen. Detailed information can be obtained by selecting the View Raw Market Transaction link.
Customer EDI Transaction
The image below shows a Customer EDI transaction example per month which are inbound 867_03 and 810 for this Customer.

EDI 867_03 Meter Read Transaction
The image below is an EDI 867_03 Meter Read Transaction which shows a detailed information including Service Period, Meter Start and End Reads and Quantity.
Invoice Engine
It is a process running in the background to process the 867s and 810s and create invoices. New Invoice Creation Request is stored in the
BillingAdmin.InvoiceQueue table.
CIS creates Invoice Batch for small groups of Customers. The Invoice Engine processes the Invoice Batch to generate invoices in bulk.
Most of the Invoice Batch(s) are created automatically by the CIS system. To set a BG to auto-invoicing, see Bill Group Management.
Incase of any invoice errors the CIS Ops team, after processing such errors as per billing rules, create manual invoices. Suppliers can also log into the CSR site and create manual inovices as per need.
Invoice Batch can be created in one of the following ways:
- By Customer
- By Bill Group
- By 867 Transaction Date
- By Consumption Date To
- By Production Cycle
To create Invoice Batch for Batch Invoicing, do the following:
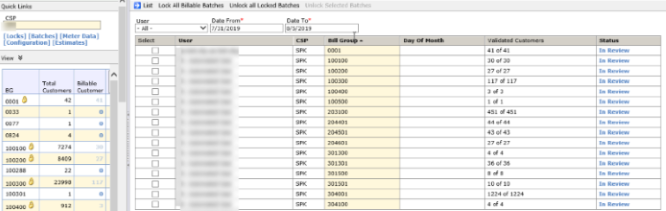
- On the CSR site, go to Administration > General > Client Invoice Administration.
- On the left pane of the page, you can see a list of BG (Bill Groups), Total Customers and Billable Customers. Check Lock Selected Batches for the BG you need to create batch and click Lock Selected Batches.
- The selected BGs will appear on the right pane and will be in Pending Validation status. After some time the BG status turns to Validating and
then to In Review.
- Click on In review link. Here you can see the pre invoice validations, if any. See Pre-invoice Validation.
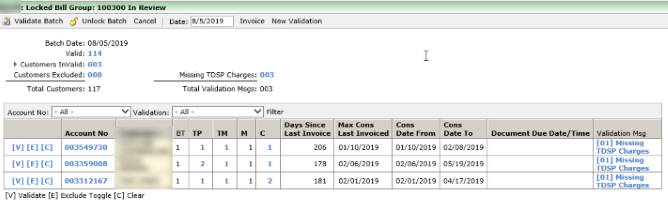
- Handle the pre-invoice validations as per business rules and click Invoice to create batches.
- From the left pane click on Batches from the Quick Links section. You see the batch created. It is identified by a number in the
Batch column.
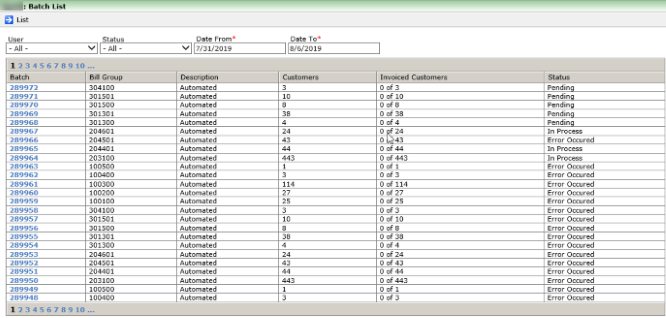
- The freshly created Batch has status Pending. The status changes to Processing after few seconds, and then to
Completed or Error Occurred.Note: Status is Completed when all the accounts in the batch are successfully invoiced.
Status is Error Occurred when there are post invoice errors for one or more accounts which failed to invoice. See Post-invoice errors.
The Invoice Engine searches the consumption table looking for new meter data that has not been processed. These are identified easily as it has no invoice ID assigned.
Once found, a new invoice is created in the invoice table with invoice details information stored in the InvoiceDetail table. A new invoice ID is allocated and assigned to the
invoice as well as the new consumption data.
- On the Customer summary screen, go to Activity > Invoice.
- Enter the Begin Date Range and End Date Range and click Generate Invoice.
- Invoice is generated successfully or invoicing error is thrown if any of the invoicing parameters is not satisfied.
Print Engine
This runs in the background to print invoices using different templates. New Invoice Print Request is stored in the BillingAdmin.PrintQueue table.
By using Crystal Reports, Active Reports, or Word2PDFs (iPDF) software, the invoice data is used to create an actual invoice. Individual PDF for each invoice/letter in the batch is created. The invoice is saved as a PDF file and made ready either to be delivered directly to Customers by email, or batched and sent to CIS Print Vendor by Export Engine for it to be printed and delivered to Customers.
In addition, Print Engine generates the outbound 810 requests in the Market database and the global service picks up and delivers it to the Market.
Below is an example of a PDF version of invoice:
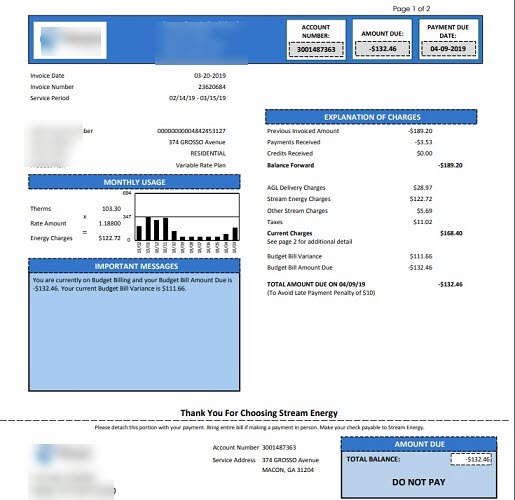
- Customer Name
- Customer account number
- Utility Account Number
- "Invoice"
- Invoice Date
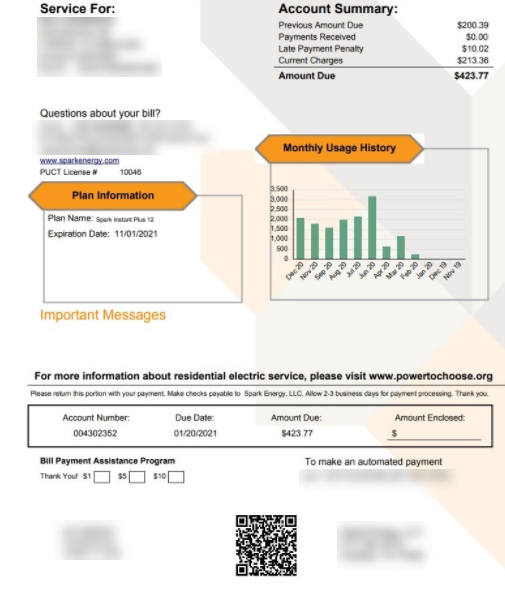
Below is an example of invoice with QR code:
Export Engine
This exports the data to Customers in csv or xml formats or exports data to third party using EDI transactions.
Here is a general overview of the invoice release and print process with the third party print vendor:
- CIS Ops team sends a confirmation email to the Supplier Ops team requesting to review the invoices within the current day’s invoice date.
- Upon receiving the request, the Supplier Ops team reviews the invoices and provides feedback to the CIS Ops team.
- Invoice Correction, if any, is implemented by the CIS Ops team.
- Once the invoices are ready for release, CIS releases the invoices to the third party print vendor. To release invoice, follow below steps:
- Go to Administration Menu > General > Correspondence Administration.
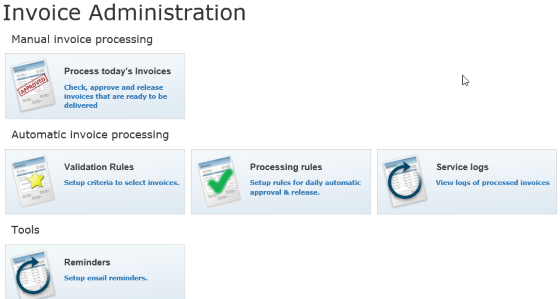
- Click Process Today's Invoice on Manual invoice processing page.
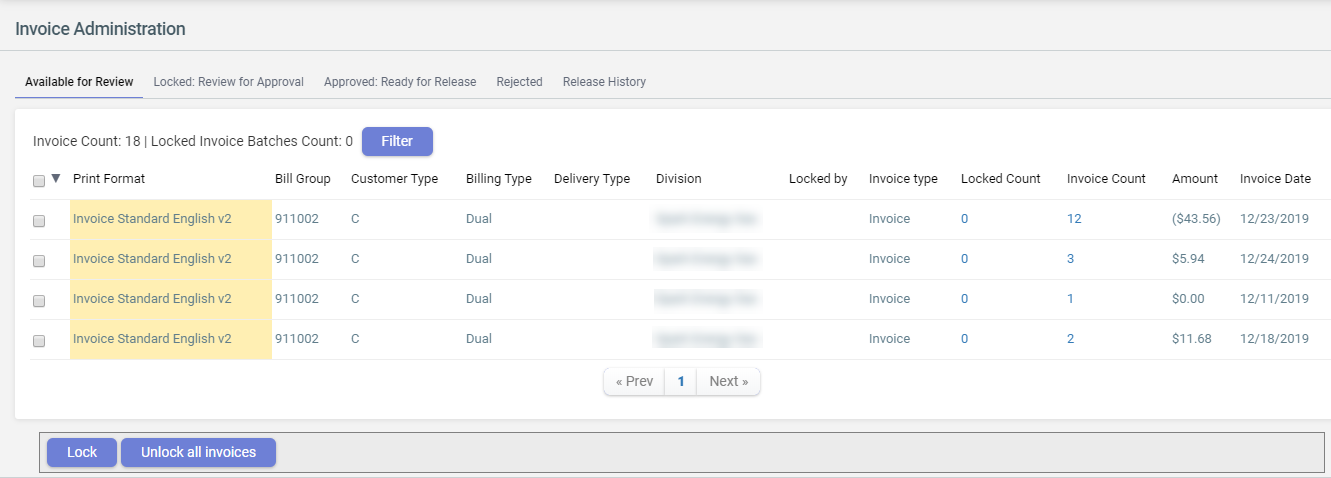
- Check the desired records and click Lock on Available for review tab.
- Go to Locked:Review for Approval tab. Check the desired records and click Approve.
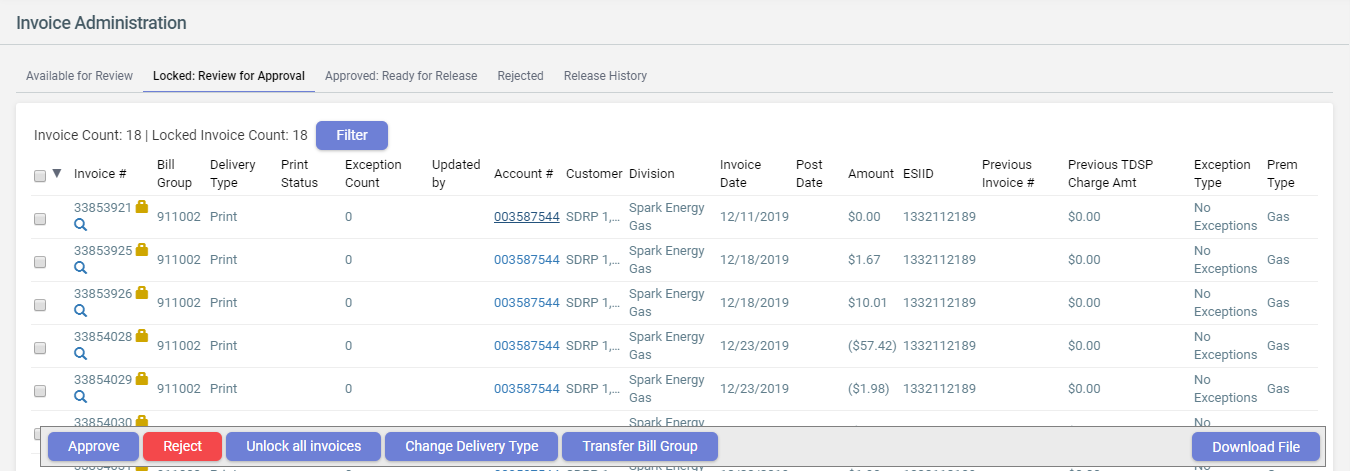
- Go to Approved:Ready for Release tab. Check the desired records and click Release Batch. This releases the selected invoices. Any time
during the process you can click Cancel to cancel releasing.

Note: Alternate functionality to release invoice - Go to . Select Release radio buttons in the displayed records and click on click Process Print Batch.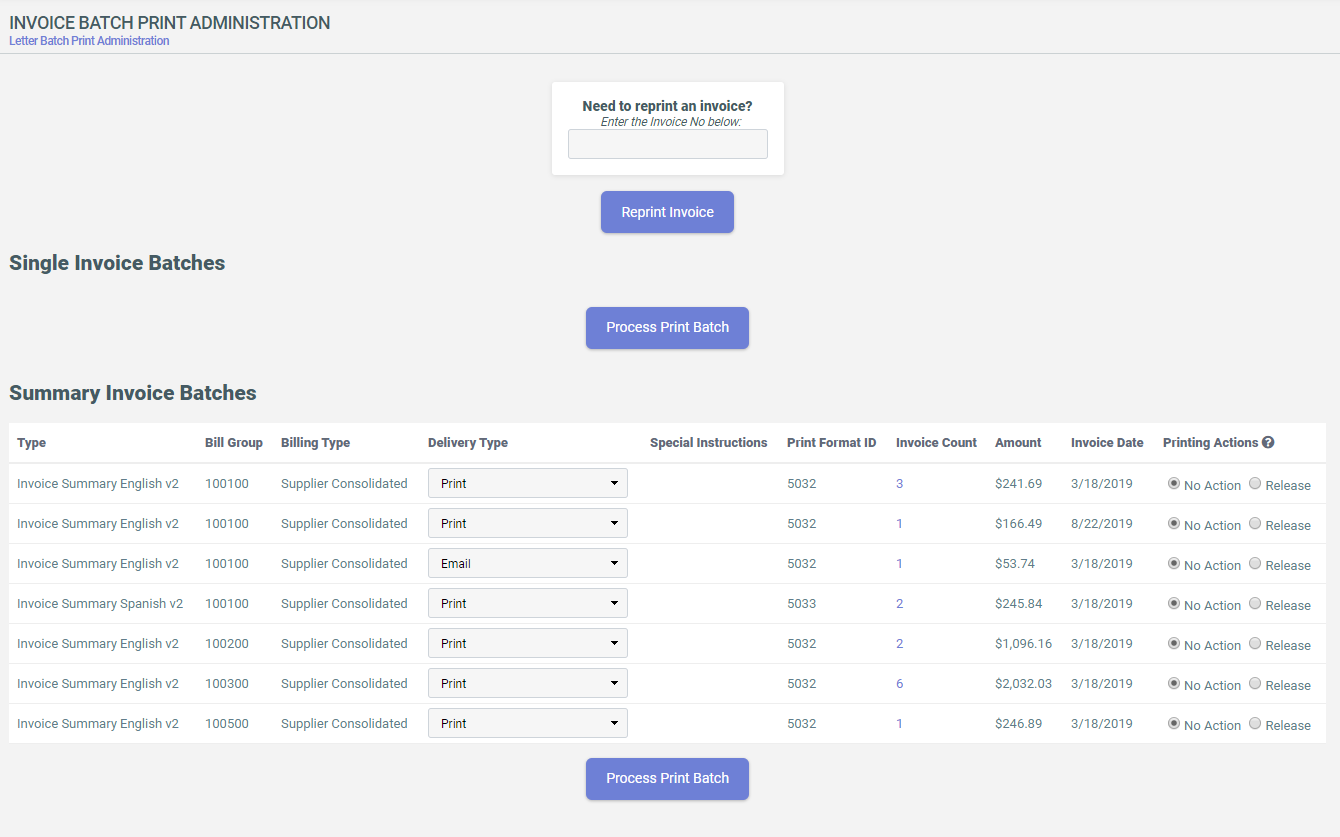
- Invoices are transmitted to third party print vendor in batches with up to 50 invoice per batch. Batches are also checked with the following criteria:
- The Bill group is correct.
- The Customer Type is correct.
- Duplicate checkers ensure that invoices are never sent twice in the same batch.
- Invoices are never sent twice in different batches.
- Validators exist to ensure that there is no corruption in both Zip and PDF files.
- The batches then receive a “Release Time” indicating when they were released.
- Once downloaded, the batches receive a “Downloaded Time” to confirm receipt by the third party print vendor.
- A subsequent file is sent to the third party print vendor that contains all batches transmitted for the day as well as the number of invoices contained in each batch.
- Once done printing, the third party print vendor sends back a confirmation file to CIS. CIS imports the confirmation file with the date in the file as the “Mail Date". The File contains
the following information:
- Batch Name
- Number of pages in the batch
- Count of distinct invoices in the batch
- Mail Time
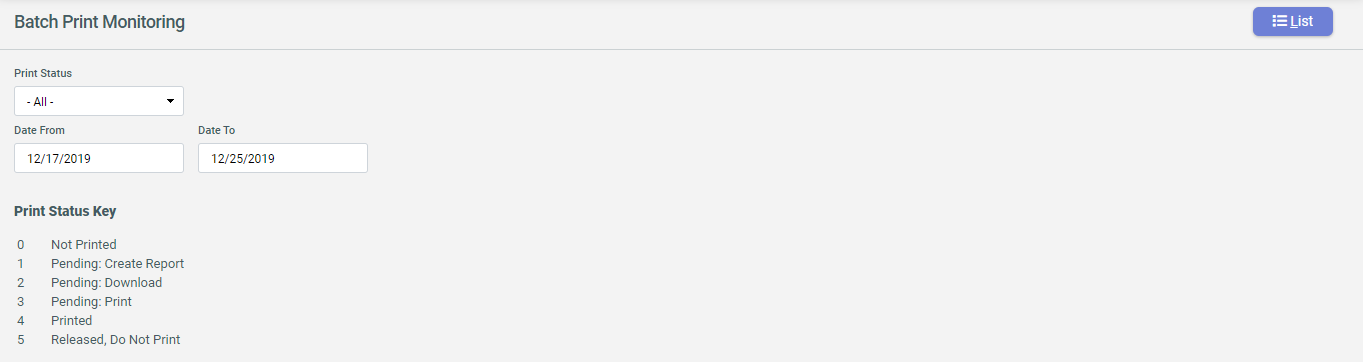
To View the print status report:
- Go to .
- Set the Date From and Date To fields. Select Print Status from drop down and click List. This
will display the desired print status report.
Event Engine
This creates and handles system events. The following tasks are conducted by the System Maintenance Engine:
- Enroll Customers
- Apply Aging
- Apply Late Fees
- Maintenance Queue
- QA Check
- Generate Events
- MCPE Back Casting
- Log Service