Bill Group Management
Bill Groups manage the billing process. Learn to setup and manage bill groups in CIS.
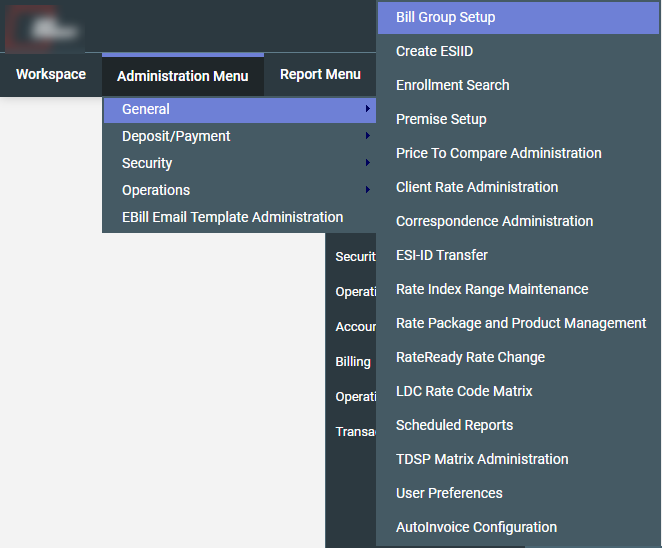
To access it, go to Administration Menu > General > Bill Group Setup.
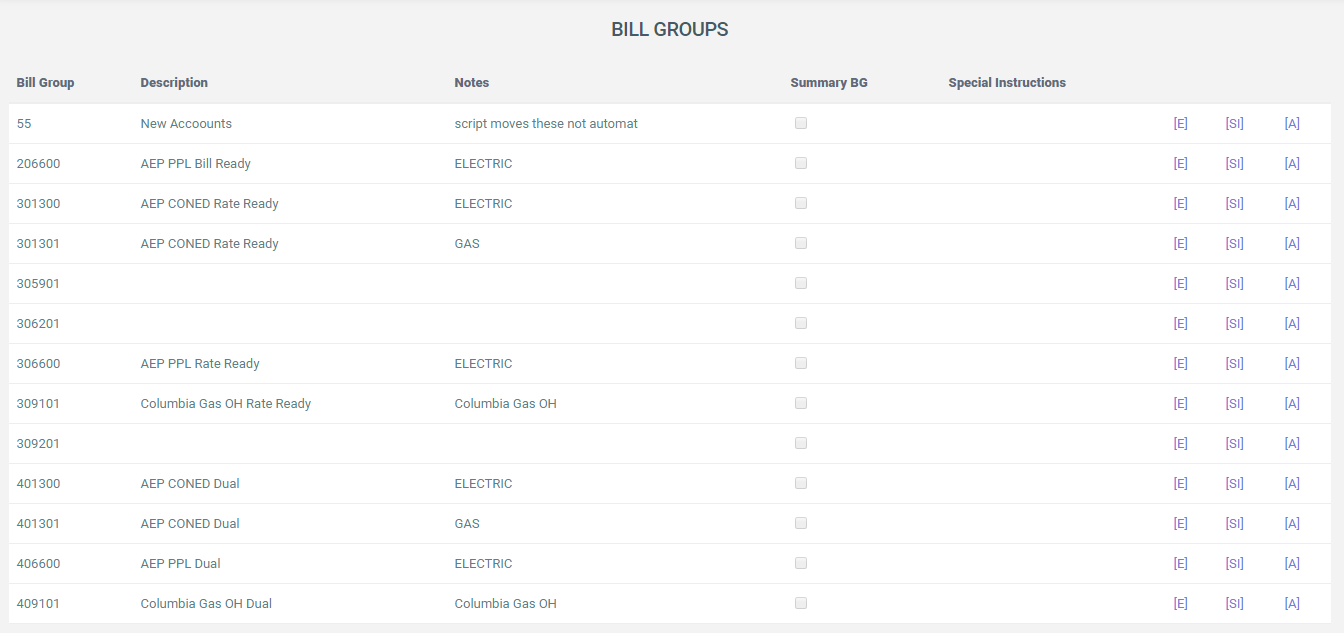
The Bill Groups page displays a grid that contains Description, Additional
notes, Summary and Special Instructions for all the bill groups that exist
in the system. It also contains actions to Edit
[E] a bill group, add Special Instructions[SI] to a bill group
or Add[A] a new bill group.
Adding a Bill Group
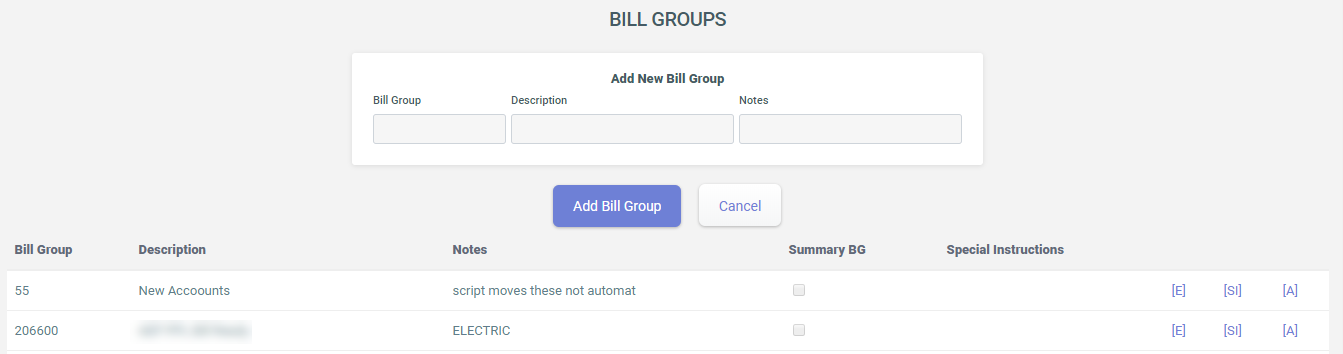
To add a Bill Group,
- Click [A].
- Enter a Bill Group number in the
Bill Group Field. - Enter a Description, and Notes to further explain.
- Click
Add Bill Groupwhen finished.
Editing a Bill Group
To edit an existing Bill Group,
- Click [E].
- On that same page, it allows you to enter a Description. Add Notes to further explain.
- Check the box for
Summary BG. - Click
Savewhen finished.

Adding Special Instructions
To add Special Instructions to an existing Bill Group,
- Click [SI].
- Select from the list of Special Instructions.
- Click Update when finished.
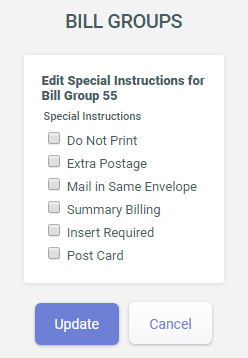
A list of options on Special Instructions include:
- Do Not Print
- Extra Postage
- Mail in Same Envelope
- Summary Billing
- Insert Required
- Post Card
You can choose all Special Instructions that apply to the Bill Group. The chosen Special Instructions shows under
Special Instructionscolumn.
Setting a Bill Group to Auto-Invoicing
To set a bill group to auto-invoicing,
- Go to Operations > Client Invoice Administration. Click [Configuration] from Quick Links.
- On the Invoice Configuration page, click Bill Group Administration.
- Click on desired BG (bill group) from Bill Group column.
- Click Edit on Bill Group Administration and check Invoice
Automated. Click Save.
