Resources
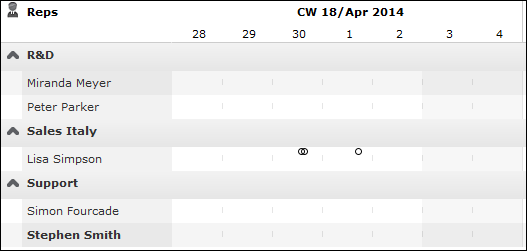
The resource view allows you to view the workload of reps.
This makes planning activities (especially internal meetings) much easier. Reps’ absences (holidays and sick leave) are also displayed here.
To open the resource view:
- Select
 (Collaboration) > Resources.
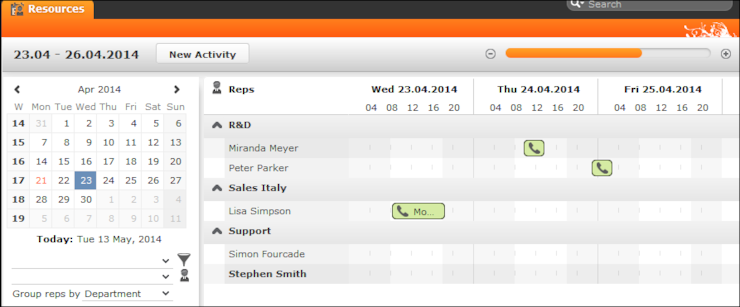
The current date and time is indicated by a vertical line. Holidays are color-coded.
You can customize the resource view,see Daily and Weekly Planning.
You can edit the displayed activities and absences and add new ones, see Editing Activities and Absences.
Customizing the Resource View
You can customize the resource view as follows:
- Display the sidebar if it is currently hidden by clicking on the arrow:

- To configure the time period that is displayed:
- Click on the desired day or start of the time period in the small calendar in the sidebar.
- Select the time period that is displayed using the slider in the header or by
clicking on the + and minus icons:

- Click on the header and drag it left or right to scroll:

- Select filters from the drop-down lists in the sidebar to determine
which reps/appointments are displayed. You can define your own filters, see Filtering Appointments.Note: At most 50 reps and 5,000 activities can be displayed. If your filters return more reps or activities, a message is displayed informing you that not all records can be displayed. Either refine your filter criteria or display a shorter time period.
- Select one or more reps displayed in the view (hold down Ctrl) and select Remove Rep from the context menu to remove the rep(s) from the view.
- You can select additional criteria used to group reps from the Group reps
by drop-down list, e.g. Department
(Org. Group ID field in the rep record),
Country or Skill or No
grouping.Note: Reps of the type "Resource" are displayed within a group at the end of the group's entries.
- Click in the Reps column in the header to sort the reps displayed in the resource view.
- Click on
 (Edit Settings):
- Select the Color Coding criteria used
to color activities. Click on
 (Legend)
to display an overview of the color-coding in the calendar.
(Legend)
to display an overview of the color-coding in the calendar. - Determine whether you wish to Show working hours only.
- Enable the Show group column option to display reps’ groups in a separate column.
- Enable the Show hidden items option to include those
appointments whose duration is less than the minimum duration for the selected
view. These appointments are only displayed for reference and cannot be edited
in the resource view.
- Select the Color Coding criteria used
to color activities. Click on
Editing Activities and Absences
You can edit the activities and absences displayed as follows:
- Use the mouse to move activities or absences to a different time.
- Drag the left or right borders of an appointment to change its duration.
- Activities are displayed with a solid frame in the row of the
organizer:
 . You can drag these activities to another rep using the mouse.Note: You cannot assign an absence to a different rep.
 - To delete an appointment, click on the appointment to select it and press Delete on your keyboard.
- Double-click on an appointment to open and edit it.
- Click on New Activity to add an activity for yourself, another rep at your company or any participants you wish.
- Use the context menu next to a rep in the list to remove a rep from the list (Remove Rep), or to add a New Activity or New Absence for the rep.
- Hold down Ctrl while clicking to select multiple reps - you can then use the context menu to select an option that is applied to all reps. You cannot however add absences for multiple reps.