eCorrespondence Module
Learn how to use the third party eCorrespondence Module.
CIS has partnered with a third-party email service provider to utilize its advanced email exchange capabilities - tracking bounce-backs, unsubscribtions and link open tracking with better support for blacklisting IP monitoring. By default, emails are sent through the existing email exchange service of CIS. The system communicates with the email vendor via a web API.
With the third-party email service integration, Suppliers can send enhanced email notifications to Customers for letters and invoices with layouts based on configurable templates.
The email transmission path can be enabled for the Supplier to take advantage of the third-party email service provider's reporting.
To configure and utilize the eCorrespondence features, you need to set up the following in the CIS:
Adding a new Email Template
To add a new email template:
- Go to Administration menu > General > Email Template Manager.
- On the Email Template Management page, click
 .
. - Enter the following details on the Email: Template Details page:
Fields Description Template Name Enter the template name. From Email Enter the from email address. Is Active Select Yes if template is active else select No. Available for Ebill Select Yes if the template is for invoice. Select No if the template is to be used for letters. Attach Invoice PDF Select Yes if PDF invoice needs to be attached else select No. Language Select English or Add other language Email Subject Enter the subject for the email. Note: If your CIS has multiple languages enabled, the Template Editor allows you to specify the Email Subject and Template Content in each of these languages. The first language tab is always for an English template and must always be filled.Template Content Enter the email body. Note: To use HTML, click on the editor.
Send Test Email, Cancel and Save buttons You can send a test email by clicking Send Test Email. Click Save to save the template and Cancel to cancel the template. Note: To include Customer specific data into the template, use the Token dropdown list on the editor. Token names are displayed enclosed in percentage signs (“%%”) in the Template Content and are replaced with the respective Customer data when the email is composed and sent out by the system.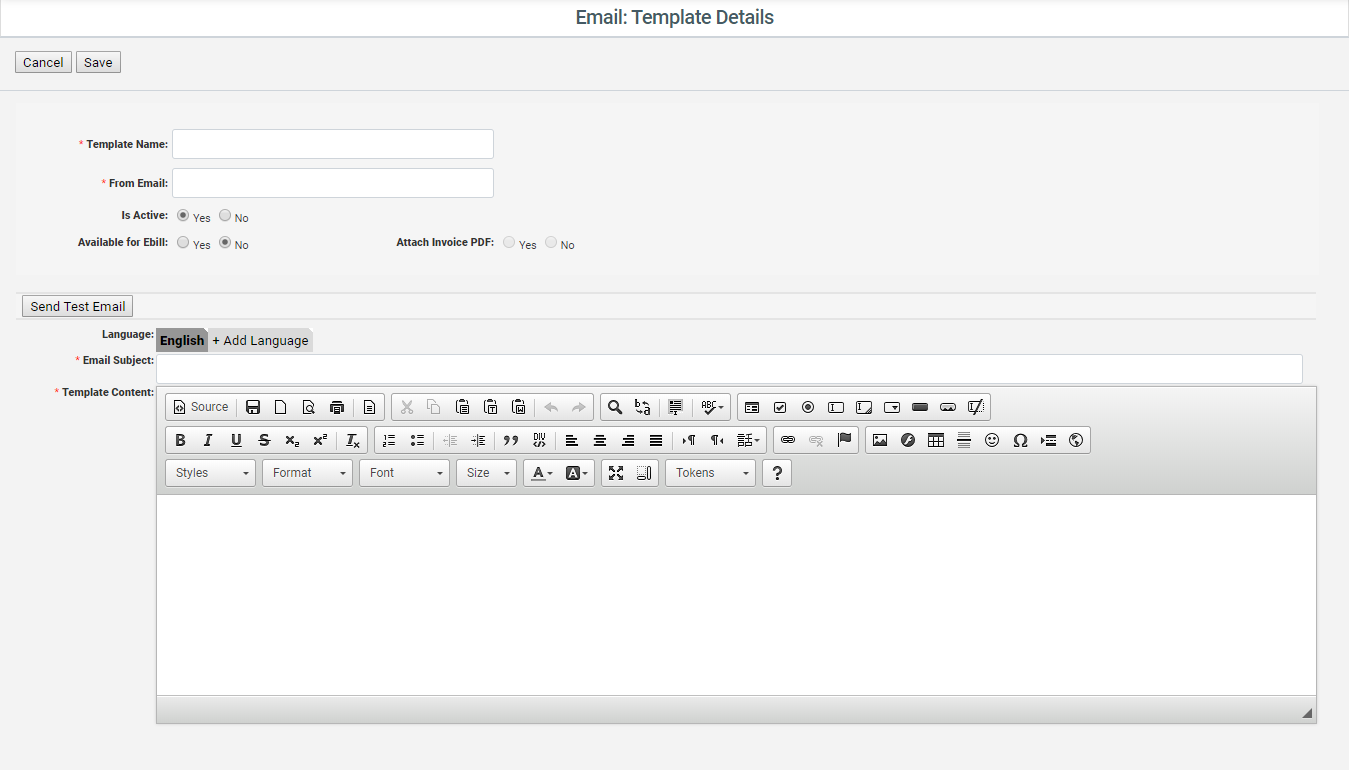
You can include a tokens in the email subject line by copying and pasting a token code (including the percent signs) from the template body into the Email Subject field.
To modify the layout or properties of an existing email click in the
respective table row of the Email Template Management page. The Edit Template
Detail page allows you to modify the parameters and contents of an existing email
template.
in the
respective table row of the Email Template Management page. The Edit Template
Detail page allows you to modify the parameters and contents of an existing email
template.Creating a Template in Multiple Languages
If your CIS instance is set up for Customers with different languages you can define separate Email Subject and Template Content fields for each of the defined languages. Customers receive emails in the language that has been defined for them in the Customer data.
To create the subject and body in a different language, click
 tab on the editor and then select the desired language from
the dropdown list.To remove a language version from a template, click the Delete button on the respective language tab.Note: The default template English cannot be deleted.
tab on the editor and then select the desired language from
the dropdown list.To remove a language version from a template, click the Delete button on the respective language tab.Note: The default template English cannot be deleted.
Defining Rules for E-bill
- Go to Administration Menu > EBill Email Template Administration. This page displays all the existing rules for email template for e-bills.
- Click Add Ebill Configuration.
- In the Add Ebill Configuration: panel, enter the Descripton for the e-bill configuration and choose the desired Ebill Email Template.
- Set Rules using Customer Parameter, Operator and Parameter
Value fields. You can also add multiple Rules using Add And and Add
OR operators.Note: You can also prioritize multiple EBill configuration rules using
 or
or  in
the Actions column on the EBill Email Templates: table. The Default
invoice email map is always set to the lowest priority and cannot be promoted
higher.Note: If you are using the IN or NOT IN operator for the Bill Group parameter, you can enter multiple bill group numbers as a comma separated list.Note: If you delete a rule that has related rules, the related rules are also deleted.
in
the Actions column on the EBill Email Templates: table. The Default
invoice email map is always set to the lowest priority and cannot be promoted
higher.Note: If you are using the IN or NOT IN operator for the Bill Group parameter, you can enter multiple bill group numbers as a comma separated list.Note: If you delete a rule that has related rules, the related rules are also deleted.
Setting Customer Correspondence Preferences
You can set a Customer to receive letters and invoices via printed letter or email. By default, all letters and invoices are being sent to Customers in printed format via postal service. Suppliers can define Customers’ preferences to have letters and/or invoices to be sent via e-mail.
- Go to the Customer Summary Screen and click next to
the Invoice Delivery Type field in the Billing Information section.
- On the Correspondence Preferences window, click
 .
. - Select Email or Print corresponding to the invoice and letters.
- Click Save.Note: Correspondence Preferences for invoices can only be set for Customers with Supplier Consolidated or Dual billing types. This setting does not apply for Bill Ready and Rate Ready Customers. For more information on billing types, see Supported Billing Models.
Setting up password protection for invoice attached on email
Invoices that are sent to Customers via email attachments can optionally be protected by a password. When enabled, the Customer needs to enter the password to view the attached file .
To set this protection for a Customer’s invoice email attachments, select the desired Password Type and Password Custom Value on the Correspondence Preferences window.
Note: If you select the Password Type as Custom, you must enter the desired password in the Password Custom Value field.