Masks
There are two view modes in Aurea.CRM win: mask and list.
The mask is Aurea.CRM win's central viewing and input medium. It corresponds to a printed form on which data are entered.
Click  (Mask) in the command bar. This switches the view from list view
to mask view.
(Mask) in the command bar. This switches the view from list view
to mask view.
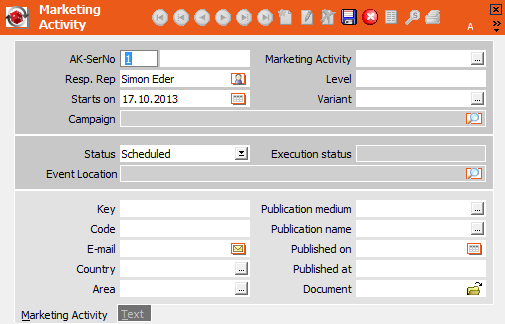
The following mask options are available in the View menu:
- Standard Mask: The last standard mask used is loaded, see Standard Masks.
- Custom Mask: The last custom mask used is loaded, see Custom Masks.
- All Mask Fields: Displays all fields of a level, see All Mask Fields.
- Load Mask: Accesses masks that your administrator has defined, see Saving, Loading and Deleting Formats.
- Original Mask: Loads the original mask. If the original mask is already selected, this option is disabled.
- Load Summary Index Card: Loads a summary index card defined by your administrator.
- Load Original Summary Index Card: Loads the original summary index card. If the original summary index card is already selected, this option is disabled.
Masks can be customized, see Custom Masks and User Interface in the Aurea.CRM win Administrator Guide.
The selected view options are saved for each module in the user directory (e.g. in pro1.cfg for the main module of Aurea.CRM win). These settings are reloaded next time you start Aurea.CRM win and take precedence over the settings in the loaded desktop or dashboard.
Summary Index Card
In a dependent info area, data from the parent record is displayed to the left in the summary index card.
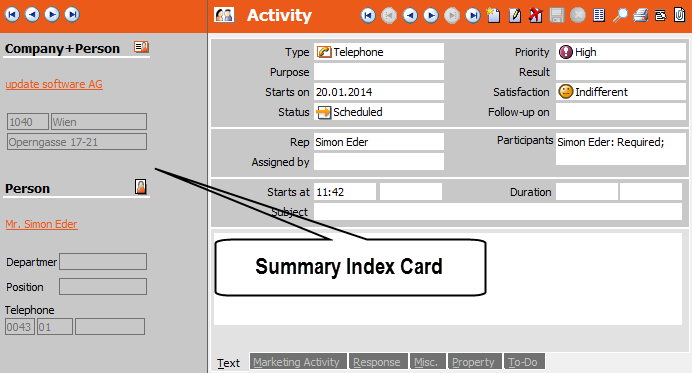
Use the arrows at the top of the summary index card to navigate between both parent records (companies and persons in the example above) and child records (activities in the example).
To switch to the parent record, click on a link in the summary index card.
Standard Masks
By default, the standard mask is opened:
- either the original mask (defined by Aurea; cannot be edited or deleted)
- or a mask designed by your administrator in the Mask Generator, see Mask Generator in the Aurea.CRM win Administrator Guide
The Standard Mask option in the View menu is enabled.
Custom Masks
You can define custom masks specially adapted to your specific requirements. To define a custom mask for an info area:
- Switch to the info area.
- Select View > Custom Mask from the menu. The custom mask is displayed.
- Select View > Load Mask Fields.
The Field Selection is displayed:
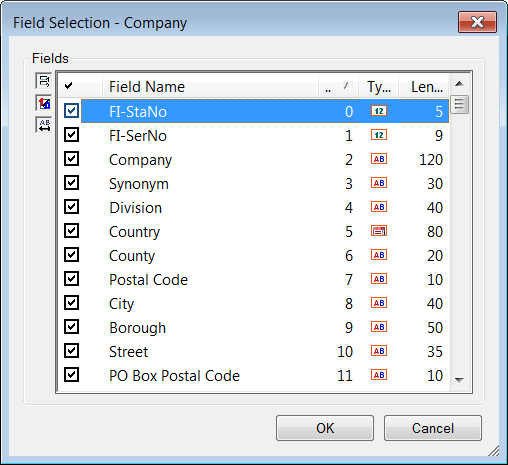
- To add or remove a field, enable or disable the corresponding check box.
- Click OK.
- Select View > Save Custom Mask from the menu.
- Enter a name for the mask and click OK.
To load a custom mask:
- Select View > Load Custom Mask from the menu.
- Select the desired mask.
- Click OK.
Masks can also be deleted, sent to other users or access can be denied to other users, see Saving, Loading and Deleting Formats.
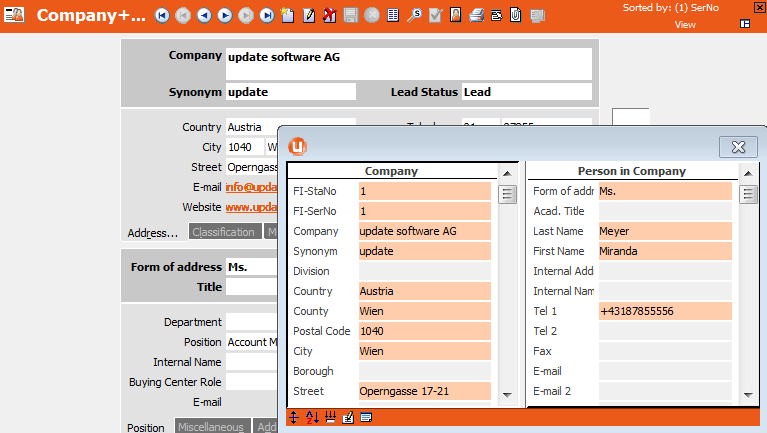
All Mask Fields
Select View > All Mask Fields from the menu. A window opens containing all the level's fields.
Customizing the Display
These commands are available from a row of buttons when displaying the custom mask and all mask fields.
|
|
Arrange horizontally/vertically (in levels containing more than one info area, e. g. Company+Person). |
|
|
Sort fields alphabetically/by number. |
|
|
Load all fields, see System Fields. |
|
|
Show last change / Show field contents. |
|
|
Show fields with content only / Show all fields. |


Drag the left field border to the right, if the field name is truncated:

To display the info area abbreviations, field numbers and field types:
Double-click on the header with the right-mouse button. Double-click on the header again to stop displaying this information.