Timelines
Timelines allow you to display customer-related information, such as activities, offers and the like in an overview, providing you with information on your company's schedule.
The selected records are displayed along a time axis as "bubbles". You can configure the overview to display different types of records using different colors, icons and text.
Defining a Timeline
To define a timeline:
- Select Extras > Define Timeline from the menu.
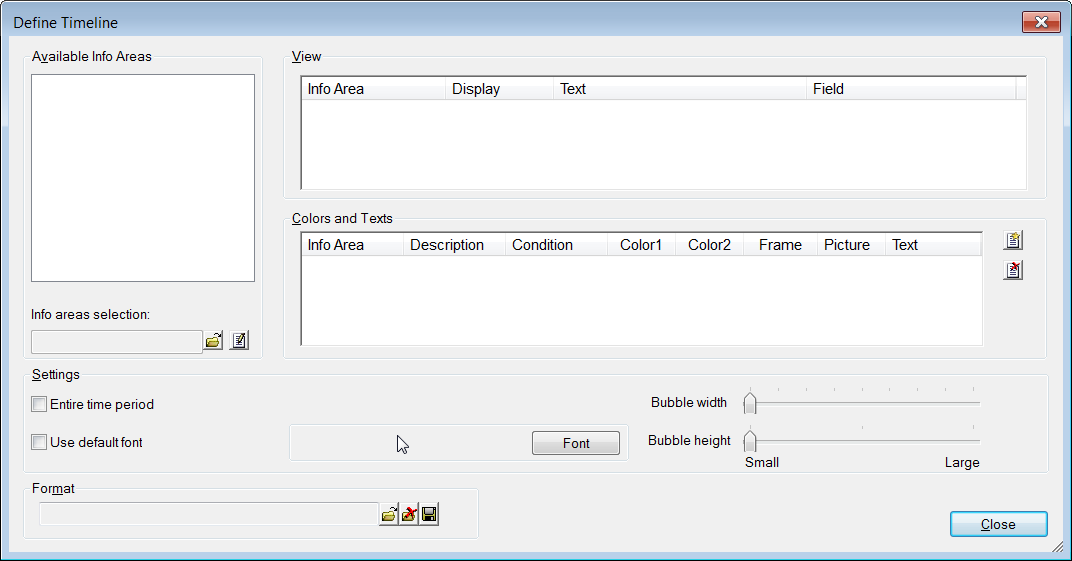
- Use the
 (Load) button under Format to select a
transfer format containing the info areas you wish to include in the timeline, see Transfer Fields.
(Load) button under Format to select a
transfer format containing the info areas you wish to include in the timeline, see Transfer Fields.If you wish to display all the activities for a person or company, for example, select the Activity info area.
Note: The transfer fields format must NOT contain the parent info area (Person or Company in the example above. You can only display info areas in the timeline that are directly related to one another in Aurea.CRM's hierarchy.Use
The info areas available in the format are listed under View. (Edit) to edit the format. It suffices to select the info areas
you wish to be included in the timeline.
(Edit) to edit the format. It suffices to select the info areas
you wish to be included in the timeline. - Use the list under View to configure the following:
- Display: This check box is enabled by default for all info areas. If you wish to prevent data from an info area being displayed, disable this check box.
-
Text: Click on
 to determine the text displayed in the
bubble, see Defining a Reference. If you do not enter any text, the default reference is used.
to determine the text displayed in the
bubble, see Defining a Reference. If you do not enter any text, the default reference is used. -
Field: The name of a default date field in the selected info
area is displayed here. This is the date that corresponds to the position of the
bubble in the timeline. If you wish to use a different date field, click on
 and choose the
field.
and choose the
field.
- Configure the colors used in the overview:
- Select an info area in under View.
- Click on
 (New) in the Colors and
Texts pane.
(New) in the Colors and
Texts pane. - Enter a description for the color settings.
- Define the conditions used to determine the records displayed in this color, see Conditions.
- Select a color for the bubbles.
- If you wish to display the buttons with gradients, select a second color different from the first color.
- Select a color for the Frame.
- Select an icon that is displayed in the bubble.
- Enter a text for the bubble. The text you defined in the View list is overwritten by this text.
You could determine that different activity types (visits, telephone calls etc.) are displayed in different colors. Define a new condition for each type of visit and select the desired color.
Define specific conditions before defining general condition, to ensure that the color defined for visits takes precedence over the general color defined for activities. The color from the first condition in the list that applied to a record is used.
Any settings you do not determine are set to the default values. You can change the settings at any time by clicking on the icons in the entries in the list:

- If you wish to define a new font, click Font and select a font.
- If you wish to use the default font settings, activate the Use default font check box.
- Use the Bubble width slider to determine how much space the bubble occupies on the screen.
- Use the Bubble height slider to determine the height of the bubble.
- Save the format.
- Click on Close.
Defining a Reference
The options in the Define Reference dialog box are used to determine the text displayed in the bubbles.
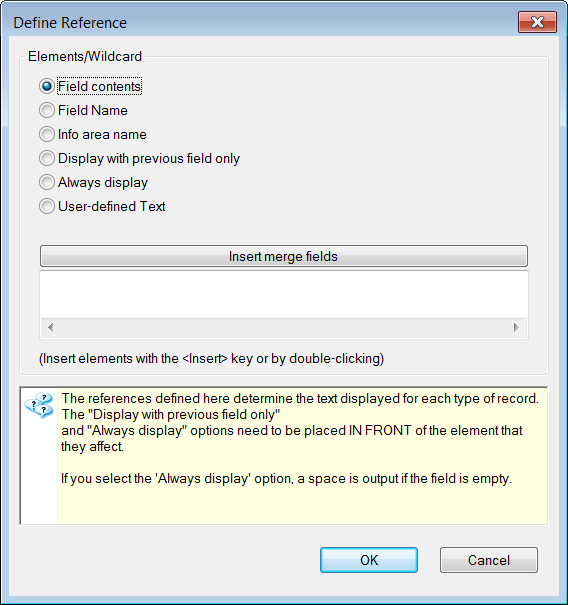
You can add the following elements by selecting the element and clicking on Insert merge fields:
- Field contents: The Field Selection dialog box opens. Enable the check box next to the field you wish to add. The contents of this field are then displayed in the timeline.
- Field Name: The Field Selection dialog box opens. Enable the check box next to the field you wish to add. The name of this field is then displayed in the timeline.
- Info area name: A dialog box is displayed containing all the info areas in Aurea.CRM. Click on the desired info area. The name of the info area is then displayed in the timeline.
- Display with previous field only: An element is added indicating that the following element is only displayed if the previous element is not empty.
- Always display: An element is added indicating that the following element is always displayed. If the field is empty, a space is output.
- User-defined Text: You can enter text in all the languages available on your installation.
You can add as many elements as you wish of different types; e.g. field contents and free text.
Displaying a Timeline
- Switch to the record you wish to use as the starting point for the time axis.
- Select File > Timeline.
- Click on
(Load)and select a timeline format.
- Click on OK. The timeline is displayed.
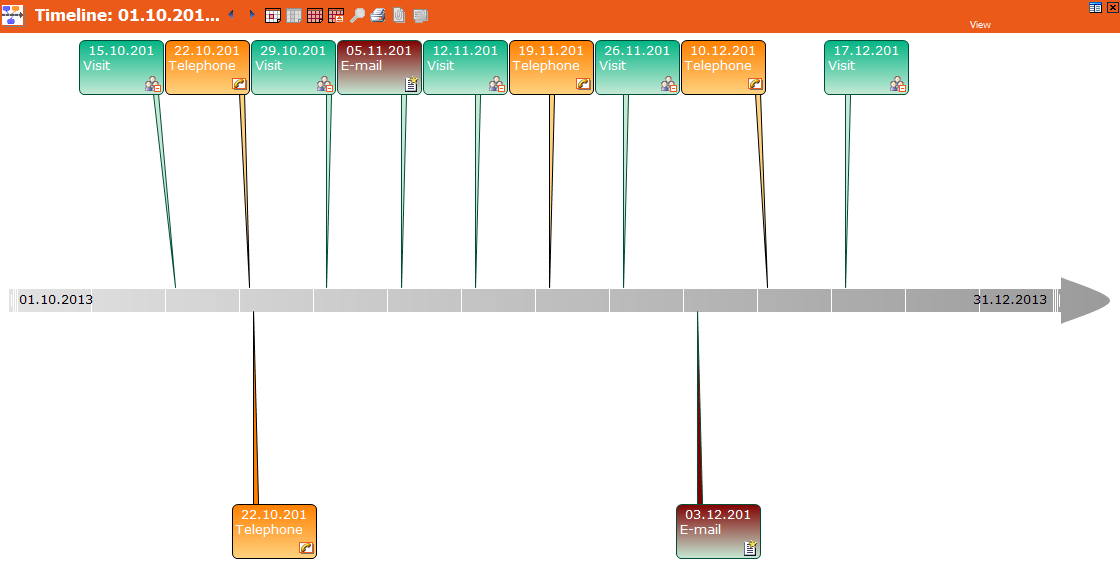
The timeline is displayed in the center of the screen and is divided into time units (1 unit represents a week in the monthly and quarterly views; 1 unit represents a month in the yearly view).
All the records that fall in the specified time period are displayed in bubbles above and below the axis. With large numbers of records, multiple records may be represented by a single bubble.
The following options are available:
- Forward: Moves forward one time unit.
- Back: Moves backward by one time unit.
- Month: Displays the monthly view.
- Quarter: Displays the quarterly view.
- Year: Displays the yearly view.
- Entire time period: Displays all records.
- Print: Prints the timeline.
Double-click on a bubble to open the corresponding record.
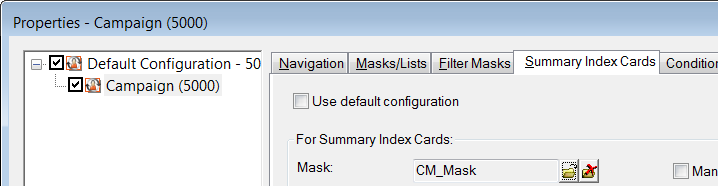
- Open the parent (and independent) info area in the integrated view.
- Create a mask for the summary index card (Extras > Edit Summary Index Card).
- Select Extras > Define Desktop from the menu.
- Select the parent level.
- Click on Level Properties.
- Select the summary index card from the Summary Index Cards tab.