Adding Elements
Learn how to add elements.
To add an element:
- Use the Elements menu (Field, Tab, Button, Text, Icon
and List options).
Or click on one of the following buttons in the Mask Elements toolbar:
 New field, see Adding Fields
 New tab
 New button, drop-down list or
list field
New button, drop-down list or
list field New textNote: Text elements are not suited to tab groups. Use text fields to define different text elements for different tabs in a tab group, see Adding Fields.
 New icon
 New list, see Defining a New List.Note: You can only define one list per mask.
 - Click on the desired position in the mask.
- Enter the desired element properties, see Element Properties.
- Click on OK.
Adding Fields
To add a new field:
- Click on (Field).
The Field Selection window is displayed:

- Select the field type:
- Info area field: Select this radio button to include a database field. Select the info area from the Info area drop-down list and the field from the Fields list.
Note: If you are adding a field to the search or match-up masks for companies, persons or properties, two entries are available for each info area in the Info area list. Select the entry ending with (Mask). Otherwise, the fields in the mask cannot be edited.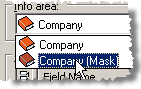
- Text field: Use this option to add static text to a tab.
- Click on OK.
- Click on the desired position in the mask.
The Field Properties window is displayed, see Field Properties.
Note: Users can only add those fields that they are allowed to access according to their
access rights, see Defining Rights at the Field Level in
the CRM.core Administrator Guide.The same field can be added to a
mask several times.