Filters
You can use filters to store commonly used search criteria, and load them to further narrow down your search.
For example, you could define a condition specifying that all persons at a certain address should be displayed.
Conditions can be defined for all search areas in Aurea CRM web.
If a filter is active, the name is displayed in the search mask.
Selecting Filters
If filters have been defined, you can select a filter to restrict the results of a search.
To select a filter:
- The available filters can be accessed from the drop-down field below the search fields.
Select the desired filter from the drop-down list.

- Click on
 (Add) to add the filter to the search criteria. The filter is
applied when searching.
(Add) to add the filter to the search criteria. The filter is
applied when searching.
Defining Filters
To define a filter:
- Click on Add more or click on
 next to
the field and select More Filters from the list. The
Filter dialog is displayed.
next to
the field and select More Filters from the list. The
Filter dialog is displayed. 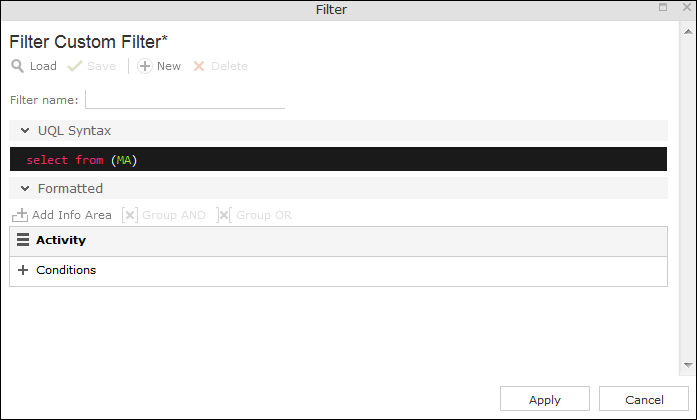
- Click on
 (New) to define a new filter. Click on
Load to load an existing filter. You can define filters in two
ways:
(New) to define a new filter. Click on
Load to load an existing filter. You can define filters in two
ways: - As AQL (Aurea Query Language) in the AQL Syntax field. For more information on the AQL syntax. For further details, see Aurea CRM web Administrator Guide.
- Using the graphical user interface to select fields and enter filter criteria. This method is described in this manual.
- Select Add Condition from the info area or condition’s context
menu to define a condition. The Select Fields in Info Area: <Info
Area> dialog is displayed. All available fields in the info area are
listed.
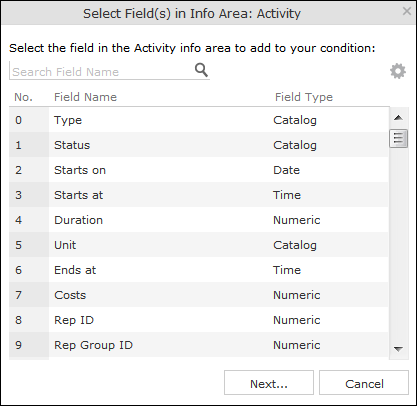
- Click on a column heading to sort the list by the entries in that column.
- Click on
 (Show/Hide Columns) to determine which columns are displayed in
the list.
(Show/Hide Columns) to determine which columns are displayed in
the list. - You can search for a specific field by entering a portion of its name in the
Search Field Name field.
- Enter one or two letters to list all fields whose name begins with those letters.
- Enter three or more letters to list all fields whose name contains the text you have entered.
You can also search for fields by field number.
- Select a field and click on Next.
- Define the condition. The conditions you can define depend on the Field
Type (as for queries).
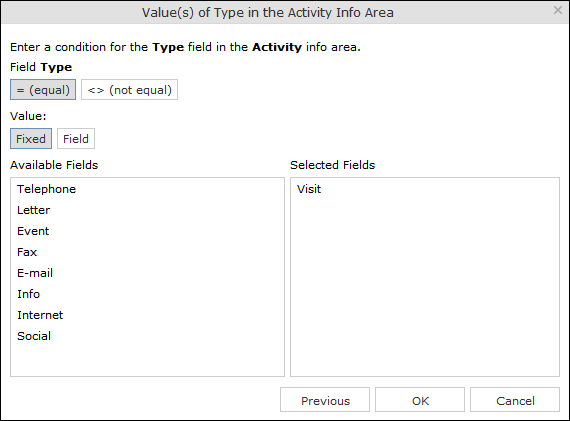
- Text fields, see Conditions for Numeric, Alphanumeric and Time Fields
- Date fields, see Conditions for Date Fields and Variable Conditions
- Catalog fields, see Conditions for Catalogs and Conditions for Child Catalogs
- Numeric fields, see Conditions for Numeric, Alphanumeric and Time Fields
- Boolean fields, see Conditions for Boolean Fields
- Time fields, see Conditions for Numeric, Alphanumeric and Time Fields
- Rep fields, see Conditions for Rep Fields and Variable Conditions
- Click on OK. The filter you have defined is displayed.
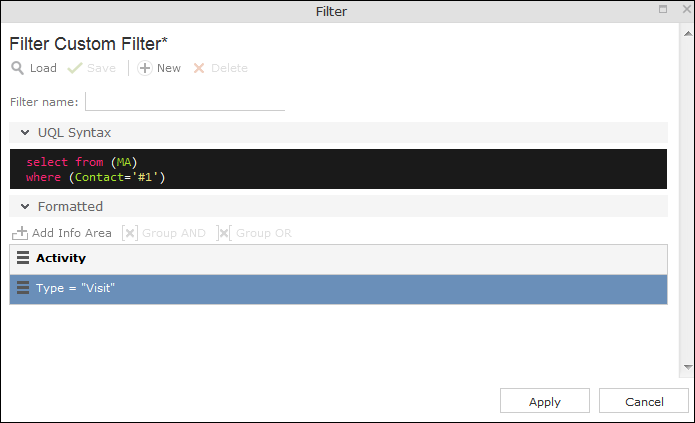
- Define any additional conditions:.
- Click on
 next to an existing condition and select Add
Condition from the context menu.
next to an existing condition and select Add
Condition from the context menu. - The new condition is linked to the existing condition. To change the logical
operator used to link the conditions (AND/OR), click on next
to the operator and select Change to AND/OR from the context
menu.
- Click on
- You can apply the filter without saving it, however it is then not available in future
(after clicking on Reset or selecting a different filter). To save
the filter so it can be reused later, enter a name in the Filter
name field and click on Save. Note: If you have unsaved changes, an asterisk (*) is displayed after the filter’s name.
- Click on Apply. The filter is activated and the search is started automatically. All results are listed.
Adding Info Areas
Filters can contain conditions applied to more than one info area.
To add an additional info area:
- Load the desired filter, see Selecting Filters.
- Click on
 (Add Info Area).Note: All info areas linked to the current info area in the data model and that you are allowed to access are listed in the dialog. Your administrator is responsible for defining which info areas you can access.
 - Select the desired info area or enter a portion of its name in the Search Info Area Name field. Click on Select.
- A dialog is displayed. Select the type of relationship between the two info areas.
- Enable the Optional check box to link these conditions to conditions applied to other child areas with a logical OR. Records are returned if they meet all non-optional conditions and at least one optional condition.
- Click on Continue. The filter you have defined is displayed.