Single Letters
Learn how to create single letter and manage it.
Select File > Single Letter from the menu. The current record is output to a temporary control file, the template is opened in your word processor and then merged with the record to create a mail-merge letter. Afterwards the connection is terminated.
This method is useful for quickly creating single letters or e-mails addressed to the current company. You can generate single letters from other info areas as well, see Transferring Rep Data.
Creating a Single Letter
To create a single letter:
- Switch to the desired record.
- Select File > Single Letter.
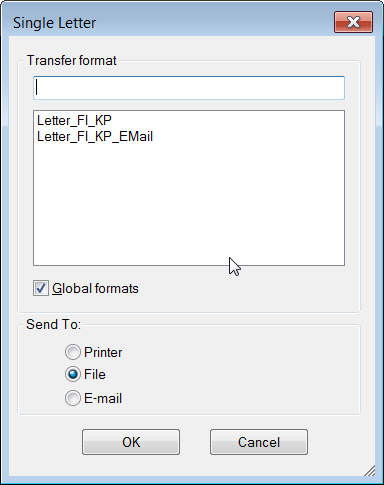
- Select a transfer format.
- Determine the output:
- Printer: The letter is sent directly to the printer.
- File: The letter is opened as a file.
-
E-mail: The letter is sent as an e-mail. (You need to
specify the client used to send e-mails in the
Configuration info area, see Configuration Info Area
(General Settings category, E-mail Client
option) in the CRM.core Administrator Guide.) If the e-mail is sent
from the Company+Person level, an activity record is
additionally added containing the contents of the e-mail.Note: You can prevent activity records from being added automatically, see Configuration Info Area (Word Processor category, Do not add activities when sending e-mails option) in the CRM.core Administrator Guide.
If the e-mail is sent as HTML, a customer document is added containing the contents of the e-mail.
- Confirm with OK.The single letter is transferred to the word processor or mail client.
- You can save single letters in Aurea.CRM's document management system, see Single Letters and Document Management.
Single Letters and Document Management
After creating a single letter, you are asked whether you wish to save the document in the Aurea.CRM database.
- Click the Yes button to save the document in the
database.
The dialog box used to save the document is displayed.
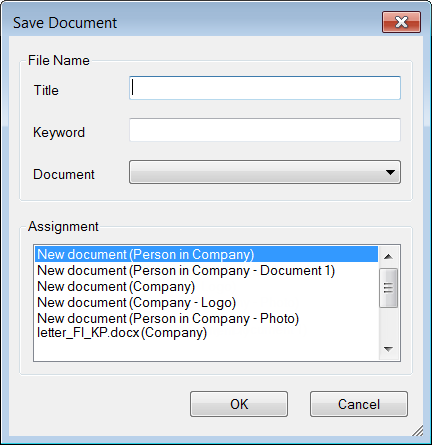
- Enter a Title and Keyword stored in the database along with the document.
- Determine where the document should be saved under
Assignment:
- New document (<Info Area>): A document link is added to the current record. The document is displayed in the Document Overview for this record, see Document Records. If a link to the Company/Person info areas is present from the current context, an additional document link is added to the company or person.
- New document (<Info Area> - <Field Name>): An entry is displayed in the list for each empty document field in the current record (in this case the Document 1 field in the Person in Company info area). Select an entry to save the document in this document field.
Note: You can prevent document fields in the Person or Company info areas from being listed using configuration entries, see Configuration Info Area (Documents category, No company fields/No person fields options) in the CRM.core Administrator Guide. - Confirm with OK.
- If you have chosen to replace an existing document under
Assignment, a message is displayed, prompting you to
confirm this.
Click on Yes to overwrite the existing document. Click on No to only replace the document in the document field; in this case, both documents are still accessible from the Customer Document info area.
A document record containing the single letter is generated. The Document Class Title and Keyword fields are transferred from the Save Document dialog box. The Format and Application fields, as well as the two key fields are filled in automatically.
Enable the Save without prompt option in the transfer format to automatically save the single letter in Aurea.CRM's document management:
- A document link is created for the record from which the letter is generated. The document is saved in displayed in the Document overview for the record, see Document Records.
- If a link to the Company/Person info areas is present from the current context, an additional document link is added to the company or person.
- If the single letter is generated from a level with several info areas, but with no link to Company/Person, a document link is added for the root info area in the transfer fields format.
- If non transfer fields format exists, the document link is added to the level's parent info area.
Note: All documents stored in the database using a document link are saved in the Document info area.You can control the automatic creation of additional document links for companies or persons in the configuration settings, see Configuration Info Area (Documents category, No document link for companies/persons options) in the CRM.core Administrator Guide.
Your administrator can prevent you from adding document links by denying access to the Document Link info area (D3), see Rights in the CRM.core Administrator Guide.