Field Types
Learn about the Field Type user interface.
Your administrator can define the following for fields:
- Keyboard shortcuts used to navigate directly to a specific field.
- The field formatting, which can differ depending on the field's content, e.g. negative numbers can be displayed in red.
- Whether catalog and percentage fields are displayed graphically or numerically, see Displaying Percentage and Catalog Fields Graphically.
The following topics describe the field types that are used to enter data:
Text Fields
You can enter strings containing any characters in text fields.
Your administrator can define that text fields are displayed spanning multiple rows. If
the text is longer than the space available to the field, a scroll bar is displayed.
Your administrator can also determine that the  button is displayed. Click on this button
to increase the size of the text field to display the full contents.
button is displayed. Click on this button
to increase the size of the text field to display the full contents.
Numeric Fields
You can only enter digits (0-9), commas (,) and decimal points (.) in numeric fields.
Catalog Fields (Drop-down Lists)
Catalogs are displayed as drop-down lists.
Your administrator can determine how catalogs are sorted:
- Alphabetically
- By catalog number
- Using a sort order defined by your administrator
To select an option from a drop-down list:
- Click on to open the drop-down list.
- Select the option you want to enter in the field. Alternatively you can navigate in the drop-down list by typing the first character (e.g. typing 'F' highlights the "Finland" entry). If you select a value, the drop-down list is closed.
Adding Catalog Values
To add catalog values:
- Click on the icon
 (Add/Find Catalog Values) next to
a catalog field. The Find or add catalog value dialog box is
displayed.
(Add/Find Catalog Values) next to
a catalog field. The Find or add catalog value dialog box is
displayed.
- Enter the new catalog value in the text field.
- Click on New to add the entry to the catalog. The new entry is displayed at the end of the list. The catalog is only sorted alphabetically the next time you log on to Aurea CRM web.
You can also use the dialog box to search for specific entries in long catalogs.
Multiple Catalog Values in a Field
Some catalog fields in the database are defined as so-called array fields. You can enter multiple values in these fields. Array fields contain the ghost text "Add X more", indicating the number of catalog values that can still be entered in the field.
To enter multiple catalog values:
- Click on the catalog field or the downwards arrow next to the field.
- The drop-down list is displayed.

- Select the desired entry. Depending on your access rights, you may also be able to
add new catalog values when needed. To do so, click on
(Add/Find Catalog Values).
- Repeat the process if you want to add additional entries. The number of entries you can still add is displayed in light gray.
Date Fields
You can enter the date in date fields directly or use the pop-up calendar. For further details, see Date Picker.
If you enter the date directly, you can only enter the following characters:
- Digits
- The date separator defined in your user configuration. For further details, see Date & Time Tab.
If your date format uses four digits for the year, the current year is entered automatically.
Use the Date Picker to select the desired date. For further details, see Date Picker.
The pop-up calendar is closed once a date is selected.
To disable auto-completion of the year field, contact your Aurea CRM administrator.
Time Fields
You can enter times directly in time fields. The following characters are permitted:
- Digits
- The time separator defined in your user configuration, see Date & Time Tab.
- "am" and "pm" if you are using the 12 hour format.
- Spaces
Rep Fields
Reps are selected using rep fields. You can either select a rep from a dialog box listing all reps, or enter a portion of the rep's name in the field, see Selecting Reps.
Mandatory Fields
Mandatory fields must be filled in before you can save the record. Your administrator can determine that mandatory fields are highlighted. In the default configuration, mandatory fields are displayed in orange and indicated with an asterisk or exclamation mark.
If data has not been entered in all mandatory fields when saving a record, the cursor is moved to the first mandatory field that is missing data.
In the example screenshot above, a currency must be entered in the Currency field before the record can be saved.
Boolean Fields
Boolean fields can only store Boolean values (i.e. false/true or 0/1 or check mark/no check mark).
Link Fields
Link fields are fields linked to records in other info areas.
Link fields are displayed as links in view mode. In edit mode, the  (Select) icon is displayed to the right of the field:

Click on to
access the search mask for the linked info area and search for and select the desired
record.
Your administrator can determine that
- selecting a child record (such as a person) causes any related parent data (such as
the person's company) to be entered.
Example: If a person is entered in the End Customer Person in the Ticket info area, the End Customer Company can be entered automatically.
- a link can be removed by clicking on
 (Remove
Link).
(Remove
Link).
Displaying Percentage and Catalog Fields Graphically
You can display the contents of percentage and catalog fields (e.g. "High", "Medium" and "Low" priority) graphically, as well as enter values using the graphical display.
Catalog Field Examples:
Your administrator can also determine which colors or icons are used for which values and whether only the icon, the value, or both are displayed.
or
or
- Click on the desired icon to enter a new value.
- Move the mouse cursor over the icon to display the value.
Percentage Field Examples:
By default, a slider is used to enter percentage values, however your administrator can deactivate the slider. Your administrator can also determine whether you can enter negative values using the slider. Positive and negative values are differentiated by color.
Default slider:

Slider for positive and negative values:


To enter a percentage value:
- Enter a value in the numeric field.
- Use the mouse to drag the colored bar to the desired position.
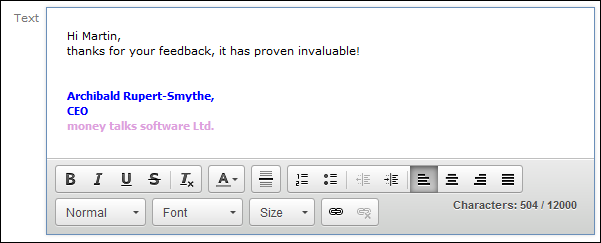
HTML Fields
HTML fields allow you to enter and format content using an HTML editor. Your administrator can add HTML fields to info areas.
The most common formatting options, e.g. bold, italics, numbered lists etc. are available.
When sending e-mails the text is sent as HTML.
Example:
Field Data Types
In some dialog boxes, the field type is also displayed along with the field name and number.
The following data types are available:
- B = Boolean
- C = Character string
- D = Date
- F = Floating point number
- K = Variable catalog
- L = Long integer
- S = Short integer
- T = Time
- X = Fixed catalog
- Z = Write-protected/decoded fields whose values are entered automatically by the business logic, e.g. system and link fields.
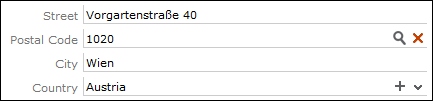
Displaying Content from Multiple Fields in a Single Field
In some views, such as the tab view or the mini details view, your administrator can combine multiple fields' contents in a single field. For example, an address field can be defined that contains the contents of the Street, Postal Code, City and Country fields:
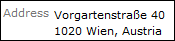
The fields are displayed separately in edit mode: