Importing Data
Learn to import data.
You can import data, e.g. from an CSV file.
To import data:
- Select Settings (
 ) > Maintenance > Import. The Import dialog opens.Note: Your administrator can also define buttons available in info areas that can be used to import data into just that info area.
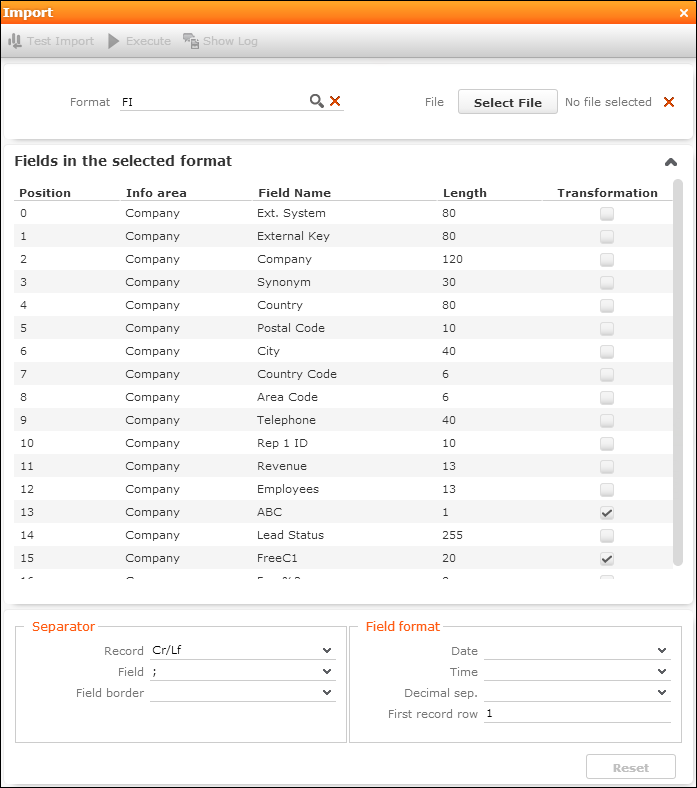
- Select the desired import format from the Format field. The
fields defined in the import format are displayed and provide you with information on
how the import file needs to be structured. The Transformation
field indicates whether data in a selected field is transformed during the import
process.Note: Formats are defined by your administrator.
- Click on Browse to select the file to import. Click on
 (Remove File) to clear the selected file.
 - Define the separators used in the import file under Separators.
- Record: The separator between records in the file. A record separator must be specified when using formats with variable field lengths; this is optional when using fixed field lengths.
- Field : The separator between fields in a record.
- Field border : The field border before and after a field (e.g. an apostrophe in DBase files).
The following options are available: " (quotes), , (comma), ; (semicolon), Blank (space); Cr (carriage return), Lf (line feed), Cr/Lf, Tab.
- Define the formats used in the import file under Field format:
- Date : The format used by date fields. Default value: DD/MM/YYYY (day/month/year).
- Time : The format used by time fields. Default value: HH:MM (hours:minutes).
- Decimal sep. : The character used to separate decimal places. If no character is selected, decimal values are not imported correctly.
- First record row: The row in the file containing the first record to be imported.
- Click on Test Import.
- A preview of the import of the first 50 records based on your current settings is
displayed. The File values column displays the values in the
import file; the Imported values column displays the values as
they are imported into Aurea CRM web.
You can navigate through the individual records to verify that the import settings are correct. Data that cannot be imported is displayed in red.
You can display a tool-tip containing the entire contents of a field if the field contents are too long to be displayed completely.
- Click on Execute to import the data into the database.Note: The import cannot be undone.
Viewing the Import Log File
Whenever you import data, all changes are written to a log file.
To view this log file:
- Click on
 (Show Log) after
importing the data. The log record is displayed. Note: You can also access the logs from the Communication Log option in the administration menu.
(Show Log) after
importing the data. The log record is displayed. Note: You can also access the logs from the Communication Log option in the administration menu. - Select Create Report from the menu. The contents of the log file is displayed in a new browser tab.
Import Results
If errors occur during an import, import results records are added.
These errors are displayed under Import Results in the Related Data area and contain the row number and corresponding error message.
Select Open Affected Record from the context menu to switch to the import result record.