Incident Management – FSI
Learn how to generate and manage incidents to keep in touch with your customers.
Events, such as customers’ birthdays, a lengthy period with no contact, expiring products, focus on specific products etc. are good reasons for getting in contact with customers.
Incidents in suite are generated by systematic, automated database queries based on freely definable criteria, see Generating Incidents.
Use incident locks to stop incidents being generated for a particular customer, see Incident Locks.
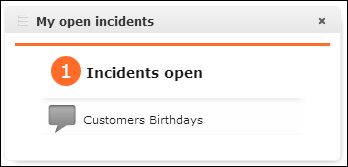
The generated incidents can then be displayed for processing, e.g. on a rep’s start page, see Editing Incidents.
Generating Incidents
You can define incidents if you have administrator rights. Here you define the criteria that is used to determine which customers should be contacted and how, and enter data such as the time period, frequency and a message for the corresponding rep.
To define an incident:
- Select
 (Collaboration) > Incident
Definitions.
 - Click on Start Search.
- Click on
 (New).
 - Enter the following data:

- Name of the incident
- Starts at: The time at which the incidents should be generated (if a large number of incidents are likely to be generated, schedule them for the night to reduce the impact on the system’s performance)
-
Repetition Frequency and Repetition
Unit: Determines the frequency with which incidents should be
generated.Note: Duplicate incidents are not generated for recurring incidents; if an incident already exists for a customer, no new incident is generated.
- Description: Description of the incident including instructions
-
Query: Select a query used to return customers for which
incidents should be generated.Note: The default version of Aurea CRM web includes a query for customers whose birthday is during the current week (TE_Incident_Birthday). You can use this query to generate incidents. You can also define additional queries, see Queries.
- Mandatory: Indicates whether the incident is mandatory.
- Expiration (d): Used to calculate the end date of the generated incidents; the incident expires after this number of days.
- Valid from, Valid until: Define the time period over which incidents are generated based on this incident definition.
- Enable the Valid check box to determine that the incident definition is currently active. Incidents are only generated if this check box is enabled.
- Save the record.
Initial incidents are generated upon saving the record. From then on, incidents are generated automatically by CRM.server in the specified interval and for the duration of the validity period.
The related person’s account manager is automatically entered in the Responsible field of the incident.
If an incident already exists for a person generated using the same query, a new incident is not added.
Your administrator can determine that incidents that are open, are not mandatory and have expired (the date in the Ends on field is in the past) are automatically set to "Missed". For more information, refer to the technical documentation.
Incident Locks
Use incident locks to stop incidents being generated for a particular customer.
To add an incident lock for a customer:
- Switch to the Incidents node in the tree view of the
company/person and click on New Incident Lock for this
Customer.

- Choose the Incident Definition that the lock should apply to.
- Enter a reason for locking the incident.

- Enter a data in the Incident lock ends on field to define a time limit for the lock.
- Save the record.
Editing Incidents
Account managers can react to incidents by contacting customers, documenting consultations, forwarding them to an expert or sending an offer.
To edit an incident:
- Open the incident.
Current incidents can be accessed:
- On the start page (for account managers)

- In the tree view of a person, company or association (Incidents node)
- By selecting
 (Collaboration) >
Incidents from the menu.

- On the start page (for account managers)
- You following options are available:
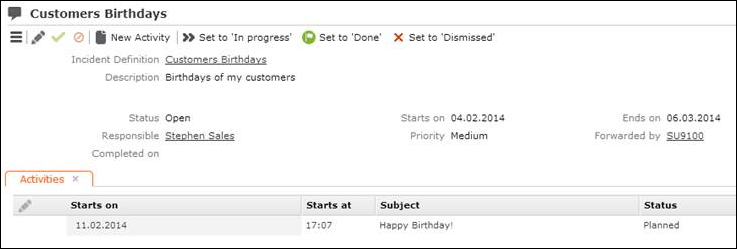
- Change the status of the incident using the Set to ‘In progress’, Set to ‘Done’ or Set to ‘Dismissed’ buttons.
- Create an activity for the incident. All activities added for the incident are displayed on the Activities tab below the record.
- Forward the incident to another rep by entering the rep in the Responsible field. You are automatically entered in the Forwarded by field.