Transferring from the Campaign Designer
To transfer a marketing activity to Lyris HQ from the campaign designer, perform the following:
- Open an existing campaign or create a new campaign. For more information, see Viewing a campaign or Creating a new campaign from scratch. The following screenshot
shows the example NewProductLaunchEvent campaign.
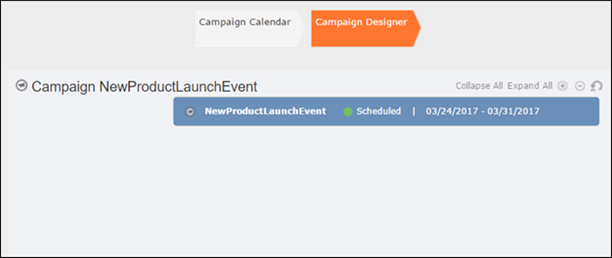
- From the campaign container context menu select New Marketing Activity. The New
Marketing Activity window displays.
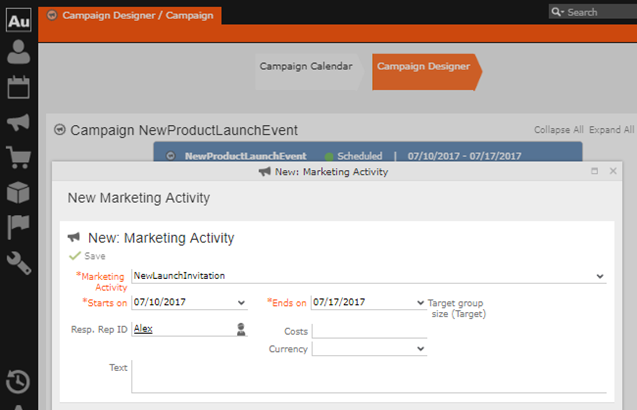
- Enter the required details. In this example we create a NewLaunchInvitation as the Marketing Activity.
- Click Save to create the new marketing activity container in the campaign
designer.
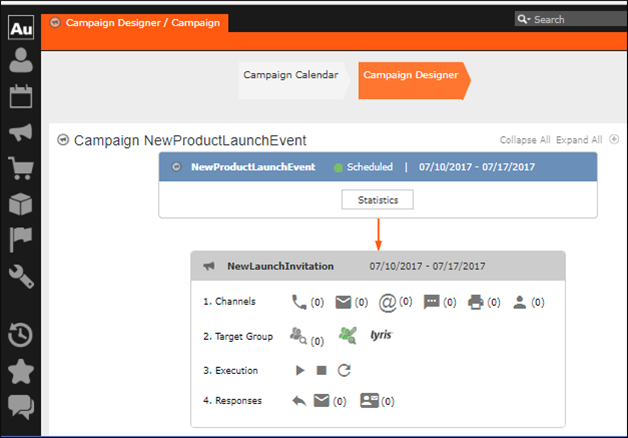
- Click (email channel). The Channel & Format Definition page displays.
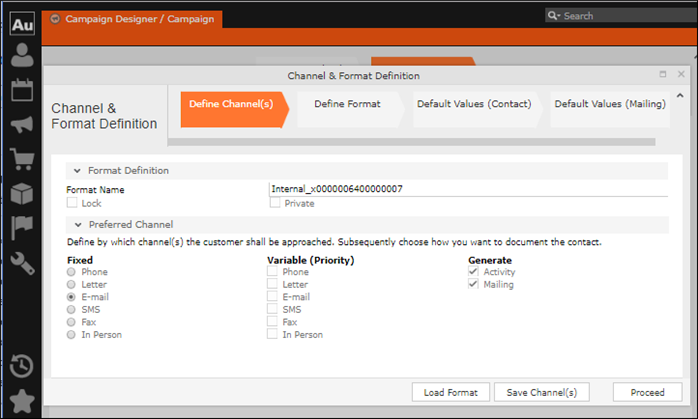
- Select the E-mail channel radio button under the Fixed column.
- Select the Activity and Mailing options under the Generate column. These are
optional.Note: If you wish to use multiple channels for the marketing activity, you can select the E-mail checkbox along with other required channels under the Variable (Priority) column.
- Click Save Channel(s).
- Click Proceed, to go to the format definition phase. The Define Format page
displays.
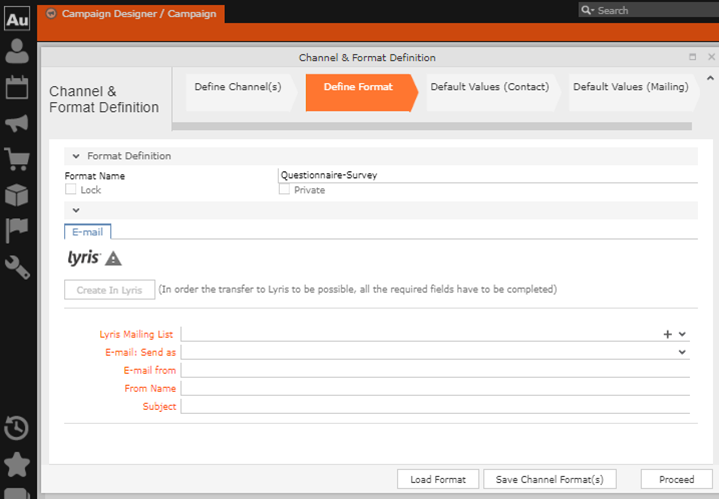
You can see that Lyris Email channel definition page is available. If Lyris is not enabled then the standard email channel definition page would be visible. Contact your CRM administrator to enable the Lyris email marketing channel.
- Populate the fields as described below. These fields are mandatory in order to transfer
the marketing activity to Lyris.Note: The Create in Lyris button is activated once all the fields are populated and the channel format is saved.
- Lyris Mailing List:Click to get a drop-down list of mailing lists in
Lyris. Select the required mailing list. You can also create a new mailing list.
To create a new mailing list, perform the following:
- Click +. The Create new mailing list in Lyris dialog displays.
A default name (CRM-NewProductLaunchEvent - NewLaunchInvitation) is provided which is a concatenation of three names: default mailing list prefix configured in the CRM Designer (CRM-) + the campaign name (NewProductLaunchEvent) + the marketing activity name (NewLaunchInvitation).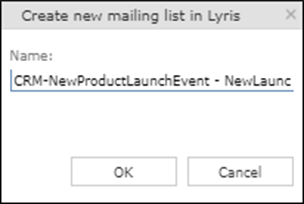
In case the marketing activity does not belong to a campaign then the prefix and the activity name is used. For this example, CRM-NewLaunchInvitation.
You can rename it to a desired name. In this example, we change the name to CRM- NewLaunchInvitation. - Click OK. A new blank mailing list is created in Lyris.
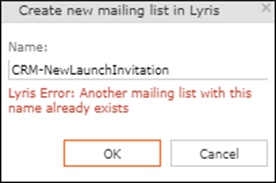
If for some reason the mailing list could not be created in Lyris then the dialog displays the appropriate error message. For example, the following screenshot shows the error message that a mailing with the same name already exists.
- Click +. The Create new mailing list in Lyris dialog displays.
- E-mail: Send as: Select the desired format of the email you wish to send: HTML or Text
- E-mail From: Enter the email address of the marketing email sender.
- From Name: Enter the name of the sender.
- Subject: Enter the subject for the email.
Note: The above fields are used as properties of the email messages that arecreated in Lyris. - Lyris Mailing List:Click to get a drop-down list of mailing lists in
Lyris. Select the required mailing list. You can also create a new mailing list.
To create a new mailing list, perform the following:
- Click Save Channel Format(s). After the channel format is saved, the Create in Lyris button gets activated.
- Click Create in Lyris.
A dummy message is created in Lyris for the marketing activity. Depending on your selection for the E-mail Send as field the dummy message is a text or HTML message. A tick appears besides the lyris icon on successful creation of the message. And a Detach message button displays. The ids for the mailing list and message created in Lyris are displayed along with the links to the instances in Lyris. See the screenshot below.
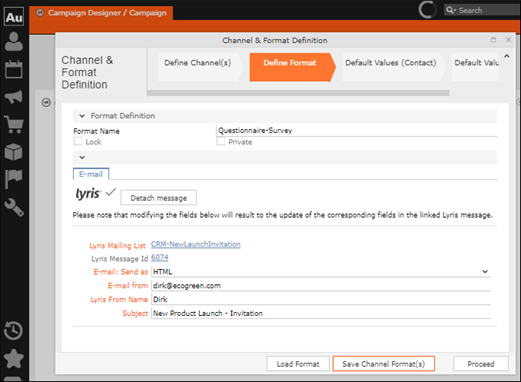
Click Detach Message to delete the message created in Lyris. Once the message is detached, all the attributes of the message are cleared, including the links in the Lyris Message ID and Lyris Mailing List fields. The corresponding message created in Lyris is also deleted. If the message is already sent then any responses received for the message are ignored by Lyris and Aurea CRM does not get any event corresponding to the message.
- Click Save Channel Format(s).
- Click Proceed.