Configuring a Menu
Learn to configure a Menu.
To configure a menu:
- Select a menu or create a new one. For further details, see Designing Configuration Units.
- Specify the following:
-
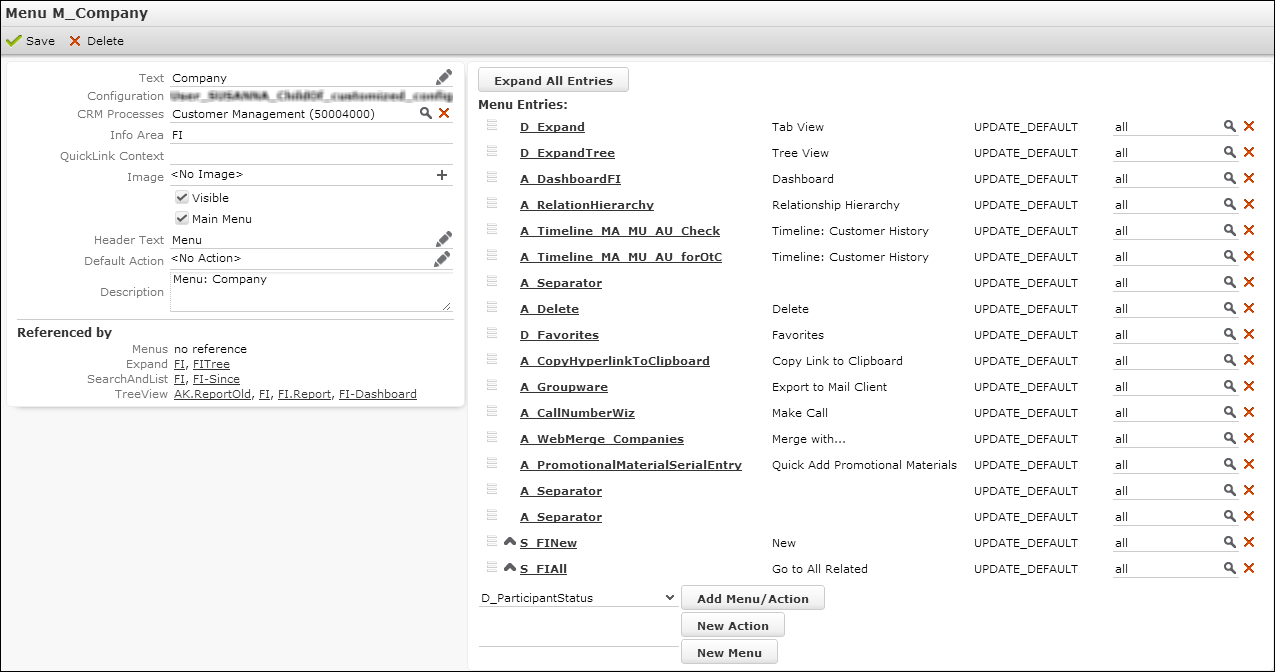
Text: The menu's label. The text is (also) visible for
sub-menus and when a menu is called from a list row (search results, query
results).

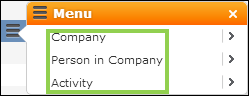 Note: Without Text the menu is not displayed.
 - CRM Processes: Assign one or more CRM processes to the menu. For further details, see Roles & CRM Processes.
- Info Area: Use this option to hide the menu depending on the current user's access rights (defined in the Aurea CRM win Rights module). Enter one or more info area IDs (separated by semicolon): If the current user has no access rights for the specified info area (Deny Access), the menu is hidden.
- QuickLink-Context: only used for menu actions
- Image: An optional image displayed left of the menu's label. The image must be registered in CRM.Designer. For further details, see Images.
-
Visible: Shows or hides the menu in a parent menu.Note: Even with Visible unchecked, the menu is still displayed where it is directly referenced by Aurea CRM.Web. Therefore, it is not recommended to set application root menus or main context menus to invisible.
- Main Menu: Only used in CRM.Designer. Checked for parent menus, unchecked for sub-menus.
- Header Text: The caption of a context menu, only visible for root menus, but not for sub-menus.
- Default Action: only used for menu actions
- Description: Add an internal description (only visible in CRM.Designer).
The right part of the page lists all sub-menus and menu actions currently configured for the menu.
-
Text: The menu's label. The text is (also) visible for
sub-menus and when a menu is called from a list row (search results, query
results).
- Select a menu or menu action in the list below and click Add
Menu/Action to add an existing menu or menu action.
To reorder the menu items, click
 (Drag&Drop) in the respective row and drag the item to
the desired position.
(Drag&Drop) in the respective row and drag the item to
the desired position.Use
A_Separatorto insert a separator line between menu items. - Enter a name and click New Action or New
Menu to create a new sub-menu or menu action. For further details,
see Menu Actions.Note: While the new menu or action is immediately created, you must click the Save button before editing the new menu or action. Otherwise the reference to the new menu can be lost.
- Click Save.