Transferring from the Campaign designer
To transfer a target group for a marketing activity to CRM designer:
- Open the marketing activity in the campaign designer.
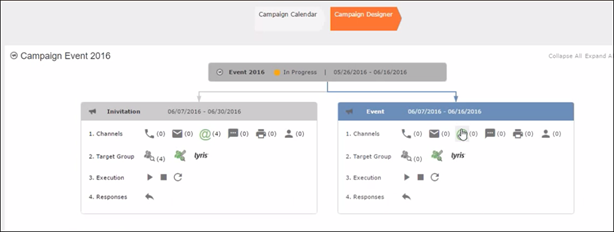
- Click in the Target Group row. The Transfer Target Group to Lyris page
displays.
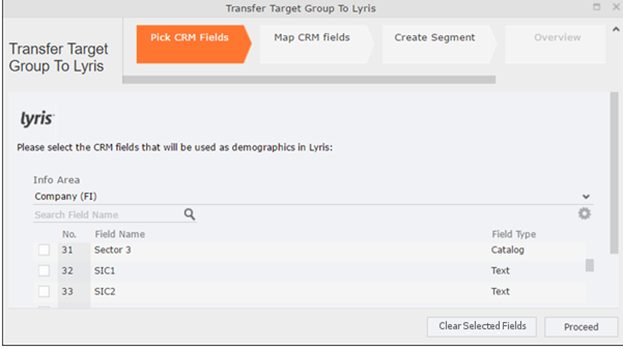
- Click the Pick CRM Fields tab. To select the required CRM fields to be included as
attributes for the contacts in the target group, perform the following:
- Select the required Infoarea from the Info Area dropdown list.
- Click the check box to select the required field from each infoarea. You can search for specific fields by typing the field name in the Search Field Name filter. You can sort the displayed fields by name or type by clicking the respective field headers: Field Name or Field Type.
- Repeat the above steps to select the required fields from different infoareas.
- The SeqNo, and StatNo fields.
- The fields for which the user does not have view rights.
- The fields containing email addresses. They are automatically transferred.
- Click Proceed. The Map CRM fields tab gets activated and the following message
displays: Please wait until the mappings between CRM fields and Lyris demographic
mappings are loaded...
Aurea CRM communicates with Lyris server to retrieve the corresponding Lyris demographics and displays the mapping table.
To map the CRM fields listed in the table with the retrieved Lyris demographics, perform the following:- Click in the Lyris Demographics column to display the list of demographics
retrieved from the Lyris server and select the appropriate demographic for each of
the listed CRM field. The demographics listed available are the ones that are
compatible with the CRM field based on the CRM Field type. See the screenshot
below:
If you cannot find an appropriate Lyris demographic for the CRM field, you can create a new Lyris demographic. See the next step.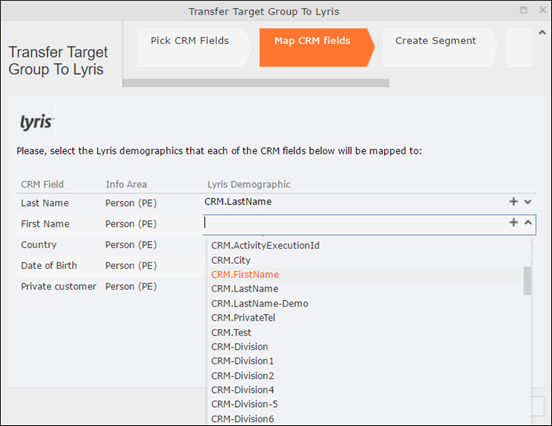
- To create a new demographic, perform the following:
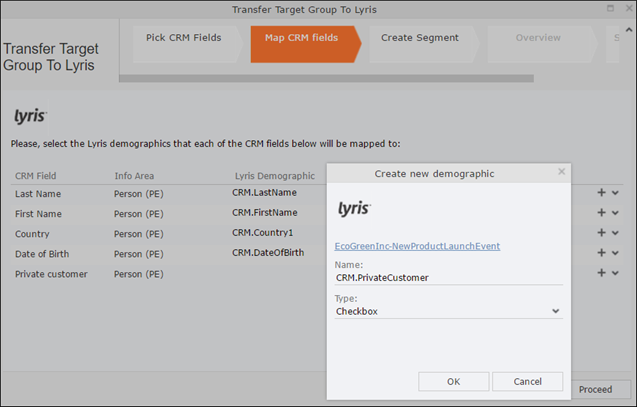
- Click +. The Create new demographic dialog displays.
- Enter a name for the demographic. A suggested name (name of the corresponding CRM field) is displayed for the demographic to be created in the Name textbox. You can also specify a name according to your preference.
- Select the type of the demographic from the Type field.
In the screenshot below a new demographic for the field private customer is created. It is named CRM.PrivateCustomer and the type selected is a Checkbox.
- Click OK. The new demographic is created in Lyris.
- To view the mapped demographic attributes in Lyris, open Attributes tab and
select the required mailing list from the List filter. The Attribute column
should show the list of mapped attributes from CRM. See the screenshot
below.

- Click in the Lyris Demographics column to display the list of demographics
retrieved from the Lyris server and select the appropriate demographic for each of
the listed CRM field. The demographics listed available are the ones that are
compatible with the CRM field based on the CRM Field type. See the screenshot
below:
- Click Proceed. The Create Segment tab displays.
- Click Create Segment. A segment for this mailing list is created in Lyris.
The name of the segment created in Lyris is displayed. Clicking the named URL opens the required Lyris segment in a new tab. The name generated is a concatenation of the name and the record id of the marketing activity.

When the segment for this target group is created in Lyris, it generates the Segment generated event. You can view the segment information in the Segment tab of the Edit/View Target group window.
- Click Proceed. The Overview tab displays.
The number of active target group entities that are eligible to be transferred to Lyris is mentioned. Note: If there are no target group entities for the email channel available to be transferred to Lyris, then a message “No target group entities are eligible to be transferred to Lyris” is displayed.You should go back and create the target group.
 - Click Proceed. The Schedule Transfer tab displays.
- Click Schedule Target Group Transfer. A tick mark appears signifying that the transfer
process is scheduled.

- To check the status of the transfer, open the Collaboration > To-Dos menu and search
for the required scheduled activity. The status of the scheduled transfer should be
visible. The following screenshot shows the status of the transfer is In
Progress.
The transfer status changes to Completed, once the target group is transferred successfully.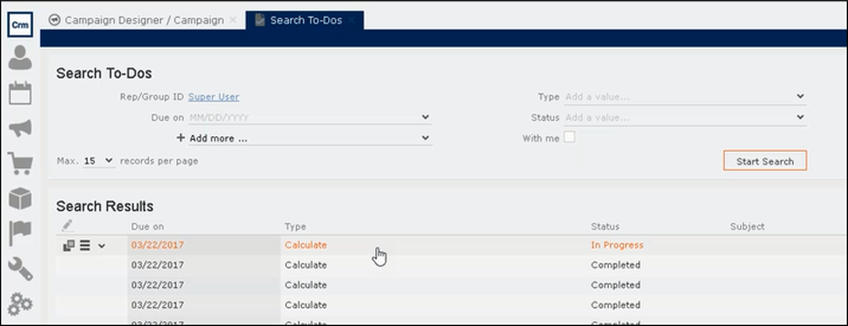
- To view the details of the transfer process, open the scheduled entity from the To-Do
search list. The Related Data tab contains a link to a text file that contains
information about the target group transfer process.
Open the document to find the information on the transfer process.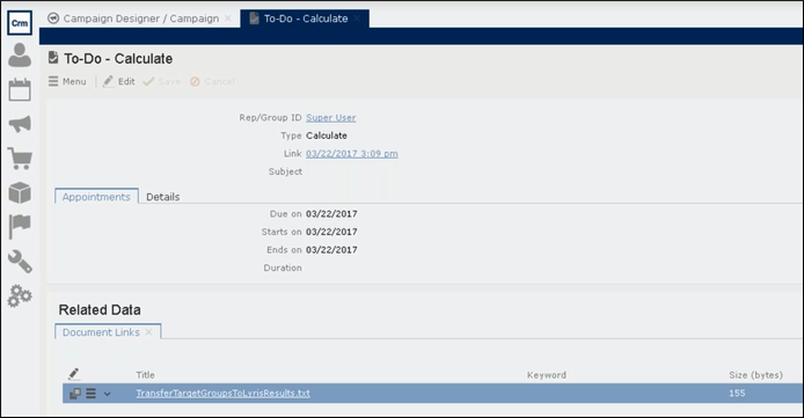
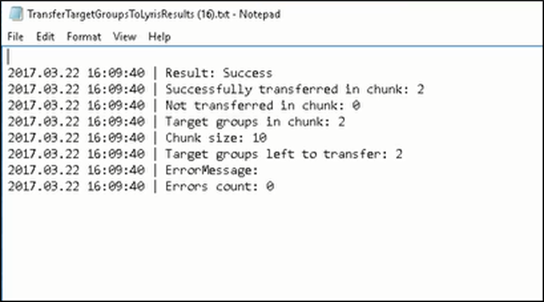
- You can check the contacts created in Lyris for the transferred target group members.
To list the contacts in Lyris and view the contact details created, perform the
following:
- Open the Contacts tab and select the mailing list from the List filter. The
contacts created for his mailing list is displayed.

- Click View to open the details of the contact generated. The View Contacts dialog
displays.
The field values of the mapped fields are transferred from CRM and populated in the corresponding mapped demographics in Lyris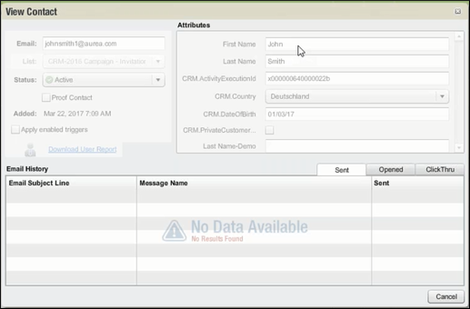
- Open the Contacts tab and select the mailing list from the List filter. The
contacts created for his mailing list is displayed.