Document Templates
Learn to create and manage document templates.
Following actions can be performed on document templates:
Using Aurea CRM Addin for Microsoft Word
Aurea CRM Add-in for Microsoft Word allows CRM users to create documents based on templates that meet the corporate customer interaction (CI) guidelines and enrich the documents with content from the CRM.
CRM administrator and users can create template documents that can be used for various recurring tasks. Some of the tasks for different user roles include the following:
- A Sales representative could create and maintain template documents for offer letters, order sheets, e-mail etc. Use the different information in the CRM system to enrich the document.
- Marketing personnel could create new templates to meet the latest customer interaction guidelines. Create templates for marketing campaigns sent by letters or flyers using information from the CRM.
- Service representatives can create solution documents or other documents for different services and use the CRM information in those documents.
- Field service representatives can create service report documents at the customer site along with the current ticket.
- All users can ensure that customers receive information in their preferred
language.Note: To send email in a language other than the default languages, you should use UTF-16 encoding for the template documents. For example, to send a mail in Cyrillic, encode the HTML template document in UTF-16.
- Allows you to use the same set of methods used by Aurea CRM web.
- Template documents can use fields that are used to store information in Aurea CRM.
- You can generate the documents on CRM.pad using the same templates from Aurea CRM.
- Serial and single letter fields can be easily integrated into the templates using drag and drop features.
- You can create template documents in multiple languages.
- You can create formatted text, when merging documents and mail merge.
- Allows you to embed additional information in the documents like images and pictograms.
Installing Aurea CRM Add-in for Microsoft Word
The recommended way to install Aurea CRM Word Add-in is to use a network shared location containing the latest installation package. Ask your CRM administrator for the central shared location for the CRM Add-in for Word installation package. Using this process ensures that the latest version of the CRM Add-in for Word is automatically upgraded to the latest version. You only have to install it once using the shared central location.
If your organization does not provide a shared location, the Aurea CRM add-in for Word installation package can be found on the Aurea CRM customer support site.
To install the Aurea CRM add-in for Word:
- Browse to the network shared central location provided by your CRM
administrator.
Or
Unzip the package
OfficeAddins_<versionNo>_full.zip. The<versionNo>is the latest version available on the customer support site. - Double click
aurea.office.word.vstofile in the shared location or the unzipped folder. The Microsoft Office Customization Installer window opens.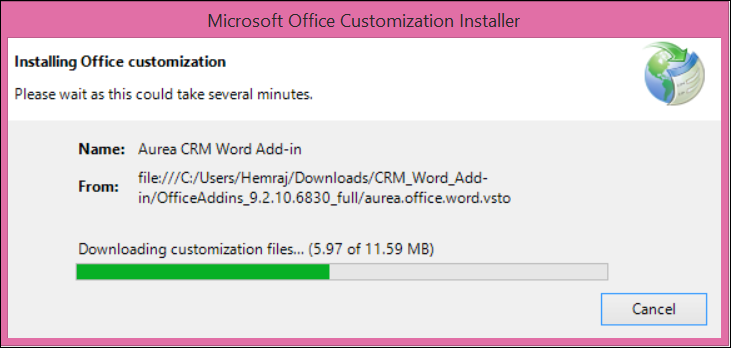
The installer verifies the publisher, in this case Aurea CRM, and then displays the following window.
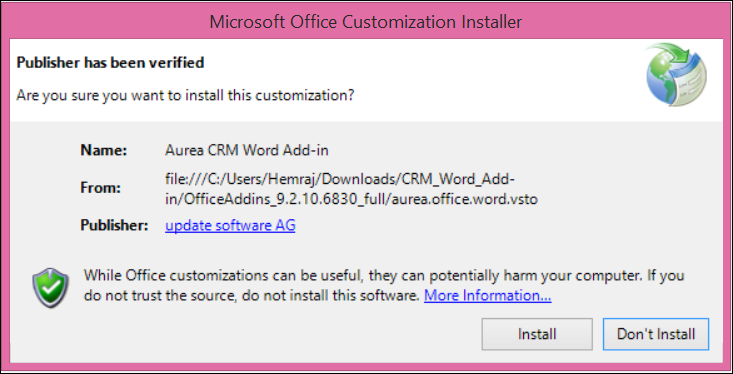
- Click Install. The Installing Office Customization message displays.

- The window automatically closes on successful installation.
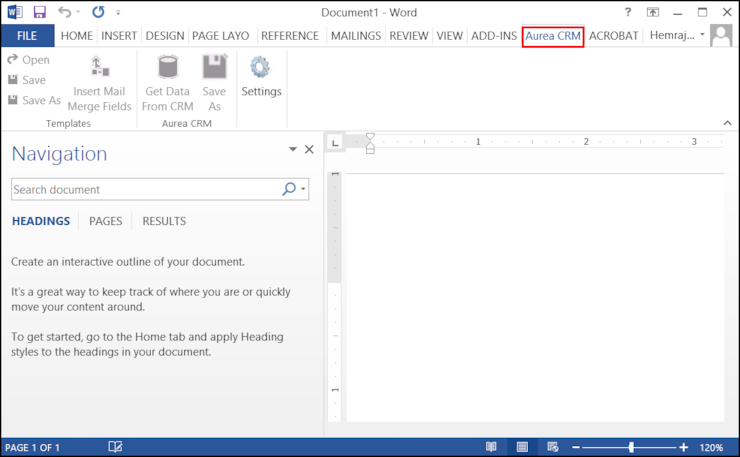
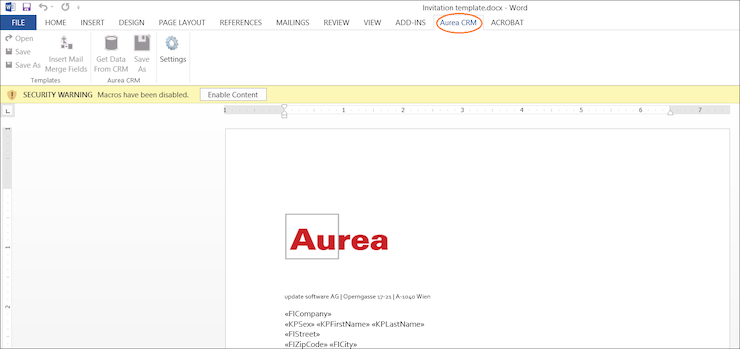
- Start Microsoft Word and open a blank document, the Aurea CRM menu item should be visible.
- Click the Aurea CRM menu.
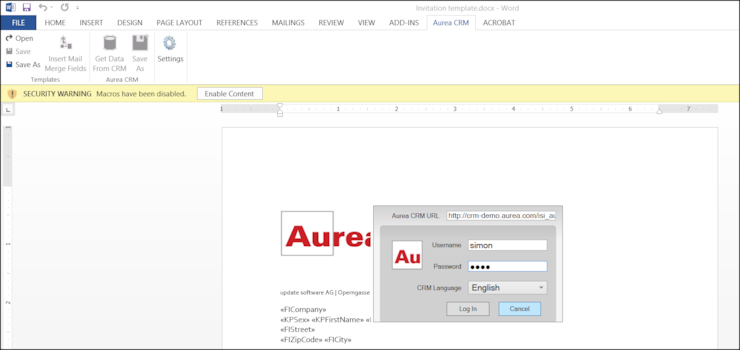
- To work with the plugin you have to be connected to Aurea CRM. Click
Settings to open the connection dialog.
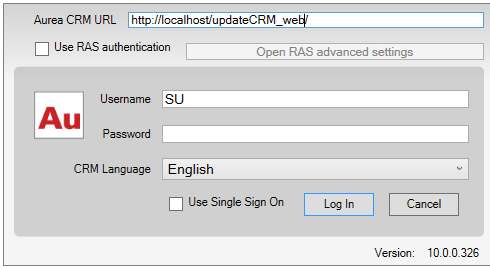
- Enter the following details in the connection dialog:
- Enter the URL of the Aurea CRM server.
- If Aurea CRM web is deployed on a RAS server, perform the following steps:
- Click the Use RAS authentication checkbox.
- Click Open RAS Advanced Settings. The following
RAS settings dialog displays.

- Enter the URL for the RAS server and the Application ID of Aurea CRM web instance on the RAS server.
- Click Close RAS advanced settings.
- Enter your Username and Password.
- Select your preferred language.
- Click Log In.
- Now you can use the CRM Word Add-in to create templates for your documents.
Upgrading the Aurea CRM Add-in for Microsoft Word
Aurea CRM Add-in for MS Word is developed as a VSTO Add-in. Visual Studio Tools for Office (VSTO) Add-ins use the ClickOnce deployment solution which automatically updates your installation of CRM Add-in for Word. This requires your administrator to publish Aurea CRM Add-in to a network shared central location. You can install the latest version from this location once, all subsequent upgrades then happens automatically. Publishing a new version to this location automatically updates the CRM Add-in for Word installed from this location. ClickOnce checks this location once in every seven days for new updates.
You may have to login to the shared network location to ensure that it is accessible to the ClickOnce installer to check for a new version of the CRM Add-in and perform the upgrade.
If you have used a network shared central location to install CRM Add-in for word, your upgrade should start automatically. If a new version is published to the shared location, on starting MS Word, ClickOnce installer checks the shared folder for a newer version and if a new version is available, it automatically starts the update process.

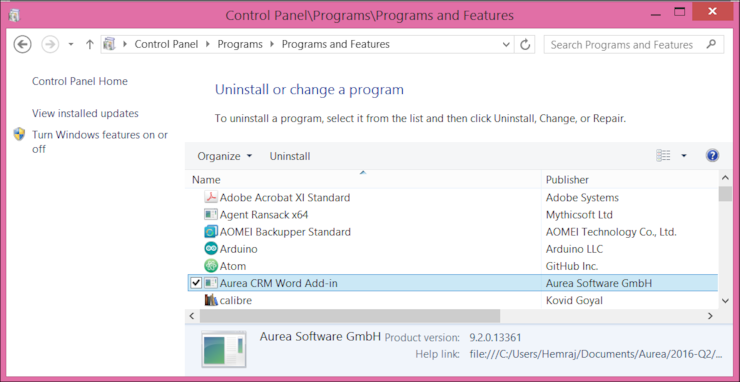
If you have installed the word plugin using the installer package from the support site, then you have to uninstall the existing Aurea CRM Word Add-in from Control Panel > Programs > Programs and Features.
Unzip the package OfficeAddins_<VersionNo>_release.zip. The
<VersionNo> is the latest version available on the customer
support site. Follow the installation instructions in Installing Aurea CRM Add-in for
Microsoft Word.
Creating and Saving new Document Template
You can create document templates for documents that you regularly use for recurring tasks.
To create a new document template:
- Open a Microsoft Word document containing basic text.
- Edit the content of the document.
- Click on the Aurea CRM menu item.
- Click Settings to open the connection dialog.
- Enter the following details in the connection dialog:
- Enter the URL of the Aurea CRM server.
- Enter your Username and Password.
- Select the language you prefer to work on Aurea CRM.
- Click Log In.
Note: None of the other Aurea CRM sub-menu items are activated until you login. - Click Save As to open the dialog.
- Give a File Name for the template.
- Select the Document Class of the template, from the
following options:
- MailMerge Template
- Template (BASE)
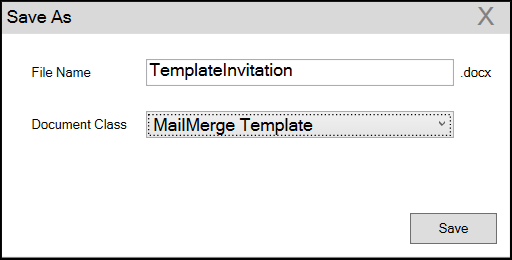
In this case, we save the template document as a MailMerge Template class.
Note: The document class is drawn from the CRM, therefore the drop-down values can be different based on your installation.
- Click Save. The template document is saved to the D1 infoarea
of the Aurea CRM server.Note: After a template is saved to Aurea CRM, the Insert Mail Merge Fields menu item is activated.
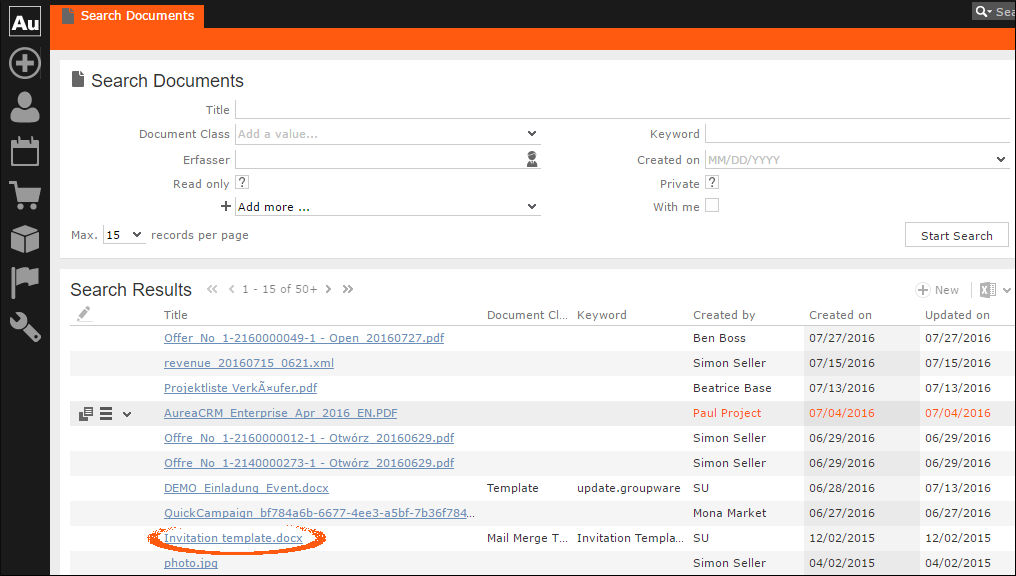
- Login to the Aurea CRM server with the same username and password and search for the
document. The saved document should be visible in the search list as shown in the
screenshot below:
- Click Insert Mail Merge Fields, to update the document with
information from the records on Aurea CRM server. The Mail Merge
Fields column displays.
- Click Queries (
 ) to list existing queries.
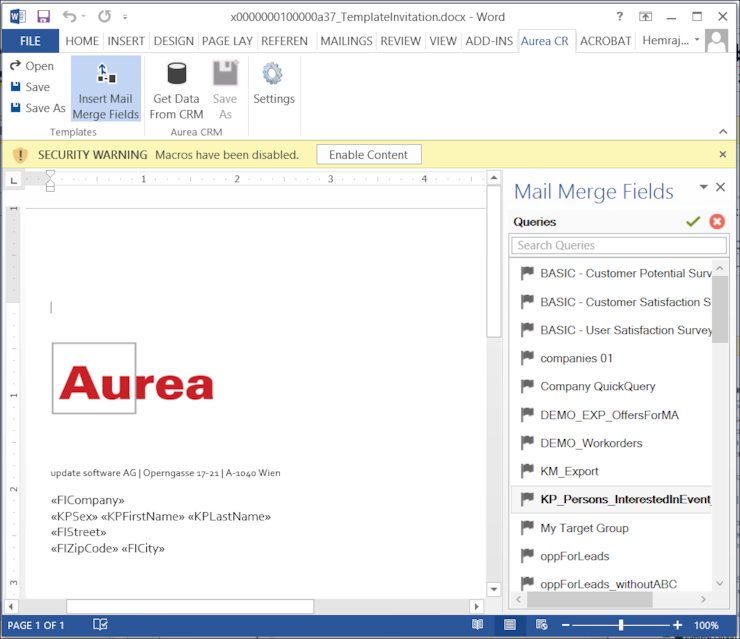
- You can create a new query by selecting an existing query then modifying, and saving
it.
To create a new query, perform the following:
- Select any query or record and click
 . In the following screenshot,
typing com in the filters text box shows
companies 01.
. In the following screenshot,
typing com in the filters text box shows
companies 01.
- Right click on the root record node and select Remove.
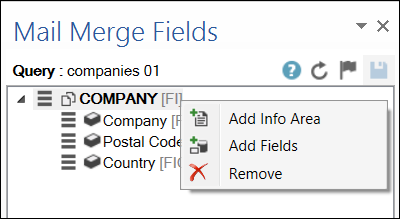
This creates a blank query, as shown in the screenshot below.
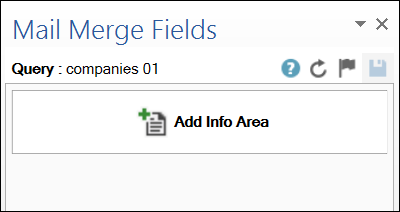
- Click Add Info Area to open the Select info
Area dialog.
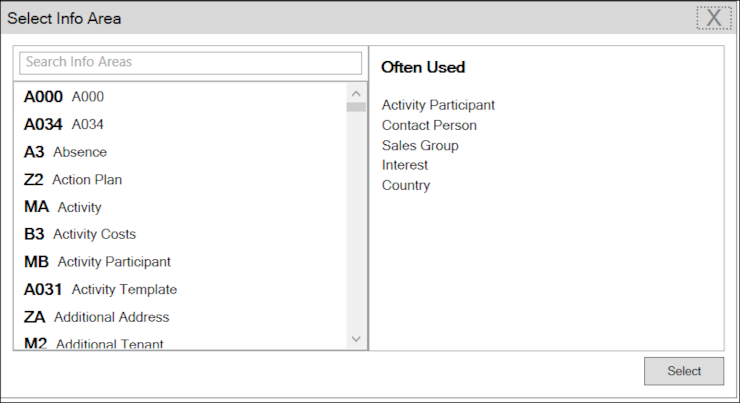
- Select the infoarea of interest and select the required fields from that info
area. For this example, type KP and select the Contact
Person info area. The Select Field(s) in Info Area:
Contact Person dialog box opens.

- Select the required fields in the Available Fields pane and click
 to move it to the Selected Fields pane. Click
OK. The selected infoarea and fields are displayed in
the Mail Merge Fields.
to move it to the Selected Fields pane. Click
OK. The selected infoarea and fields are displayed in
the Mail Merge Fields.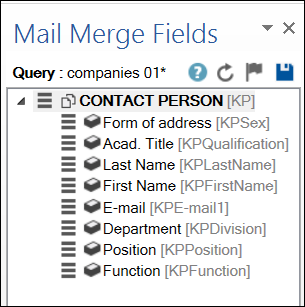
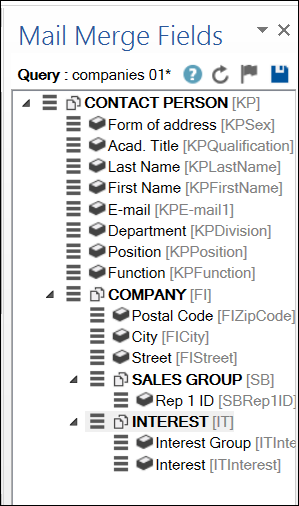
- To add more info areas, right click on an infoarea and select Add
Info area. Selecting the infoarea opens a Relationships dialog.
You can define the type of relationship between the existing infoarea and the
new one you add.

- Select the required fields from for the new infoarea. The following screenshot
shows the Mail Merge Fields with the selected info areas
and parameters.
- Click
 to save the modified query.Note: This overwrites the before selected query and the changes is done in the CRM solution. Please ensure that the query can be modified to your requirements to avoid conflicts with queries set up by other users.
- Select any query or record and click
- To populate the template document with the fields from infoarea records, drag and
drop the fields in the required places. The following screenshot shows the template
document enriched with fields.
- Click Save. The template document is saved to the D1 infoarea on Aurea CRM server.
Opening and Editing document templates
You can open an existing template and edit and save it. You can also rename it and save it with a different template name.
To open an existing template:
- In the Microsoft Word, click on the Aurea CRM menu item.
- Click Settings, and login to the Aurea CRM server.
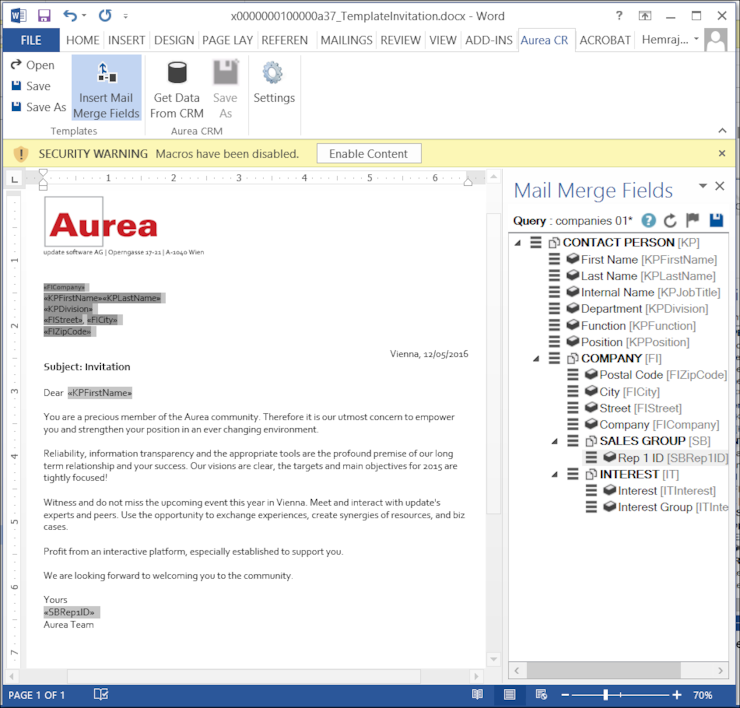
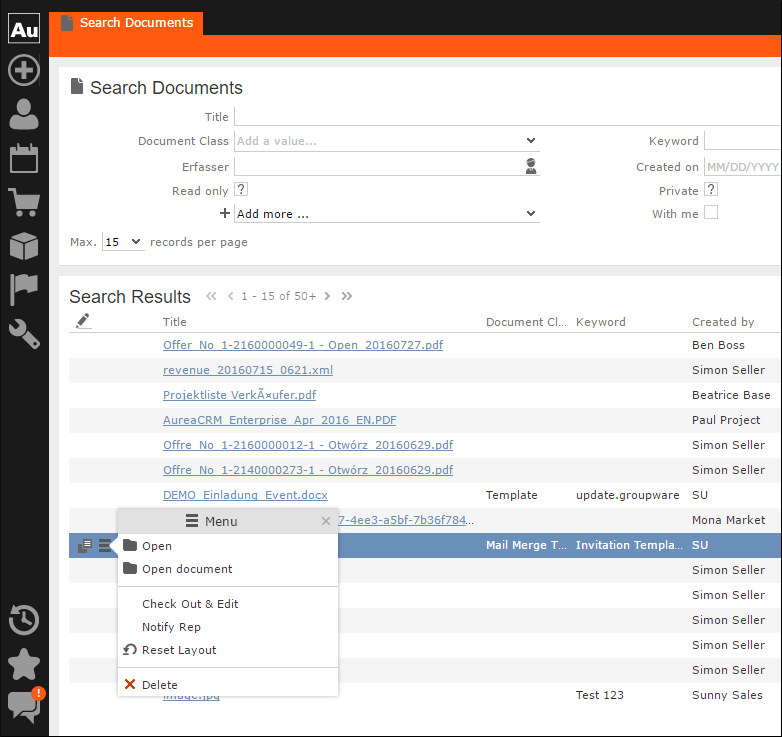
- Click Open. The Documents dialog is displayed.

You can type in the text box to filter for a specific document. You can also select the name of the template document. In the screenshot above, Template (BASE) was the document class selected and invi was typed in the filter text box, to find the Template Invitation.docx template.
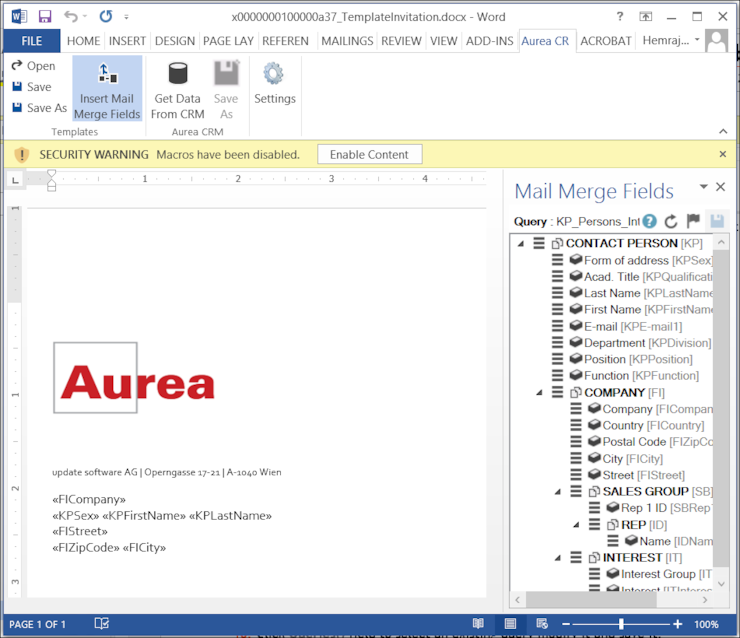
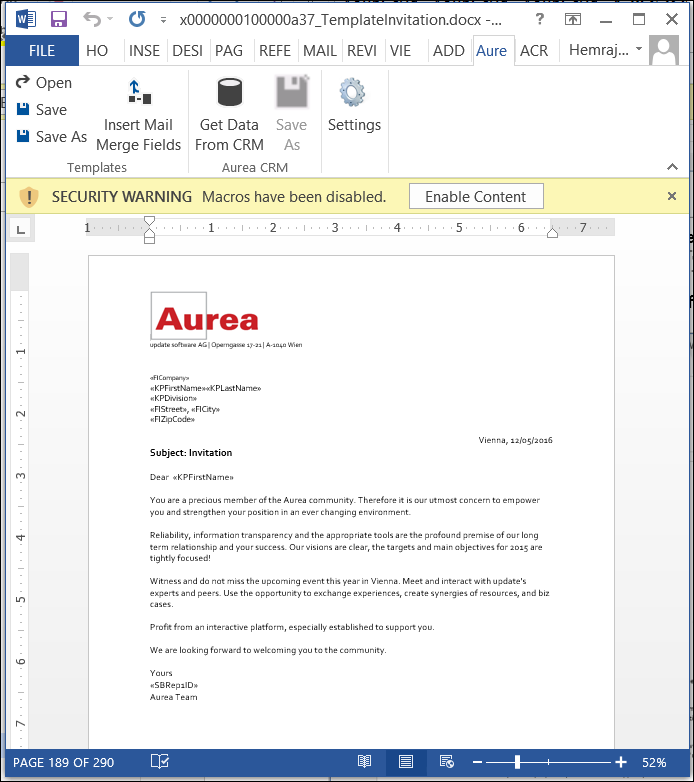
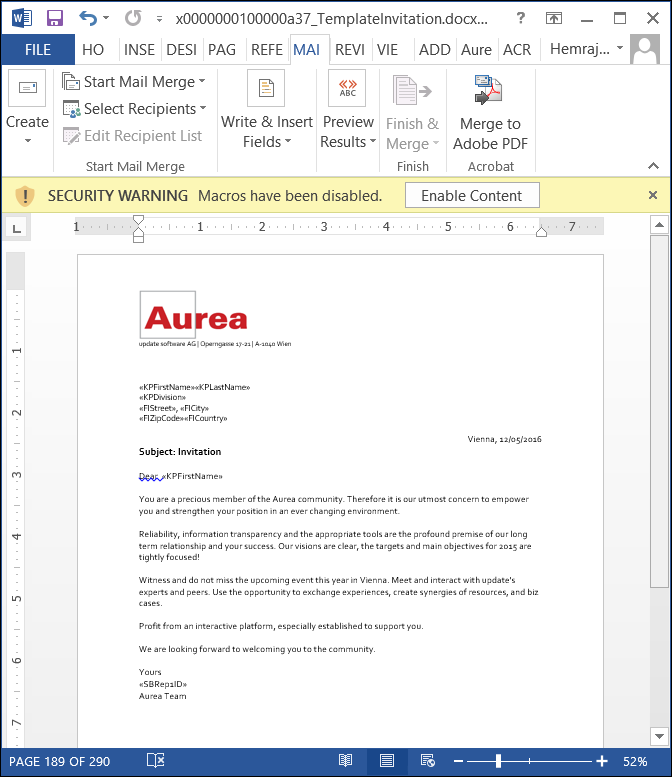
- The selected template document is retrieved from the Server and loaded into
Microsoft Word. For example, the screenshot below shows the Template
Invitation.docx.
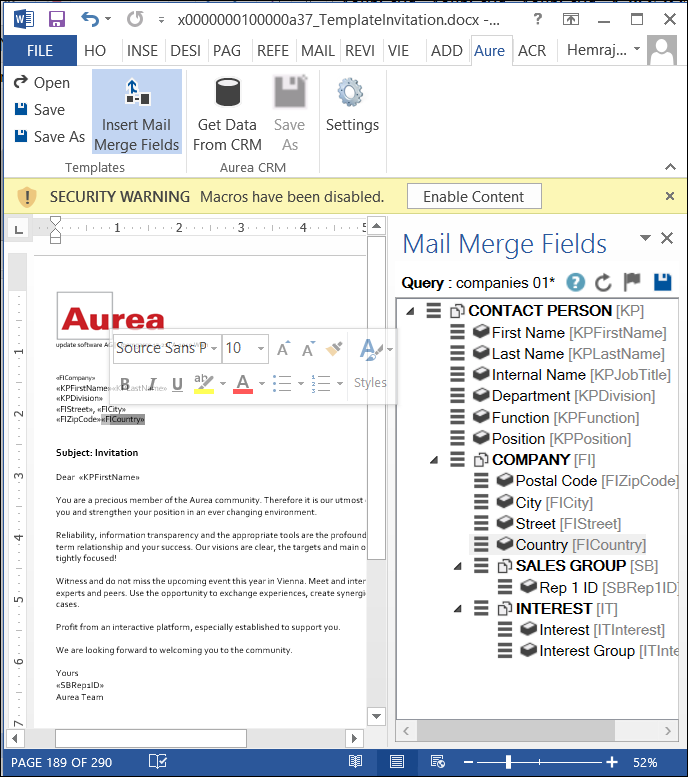
- You can edit the template document and make modifications. For example, in the Invitation template.docx, you might want to add the country name, after the City name.
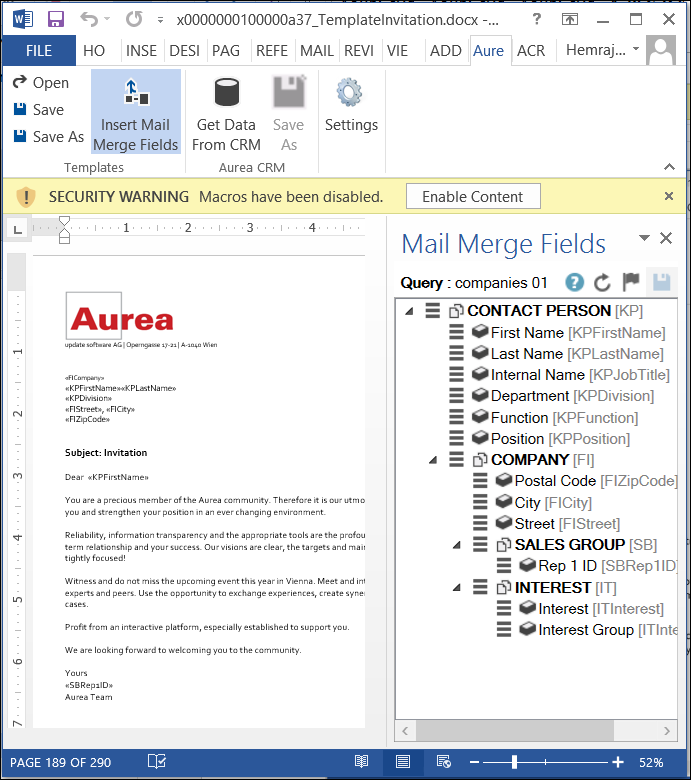
- Click Insert Mail Merge Fields. The Mail Merge Fields column displaying the fields
from the selected infoarea is displayed to the right of the editing pane. See the
screenshot below.
- To add a field from the infoarea to the template document, select the field and drag
and drop it in the document at the appropriate position. For example, the Country
field was selected and added to the document. See the screenshot below.
- Click Save. The template document is saved to the D1 area of Aurea CRM.
Mail Merge Using Document Templates
To generate a document for several persons using the document template:
- From the Aurea CRM menu, login to the CRM server and open the Mail Merge template document. Edit the template document if necessary. For more information, see >> Opening and Editing document templates.
- Click Get Data From CRM. The Select Records dialog displays
single record or a list of records, showing the data fields you selected. You can
then select the data you want use with the document template.
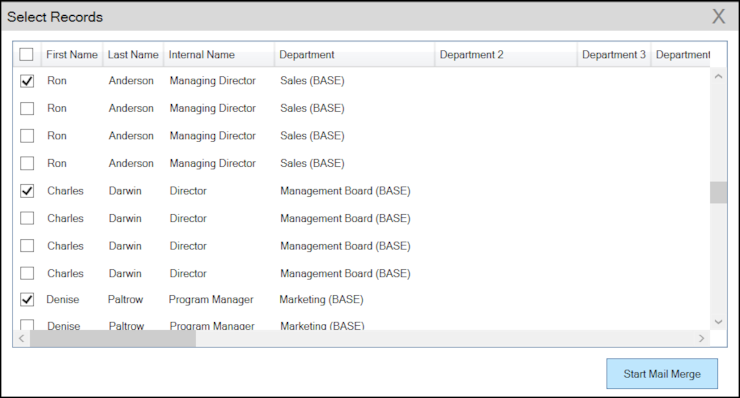
- Click Start Mail Merge. The document is opened is in a new Window.
- To see the individual documents populated with the field values, select the required
recipient from the Preview Results menu. The document is
populated with the required information. The following screenshot shows the merged
fields with their values populated and highlighted.

- You can work with the documents created from the Aurea CRM server. The following
screenshot shows the Invitation template.docx template
document on the CRM server.
Deleting a Template Document
You can delete a template document from the CRM server. This deletes the template document along with all linked information in Aurea CRM and the D1 infoarea.
To delete a template document:
- Search for your documents in Aurea CRM using Colloborate > Documents menu option.
- Open the required document from the search results.
- Select the Delete option from the context menu for the document.
Working with Images in the Template Document
You can add images and then modify them in the template document. The following steps show a sample of adding an image to the template document and modifying then making some modifications to the image. You can use the standard functions available in Microsoft Word to process an image, like resizing and adding borders.
Perform the following steps:
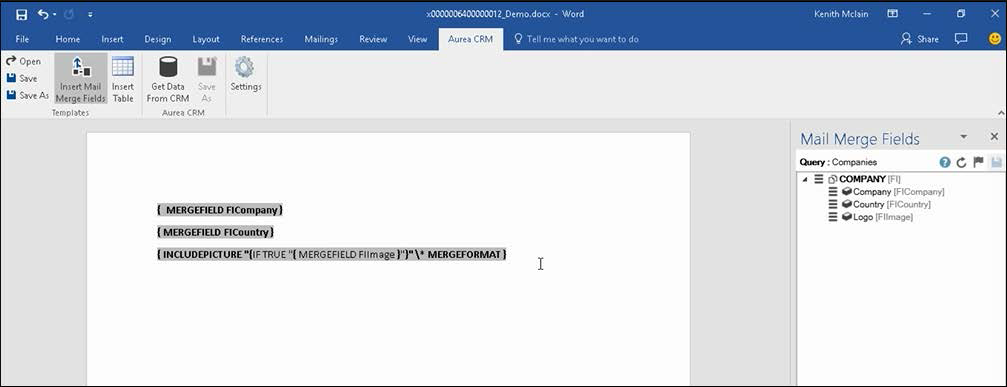
- Create a new blank template document. Perform steps 1 to 11 in the topic Creating and Saving new Document Template. In step eleven you have to create a query that retrieves the fields from the infoarea that has the images you require. For this example steps, we have created a simple query to retrieve the Company infoarea records that has the Logo field containing images of company logos (F1Image), the name of the company (F1Company), and the country (F1Country) it is located in.
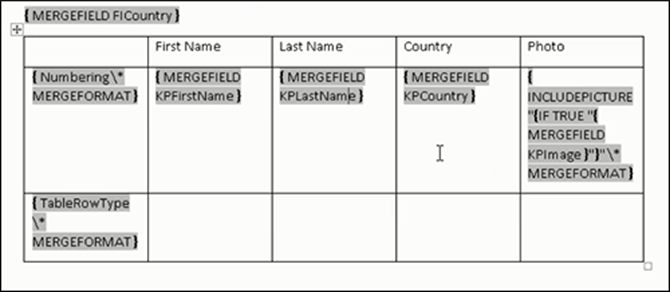
- Add the three fields the company name, country, and logo fields to the template
document. The Word add-in automatically detects that the added field is an image
field and adds the appropriate code, see the screenshot below.
- Format the fields to the desired fonts, bold it and other changes you desire, as you would a normal a normal word document.
- Click
 to execute the mail merge. This fetches the data, populate the record
field and create the pages for each record set in the CRM database.The screenshot
below shows one of the pages generated.
to execute the mail merge. This fetches the data, populate the record
field and create the pages for each record set in the CRM database.The screenshot
below shows one of the pages generated.
- To resize the displayed image switch to the template document and click on the logo record, a sample image is displayed, resize it as you would resize an image in a word document.
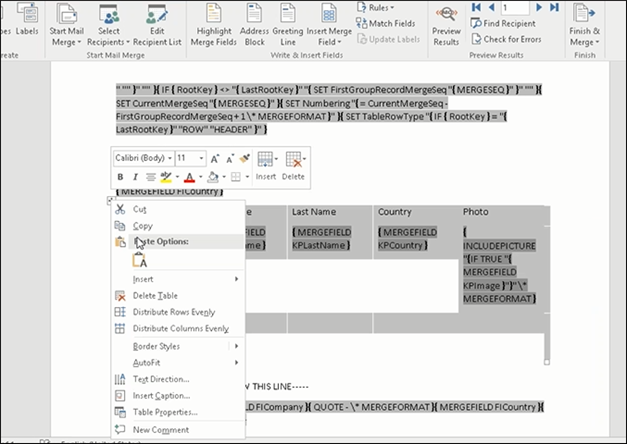
- To add a border, right click on the image in the template document and select
Borders and Shadings as shown in the screenshot below.

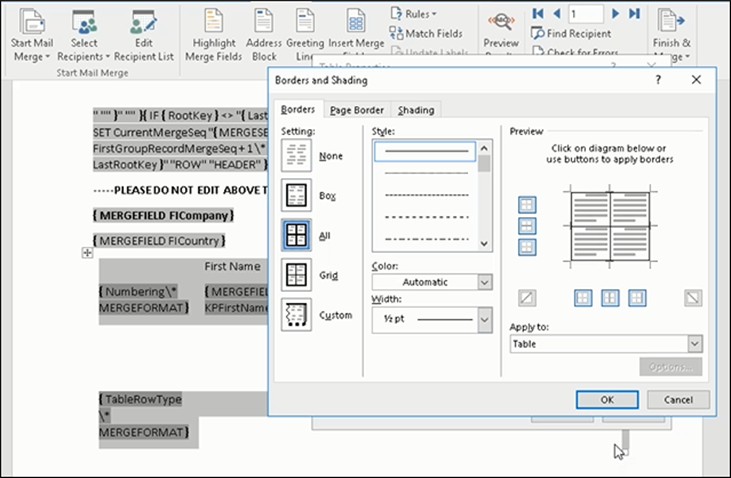
- Add a border using the standard Borders dialog in MS Word.
- Click to execute Mail Merge again. The resulting document is shown in the screenshot below.
Adding Tables to a Template Document
Aurea CRM add-in for Microsoft Word provides an Insert Table feature that allows you to create a hierarchical grouping of records.
For example, if you want to group all the employees of a company into separate documents, you have to use the Insert Table feature. If you have two companies and three employees in each company then a simple mail merge would create six pages containing the company name and one employee name. If you use the Insert Table feature then the result document contains two pages for the two companies and all the employees of a company are grouped in a single page.
The sample table created in the procedure described below uses a query to retrieve a company along with the employees of the company.
Perform the following steps:
- Create a new blank template document. Perform steps 1 to 11 in the topic, Creating and Saving new Document Template. In step 11, you have to create a query that retrieves the fields from the infoarea that has the information that you want to tabulate. For this example steps, we have created a complex query to retrieve the Company infoarea records along with its employee information.
- From the Mail Merge Fields add the Company name and the Country fields to the template document.
- Click Insert Table.
The Table Builder Wizard (Step1/2) dialog displays. See the screenshot below.

- You can add tables to the template document based on a grouping field or without a
grouping field. A grouping field groups the sub-records of a selected parent
record.
To add a table based on a grouping field, go to step 5.
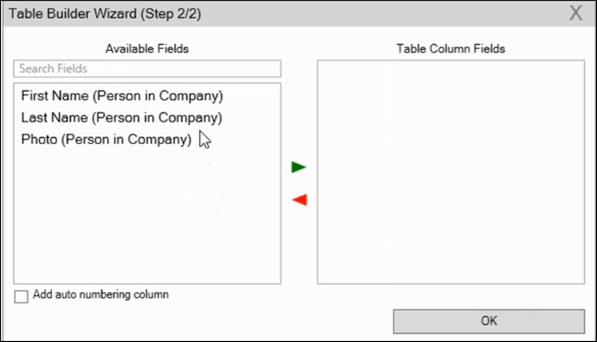
To add a table without grouping fields, perform the following steps:- Click Next. The Table Builder Wizard (Step2/2) dialog displays.

- The Available Fields pane in the dialog displays the records that you can add to your table.
- Select the records that you want to add to your table and click to select the
required records. The selected records are added to the Table Column Fields pane.
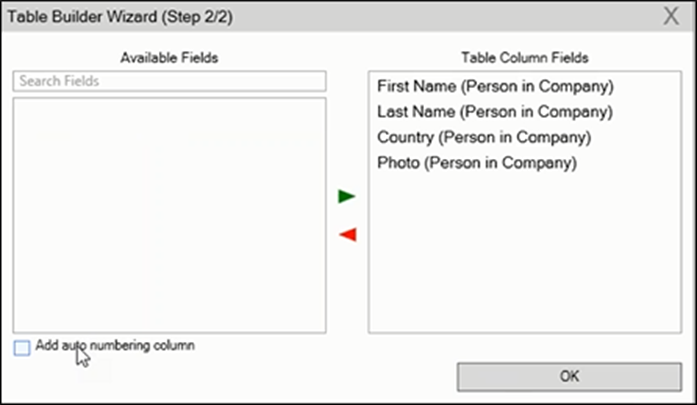
- Click Add auto numbering column to add the numbering column for all
the employees that get populated for each company in the result
documents.Note: The numbering re-starts for each separate table (hierarchical group) created in the result document.
- Click OK.
- The required code is generated and populated in the template document.

- Click
 to execute the mail merge. The Select Records
dialog is displayed.
to execute the mail merge. The Select Records
dialog is displayed.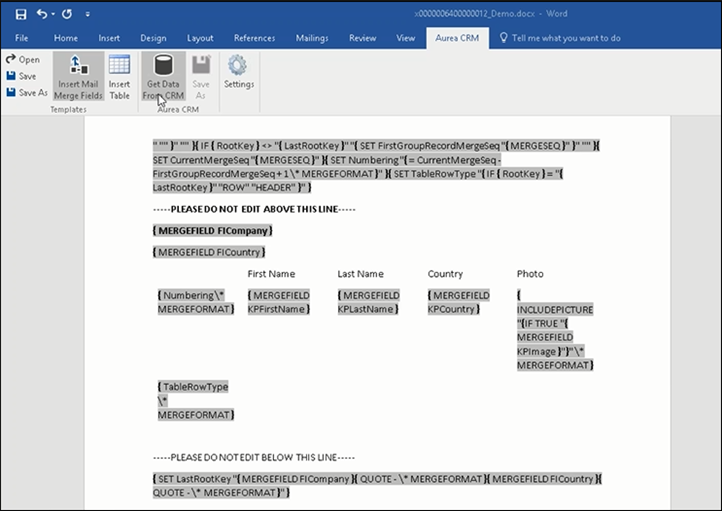
- Click Start Mail Merge.
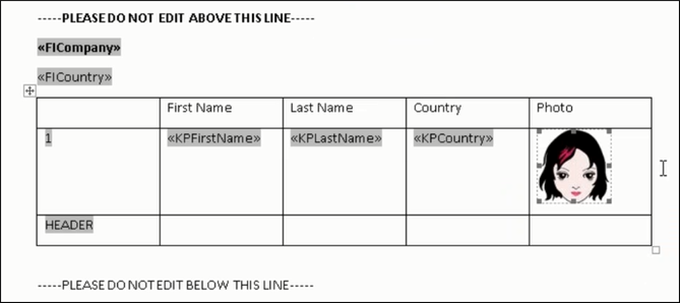
- The results documents are created. Sample pages containing the tables for
companies are shown below.
Another page: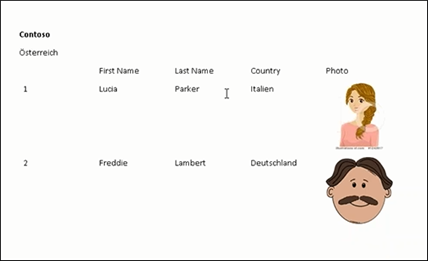

- You can add formatting to the table by selecting the table format in the template document and add the required formatting.
- To format the table, go to the template document, right click the table and
select Table Properties.
- In this example, we set the borders in the table. See the screenshot below for
the dialog.
- In this example, we apply a simple formatting to the table. All borders to the
table grid. See the screenshot below.
- You can resize the image. Click the image record in the table and resize the
image visible in the table cell. See the screenshot below.
- To see the result of resizing, click
 to start the mail merge. A result page is shown in the
screenshot below. The images are displayed in the size specified in the
template document.
to start the mail merge. A result page is shown in the
screenshot below. The images are displayed in the size specified in the
template document.
This completes the steps required to generate documents without using a grouping field.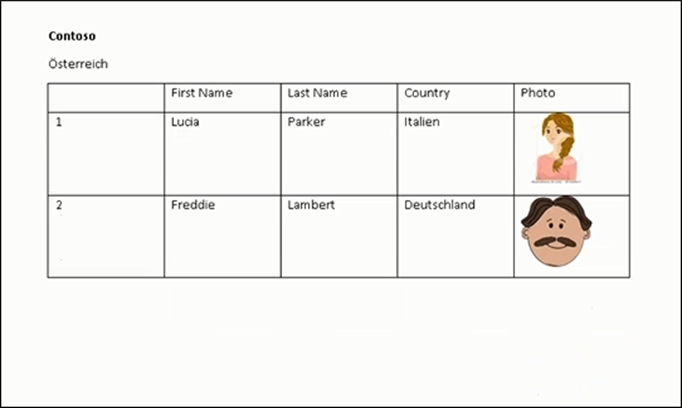
- Click Next. The Table Builder Wizard (Step2/2) dialog displays.
- To create a template document using a grouping field, perform the following steps:
- Select a grouping field. The following screenshot shows the Country (Person in
Company) field selected.

- Click Next. The Table Builder Wizard (Step2/2) dialog displays.
 Note: Note: This grouping fields does not show Company record in the available fields as it is not a sub-record of the selected grouping field, Country (Person in Company) field.
 - Select the records you want to add to the table columns and click
 t o
add the records to the Table Column Fields. Click OK.
t o
add the records to the Table Column Fields. Click OK.The table wizard generated the required code in the template document.
- Add the Company name and the Company Country records to the template document.
See the screenshot below.

- Click to execute the mail merge. The Select Record dialog displays. See the
screenshot below.
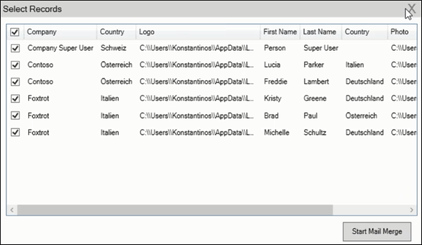
- Click Start Mail Merge to generate the result document.
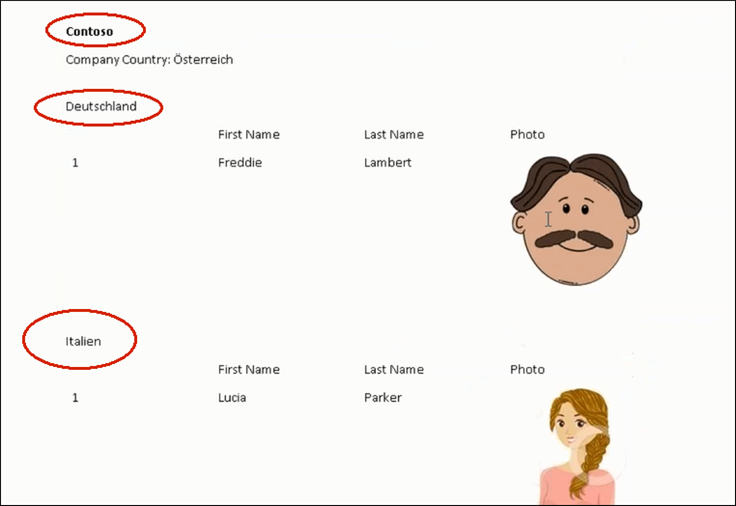
The result document contains three tables for each company, based on the country of the employee (grouping field), which are three countries.
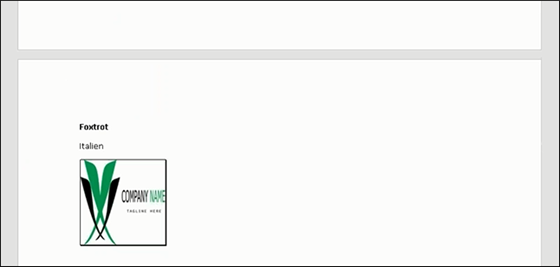
The following screenshot shows the result document showing the employee tables for the company “Contoso” in two tables for the grouping in terms of countries: Deutschland and Italien.
- Select a grouping field. The following screenshot shows the Country (Person in
Company) field selected.
- Click Save As to save the template document. The Save As dialog
displays.
A default name in the following format is automatically displayed,
<documentName_<date>_<user name>. In the screenshot above the default name is<Demo>_<2016-12-21>_<SU>. - Click Save. The template document is saved to the D1 infoarea of the Aurea CRM server.