Configuring the Google Analytics Tracker
Learn to set-up the Google Analytics Tracker.
To track the CRM.Web application using Google Analytics, you can:
- Use the main tracker provided by Aurea CRM. This tracks all aspects of CRM.Web
application. Use the
GoogleAnalytics.MainTrackerEnabledparameter to enable tracking by Google Analytics tracker provided by Aurea. Tracking for CRM.Web application is disabled by default. - Enterprise customers can use their own Google Analytics tracker and they can specify if the user ids should or should not be sent to the tracker.
To configure your own instance of Google Analytics tracker, perform the following steps:
Note: These instructions are a minimal subset of configurations possible for Google Analytics. Refer to the Google Analytics Help Center for detailed instructions and possibilities.
- Disable tracking by Google Analytics tracker provided by Aurea by setting the parameter
GoogleAnalytics.MainTrackerEnabledtofalse. - Open the Google Analytics home page configured for your organization.
- Select the Admin tab. The Administrator page displays.
Create a new property
- Under the PROPERTY column, select Create New
Property from the drop down list. The New Property
page displays.
This page allows you to create the tracking id for your Aurea CRM.Web application. The tracking allows google analytics to track the data on your Aurea CRM site. Click the Website button and provide the following details: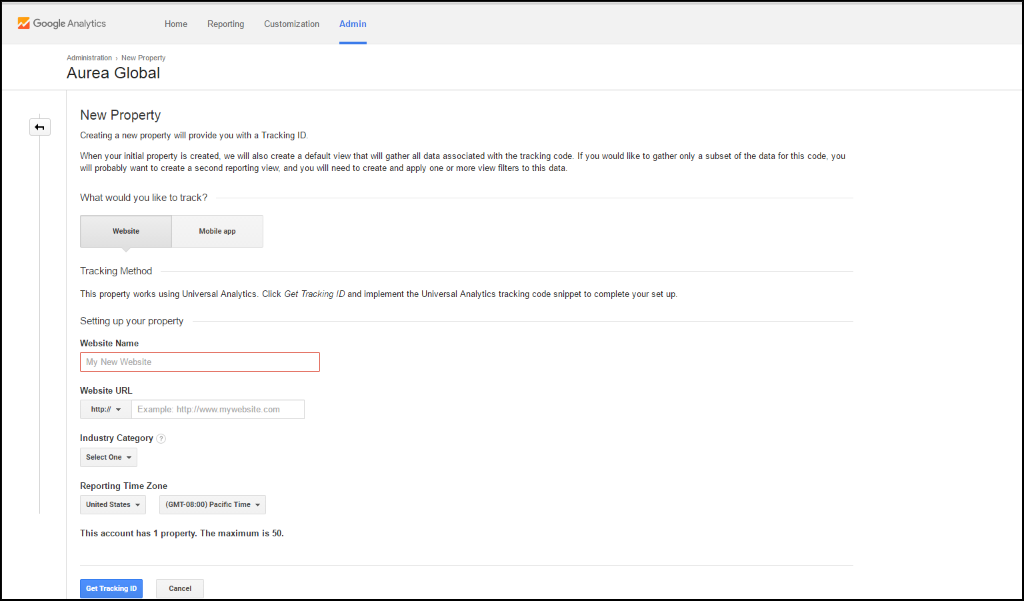
- Website Name: The name of the website configuration you are creating for Aurea CRM.
- Website URL: The URL of your Aurea CRM.Web application.
- Industry Category: Select the category of your industry.
- Reporting Time Zone: Select your country to set the time zone.Note: In the following sample screenshots we use the website name Aurea to configure the remaining properties.
- Click Get Tracking ID. The new tracking id for the new property
is generated. The new property is now visible under the drop down list under the
Property column in the admin page.
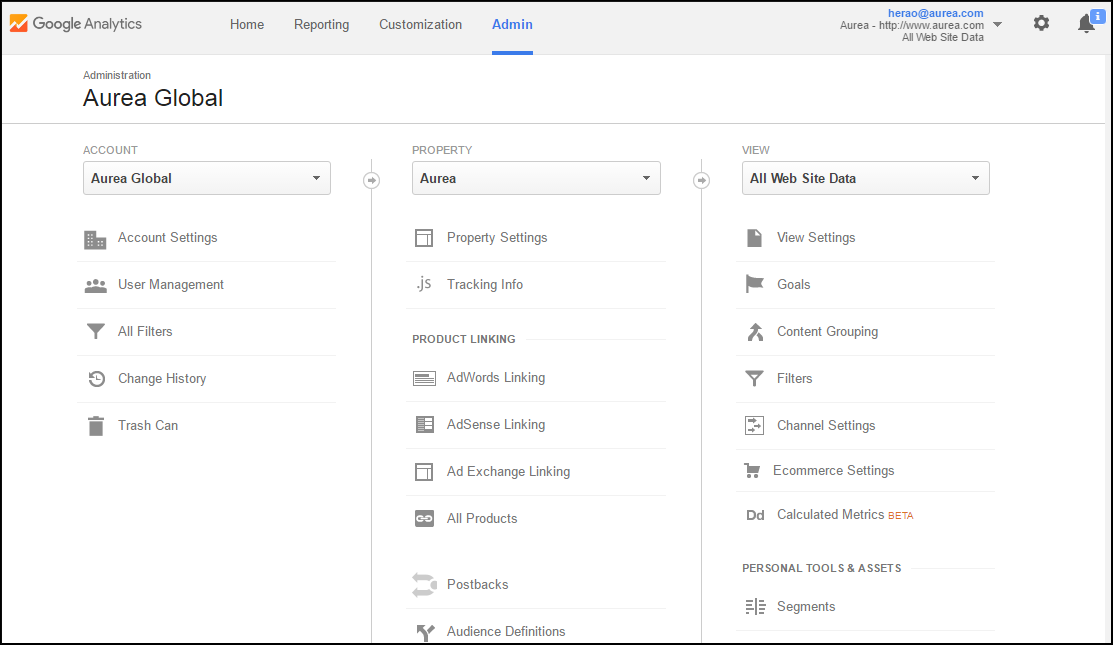
Edit the property settings for the new property
- Select the new property name from the drop down list in the PROPERTY Column.
- Click Property Settings. The Property
Settings page displays.
Configure the basic and advanced properties listed on this page as required.
- Click Save. The Administrator page opens again.
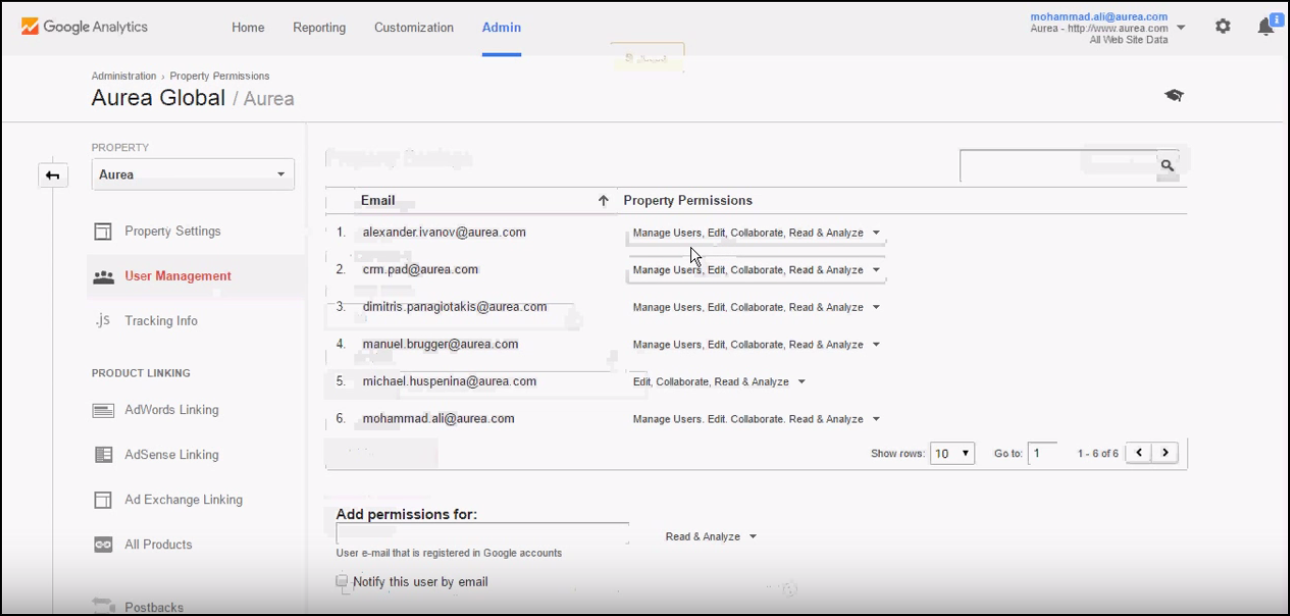
User Management settings
- Click User Management node in the PROPERTY column. You can add users and assign them
access permissions from this page. Click Save.
Configure and retrieve tracking information
- Expand the Tracking info node in the PROPERTY column. Click Tracking Code. This page
provides the following:
- You can retrieve the Tracking ID for the Aurea CRM tracking instance. You have to configure this value in the Aurea CRM Designer.
- You can get the Tracking code that you have to embed in the Aurea CRM Web pages
that you want to track. Note: Refer to the Google Analytics Help Center for more information.