Dashboards
Dashboards display different kinds of information - appointments, analyses, record lists - on one page.
Dashboards can be used as start pages for specific users or user groups.
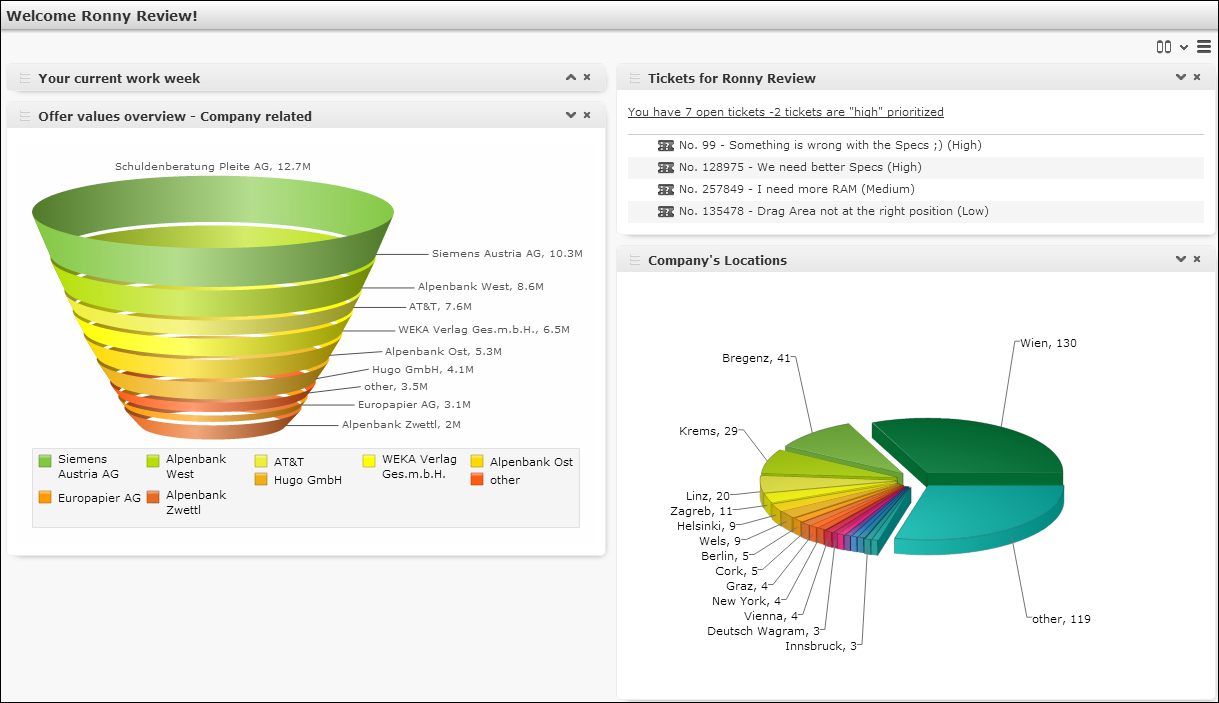
Users can switch between views (one column, two columns and tabbed), expand/collapse and reorder the areas of the dashboard. The user's settings are saved per client, allowing users to arrange their dashboards differently e.g. on a tablet PC and a notebook. The user's settings are saved separately once for the one column and tab views and once for the two columns view.
Use the DashboardPanel widget to configure dashboards. For
further details, see Configuring Dashboards.
To configure a dashboard:
- Add the
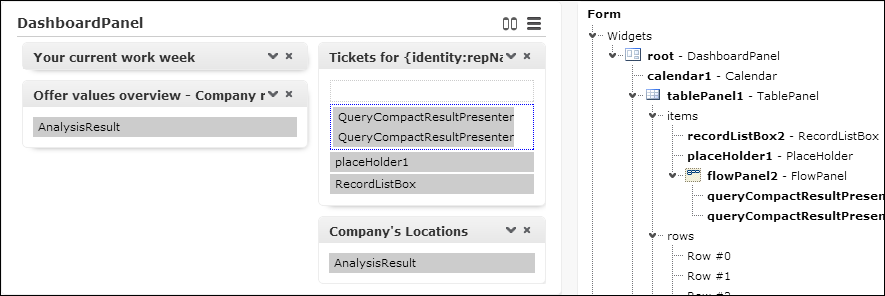
DashboardPanelwidget as root widget to your form. TheDashboardPanelwidget can be added to any kind of panel widget as well.By default, a two-column grid containing placeholders is created. Use the layout attribute to set/change this default (1Column | 2Columns | Tab).

The
DashboardPanelwidget uses the special headerDashboardPanelcontaining the buttons for switching between views, hiding items and resetting the dashboard.To configure an additional custom header (e.g. a personalized text like "Welcome {identity:repName}!" on a start page), define a special header and enter it as
HeaderNamein theShowFormaction. For further details, see ShowForm and Placeholders in Texts. - Enter a
settingsName: This name is used as storage key for the user customizations rearrange panels, selected view etc. - Add the desired items to the grid. For further details, see Arranging Elements on a Form. You can
use any kind of widget: CRM widgets, panel widgets, generic widgets like buttons
etc.
Each item is created inside a
DashboardPanelItem, i.e. a specific area of the dashboard. Use panel widgets to add multiple items to oneDashboardPanelItem.- To reorder items, select the widget contained in the
DashboardPanelItemand use the (Drag&Drop) button.
 - To hide items that contain no data (e.g. due to rights restrictions or an
assigned CRM process), set the
hideItemsIfEmptyproperty totrue.Note: Hiding empty items may impact performance because it requires pre-loading all widgets.
- To reorder items, select the widget contained in the
- To edit the
DashboardPanelItem's settings, select one of it's items.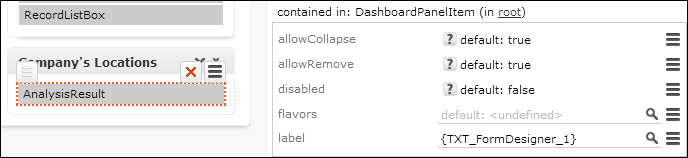
- Define a label to be displayed as the caption of the respective area of the dashboard.