Creating and Managing Products
Learn about creating and managing products.
CIS allows you to create and manage/edit products from the Rate Package and Product Management page.
Creating a Product
- Adding product details
- Adding billing charges to the product
- Reviewing the added details and charges before finalizing creation.
- Go to Administration Menu > General > Rate Package and Product Management.
- In the Product Management tab, click Add New Product.
- On the Product Details page:
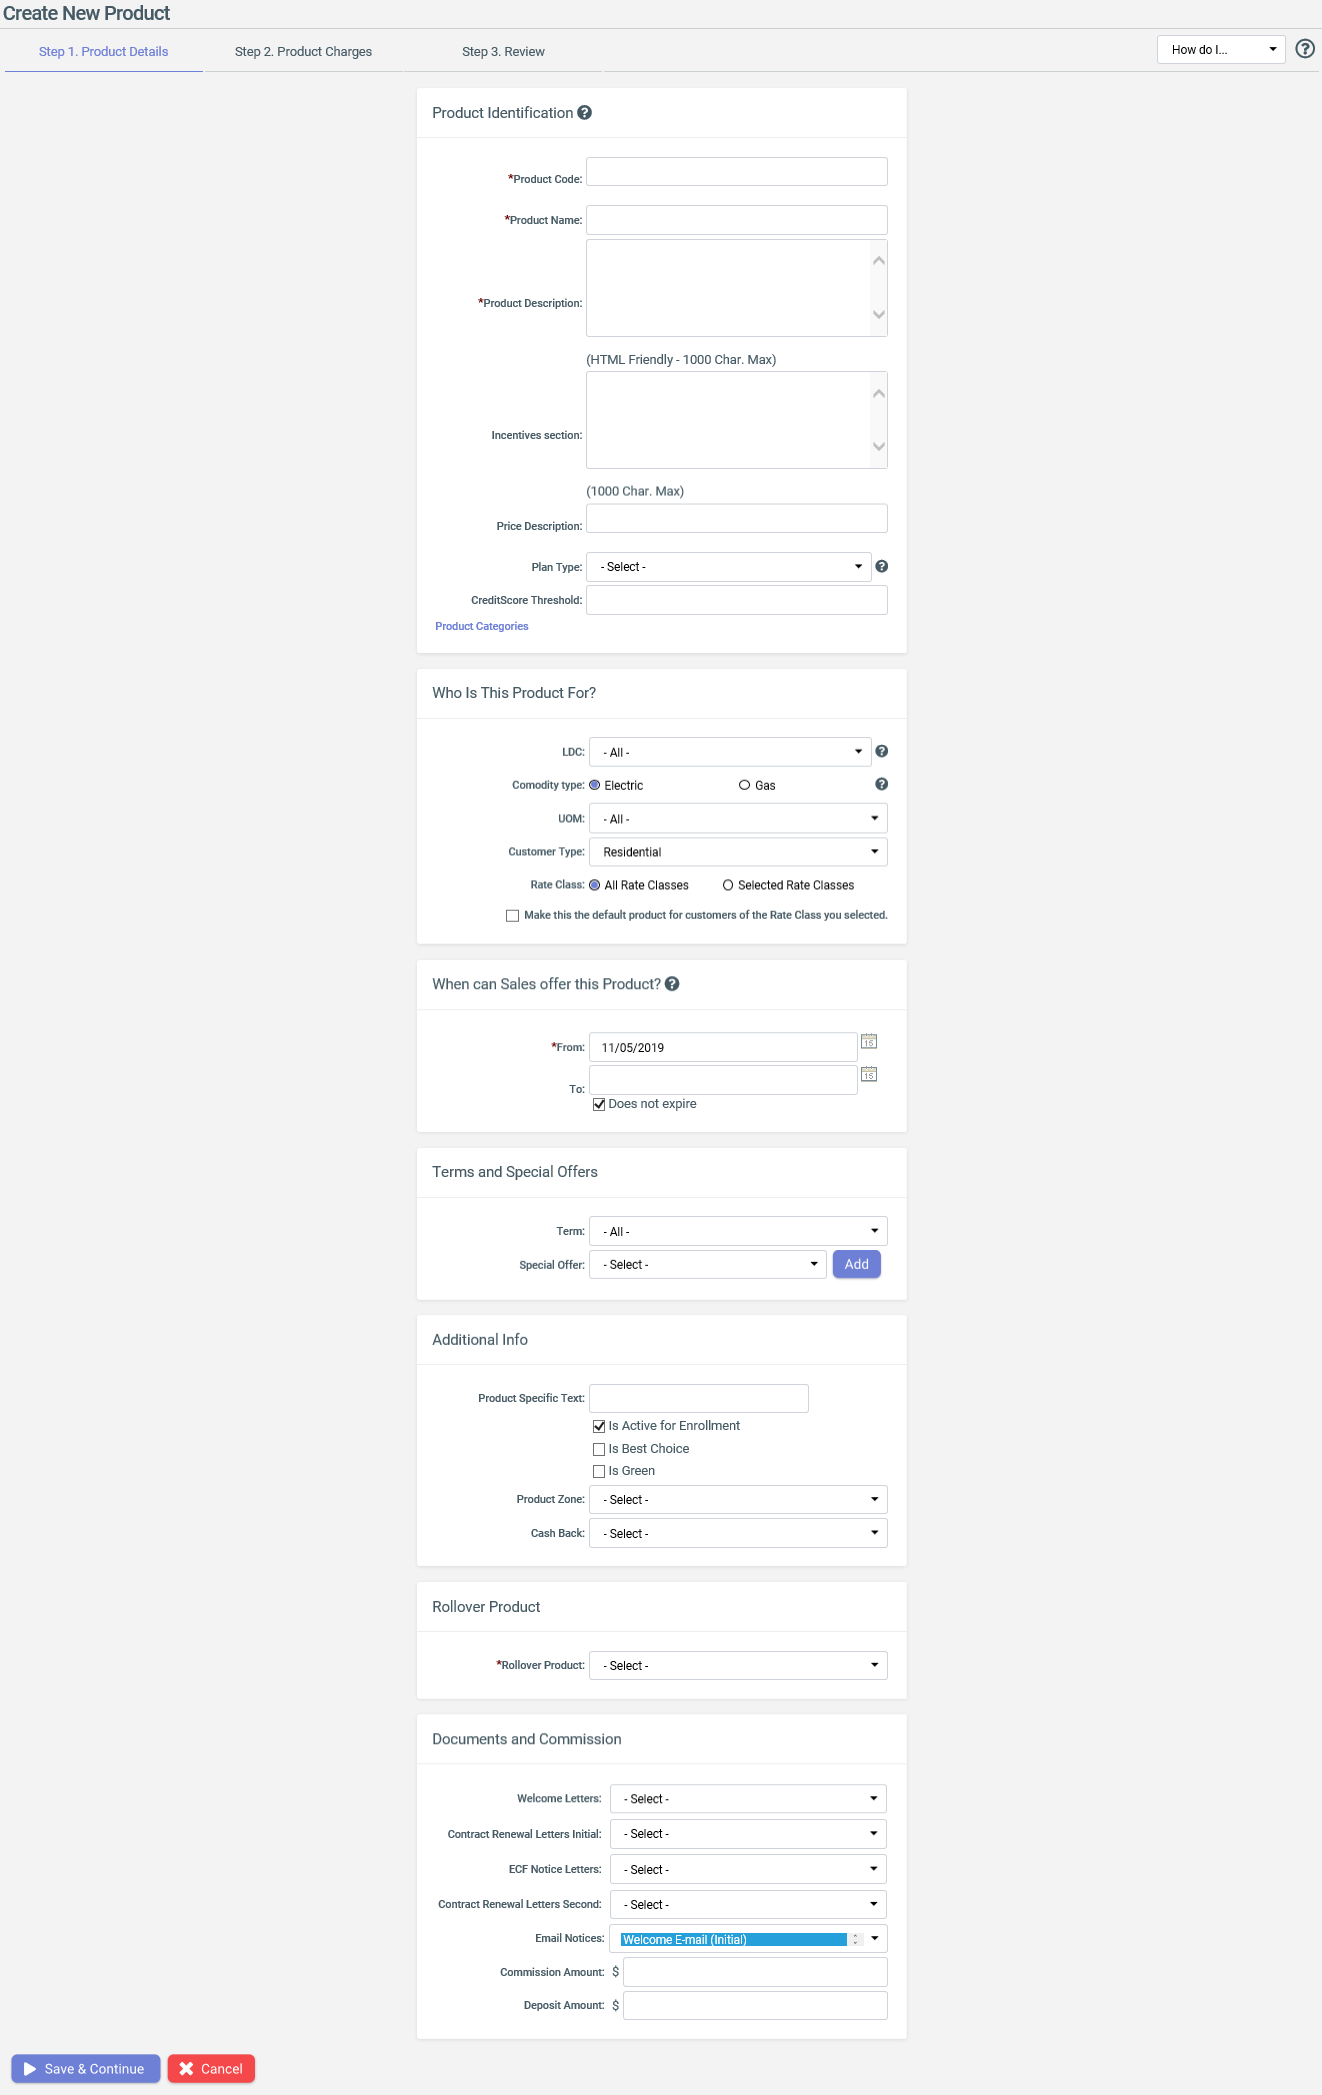
- Specify the following Product Identification details:
Field Description Product Code Enter a Unique code to locate and assign this new product in CIS. Product Name Enter the name for this new product. This name appears on Customer invoices and is displayed to Customers during product selection. Product Description Enter the description outlining details of this new product to help Customers decide during product selection. Incentives Section Enter details of any incentives attached to this new product. Price Description Enter the description for price attached to this new product for sales. Plan Type Select an appropriate plan from the options available to categorize this new product. CreditScore Threshold Enter a threshold value of credit score for Customers to avail this new product. Product Categories Add new product categories or select the existing to link them to this new product. - Specify for whom this product is being created:
Field Description LDC Choose the Utility Territories where this new product would be offered. Note: All the relevant Rate Classes linked to the selected LDC get applied to this new product.Commodity Type Choose the relevant commodity type for this new product. UOM Enter a Unit of Measure for this new product. Customer Type Choose whether this new product is for CommercialorResidentialCustomers. For more information on these Customer types. see Customer & Account Types.Rate Class Choose either All Rate Classesor a fewSelected Rate Classesto link to this product.Make this the default product for Customers of the Rate Class you selected. Check this option if applicable. - Specify when and how long can this new product be offered for Sales using From and To date fields. In case you want the product to be always available for sales, check the Does not expire option.
- Select an appropriate Term and attach any Special Offers you want to provide on this new product.
- Specify the following additional information for this new product:
Field Description Product Specific Text Enter text to tell Customers more about this new product. Is Active for Enrollment Check this option if you want to make this new product applicable for enrollment right after its creation. Is Best Choice Check this option to tag this new product as best choice. Is Green Check this option to indicate the same. Product Zone Select to limit the product offering to a specific zone. Cash Back Select if you want to offer cash back to Customers who avail this product. - Select a Rollover Product that a Customer of this new product would be enrolled to after its term expiration. Select "The Same product" from dropdown if the Customer needs to be enrolled to the same product after the term is expired.
- Specify the following Documents and Commission details to be attached to
the new product:
Field Description Welcome Letter Select a specific 'Welcome Letter' to be sent to Customers of this new product. Contract Renewal Letters Initial Select a specific 'Renewal Letter' to be initially sent to Customers of this new product. Contract Renewals Letters Second Select a 'Renewals Letter' to be sent out to Customers after they have already been sent a renewal letter before. ECF Notice Letters Select an ECF Letter to be sent to Customers of this new product. Email Notices Choose one or more from the list of Email notifications you want to link to this new product. Commission Amount Enter the commission rate to be paid to the Sales Channel of this new product. Deposit Amount Enter an appropriate deposit amount required to avail this product. - Click
Save and Continueto proceed to adding charges to the product.
- Specify the following Product Identification details:
- On the Product Charges page:
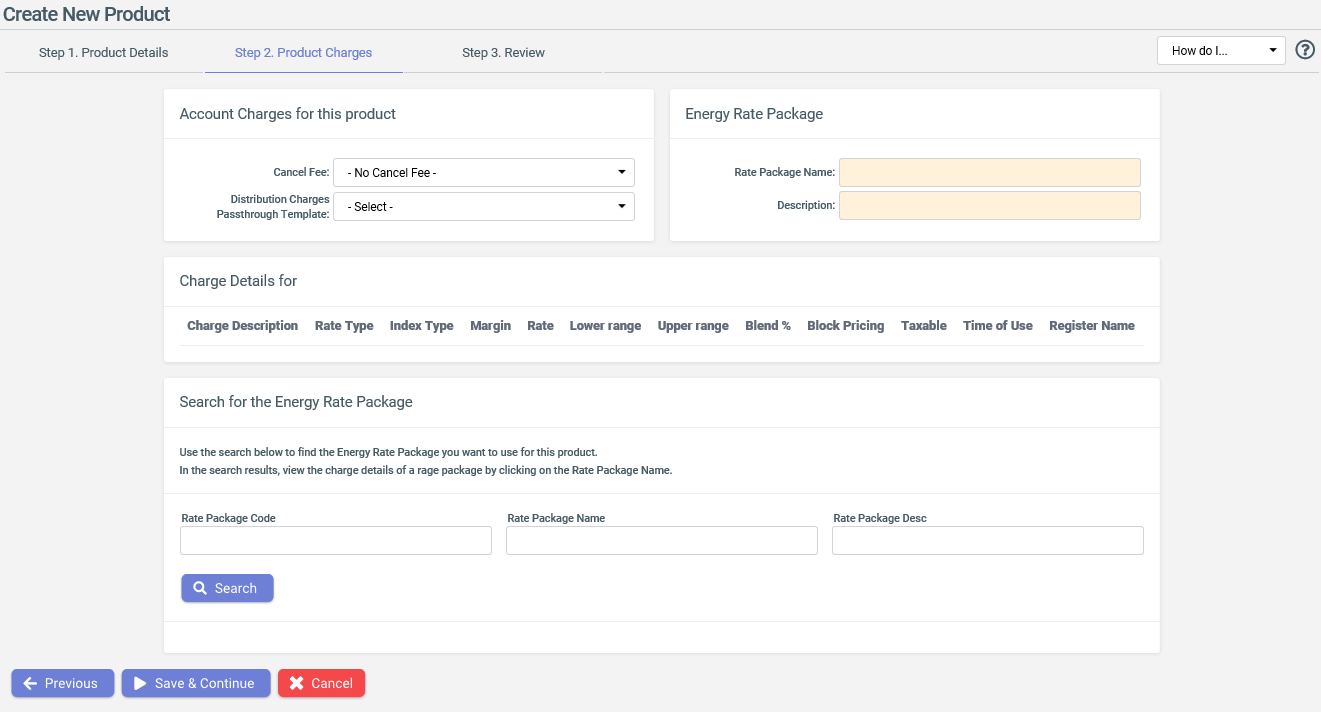
- Specify Account Charges for this product.
- Cancel Fee - Select a relevant cancel fee, if applicable.
- Distribution Charges Passthrough Template - Select an appropriate template for distribution charges.
- Use the Rate Package Code, Rate Package Name and Rate Package
Desc search fields to find and select the Rate Package you want to use with
this product for billing purposes. For more information on Rate Packages, see Creating and Managing Rate Packages.

- Click
Save & Continueto move to the product review stage.
- Specify Account Charges for this product.
- On the Review page, validate the details configured for the product in the
previous steps before finalizing creation. If required, use the Edit option
available for each of Product Details and Product Charges section to do
changes.

- Click
Finishedwhen done.
Editing or Cloning a Product
Apart from creating a new product from the Product Management tab on the Rate
Package and Product Management page, you can also use the Search
feature to look for existing Products in CIS.
Enter the exact Product Code or its first few characters to find the relevant Products. The search results include Products that matched your searched text. You can further filter the search results using the Brand, LDC, Status and Product Category search fields.
You can also leave all the fields empty and click on Search button to
fetch all the product codes and their corresponding details in the system.

- clone or edit any product from Action column.
- click the Product Code to open details of a particular Product. The fields and
sections that are eligible for editing display an edit
 icon that can be
used to change the current details.
icon that can be
used to change the current details.