Administration
Learn about CRM process administration to manage user interfaces.
CRM Processes are used to manage visibility of the user interface (masks, buttons, tabs, actions …) in the template. Processes make it possible to hide units/elements in the user interface.
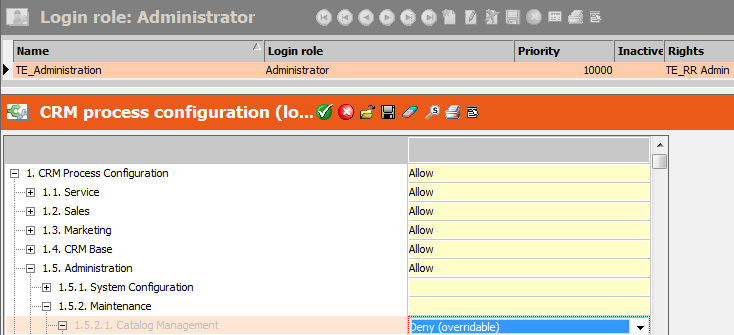
Catalog Maintenance(CRM 312600?)
PVCS #73510
In the course of consolidating the Settings menu the Settings -> Maintenance -> Catalog Maintenance menu option which uses the catalog maintenance process has been enabled for the superuser only (not the normal administrator rule) by denying it in the CRM process of the administrator role.
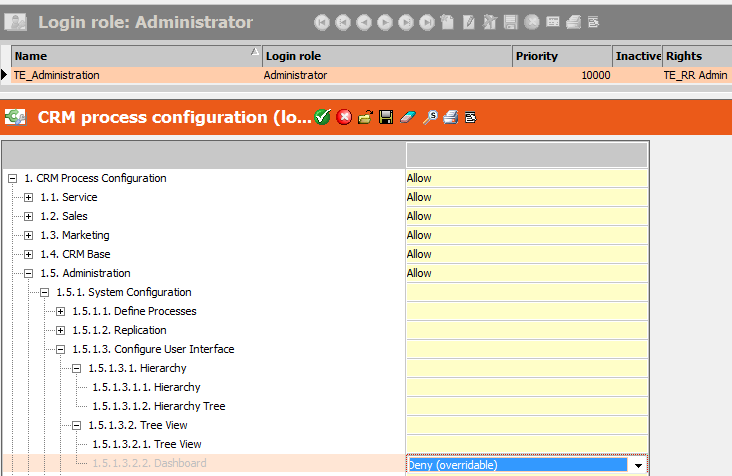
Dashboard(CRM 50050030)
PVCS #73510
In the course of consolidating the Settings menu the Settings -> System Administration -> Application Settings menu entry which uses the dashboard process has been enabled for the superuser only (not the normal administrator rule) by denying it in the CRM process of the Administrator role.
History
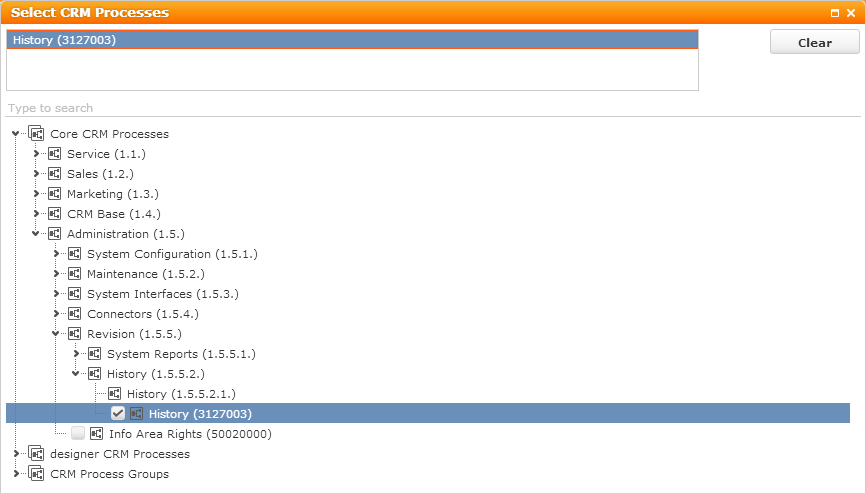
The history for all info areas is activated (see Rights & Triggers for the CM, AK, AD, AN, AG, AO, AX, AI, V1, V2, V3, V4, V5 and V6 info areas). The “History” (H0) info area is configured for the ExpandChildren header of the header groups but they are assigned to the “History” CRM process and are therefore only visible if the user has access to this process.
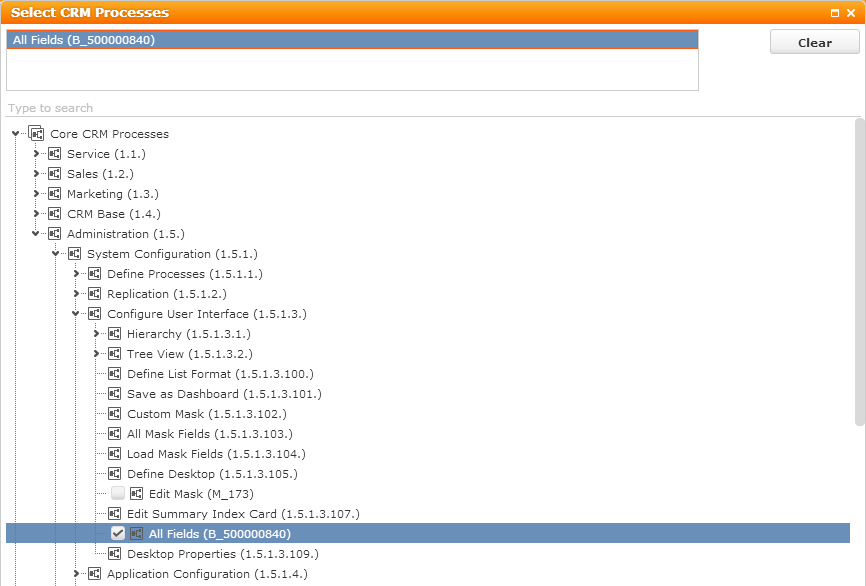
Notify Rep and All Fields function in Context Menus
The “A_NotifyRep” and “A_ViewAllFields” menu items are defined for all context menus:

“Notify Rep” is visible in general, “All Fields” is assigned to the “All Fields” CRM process and only visible if the user has access to this process.
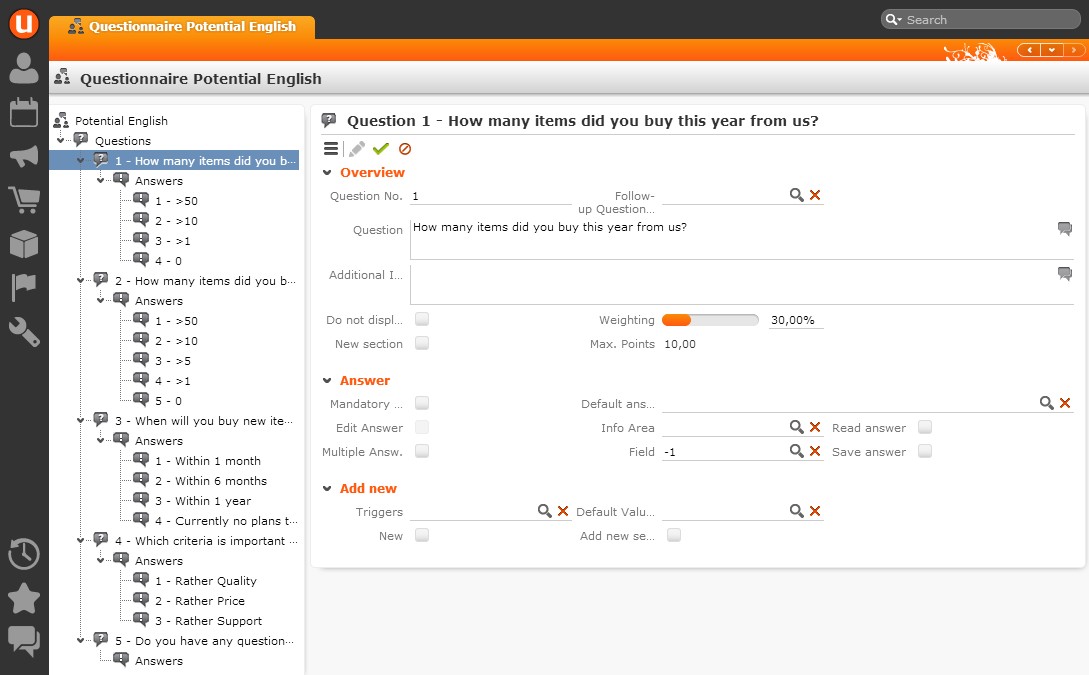
Questionnaire(CRM 20000)
PVCS #77849
Questionnaires have their own questionnaire tree so that questions and answers can be edited quickly and in a clear layout.
Reps(CRM 50000670)
PVCS #82589
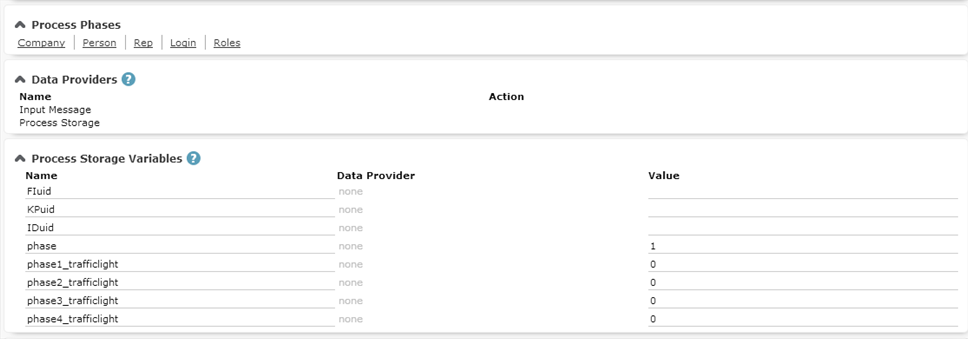
We created a new process called „CORE_ID_New“.
Used process storage variables:
|
|
FIuid |
Company which is linked to the rep |
|
|
KPuid |
Person who is linked to the rep |
|
|
IDuid |
Rep (after creating the ID record, used as parent for the ES login configuration and R3 rep roles) |
|
|
phase |
Active phase |
|
|
trafficlights |
Process storage variables to visualize the traffic light metric for each phase |
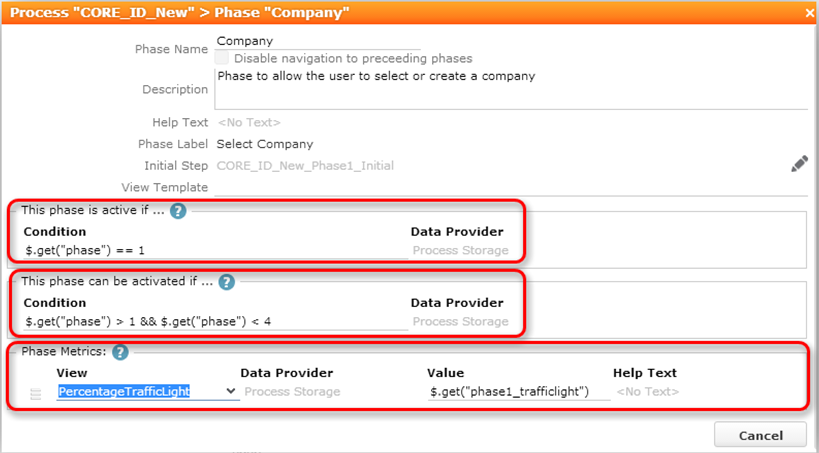
Phase definition example of phase 1:
Process Tree:
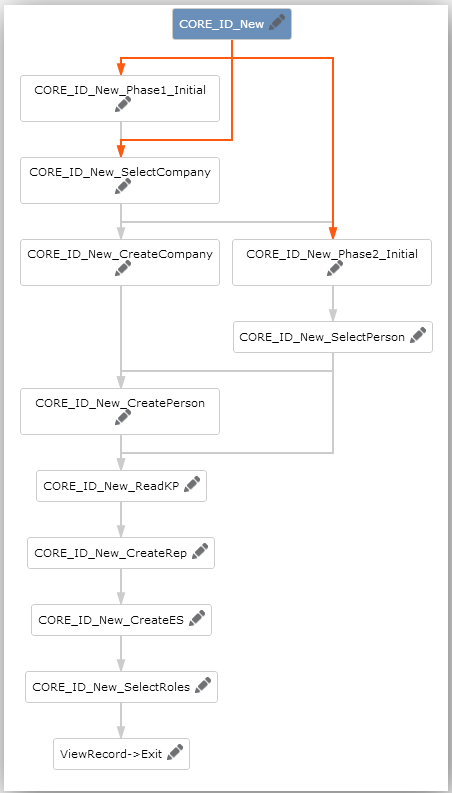
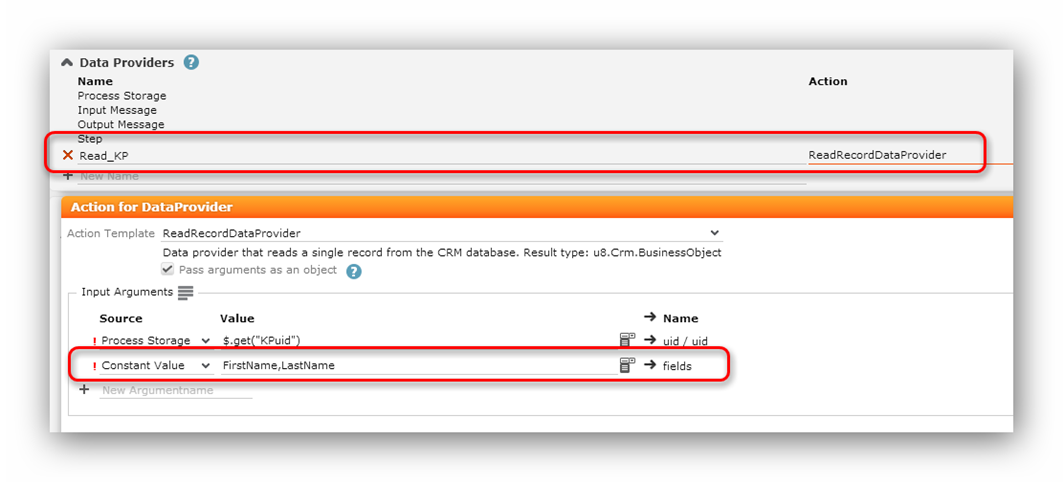
After selecting a company and a person, the process gets values from the person record in the “CORE_ID_New_ReadKP” step, because we want to set the “FirstName” and “LastName” fields as default value for the field #3 (description) of the new rep record.
The “CORE_ID_New_Phase1_Initial” step is used if the user clicks on the first phase in the header of the process. If the user steps through the process without clicking on the phase, then this step is not executed.
The “CORE_ID_New_Phase2_Initial” step is not only used when the user clicks on the phase. The step is also used to set the phase and the traffic light variables when moving from phase1 to phase2.
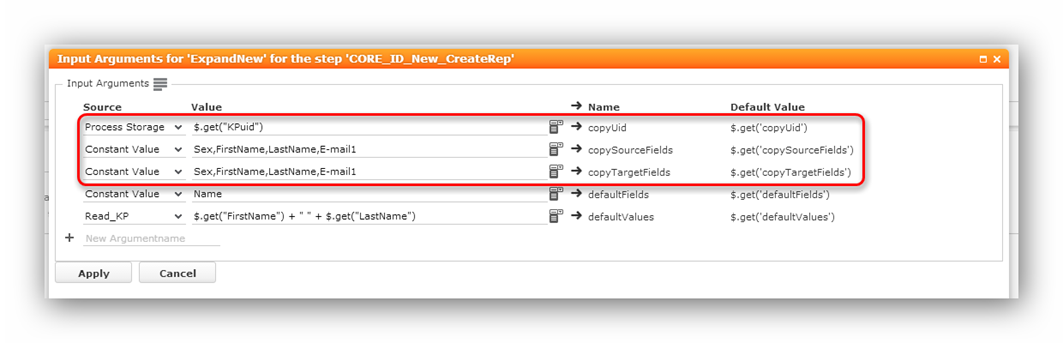
In the dispatching area we are handing the combined string (FirstName + LastName) over to the next step as default value:
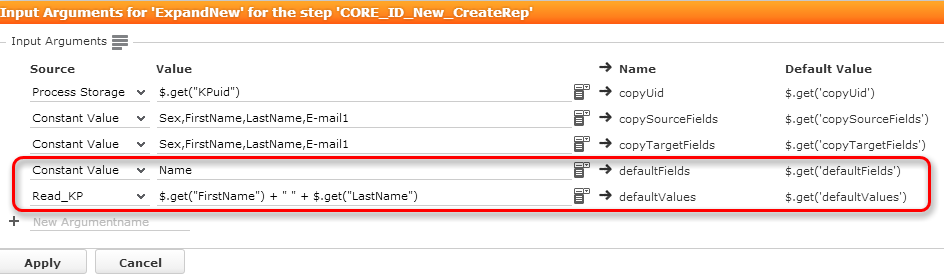
Furthermore we are setting some other default values by using the xml names:
In the “CORE_ID_New_SelectRoles” step we are using a special searchAndList with a special defaultAction and a special contextMenu. This action calls a javascript function which creates rep role record (R3) from the selected login roles. (R2).
In the action itself it is possible to set default values for the role (active flag, default flag).

After creating the roles for the rep we proceed with the ViewRecord->Exit step to display the rep record.
We created a new “CORE_R3_AddMultipleRoles” button which is used in the R3 sublist in order to make it possible to create more than one rep role at once.
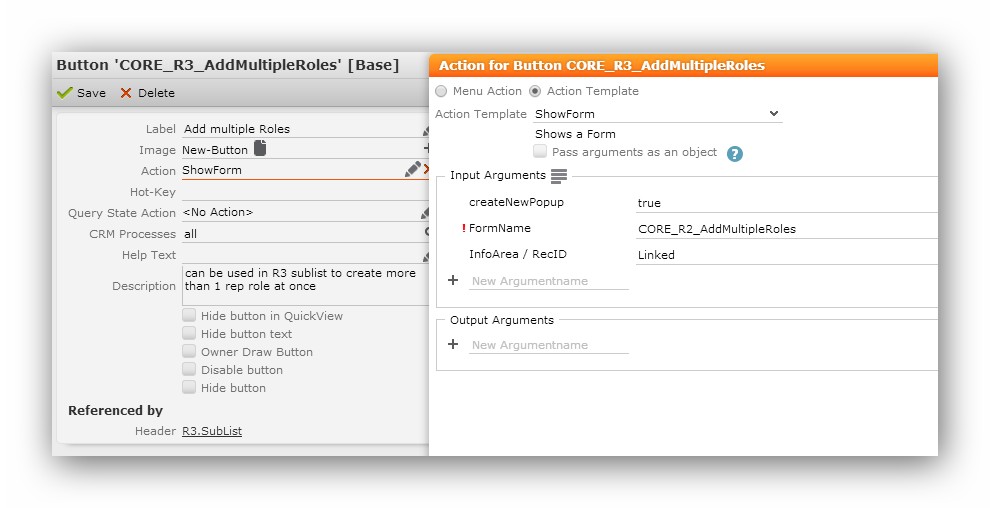
The button opens a form in a popup, displaying a special searchAndList. This is nearly the
same functionality as in the process. Javascript used for creating roles:
“\web\scripts\te.base\baserepprocess.js”.
Reps Masks in windows mmri.exe
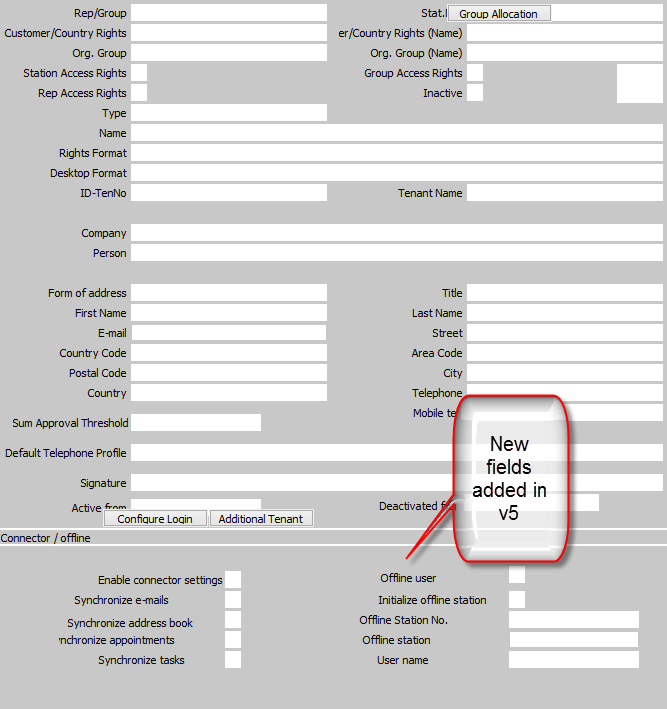
A new mask definition was created showing fields needed often for the Aurea connector.
PVCS # 86937
Due to a restriction of the product, the mask needs to be selected by the win user to see it. Please follow steps below:
- Go to Edit Mask in the Extras menu:

- Load the mask:
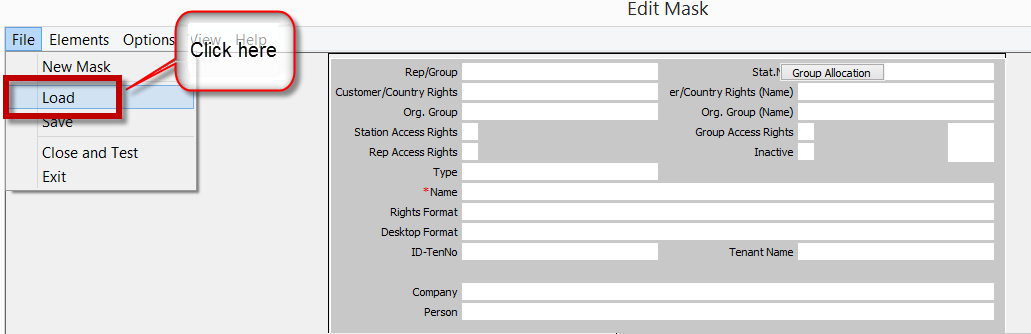
- Select the mask “ID Maske”:

- Activate the mask

➔Congratulations, now you should see the new mask. This setting is saved automatically for this win user.
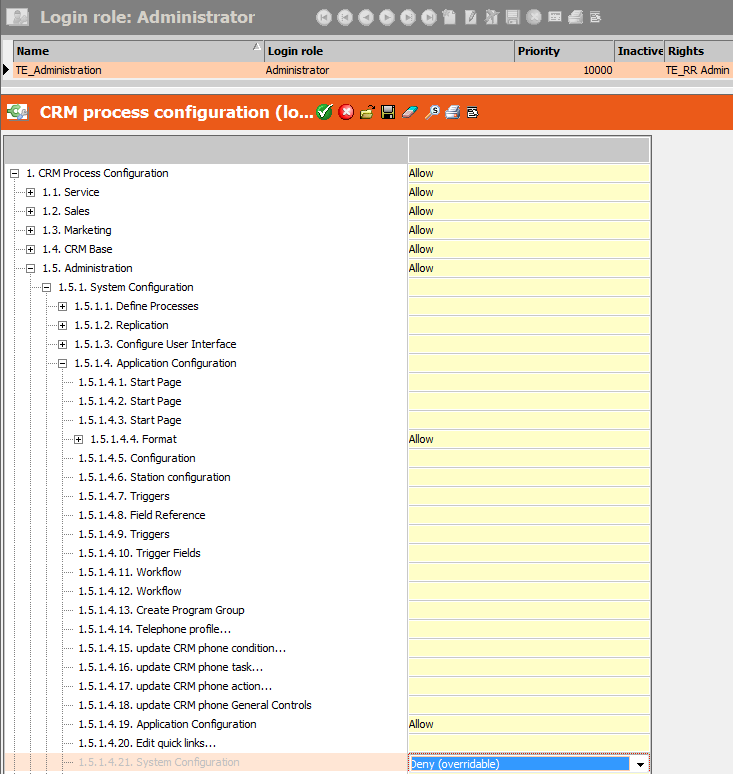
System Configuration(CRM 50050080)
PVCS #73510
In the course of consolidating the Settings menu, the menu entry which uses the system configuration process has been enabled for the superuser only (not the normal administrator rule) by denying it in the CRM process of the administrator role.