Tickets
You can view and edit existing tickets in CRM.pad but you cannot add new ones.
Viewing/Editing Tickets
To view tickets:
- You can:
- Switch to the desired company and then to the Tickets tab. Tickets linked to the company are displayed.
- Tap on
 and select Tickets. All tickets that are assigned to you are
displayed. You can limit the hits by defining search criteria, selecting a filter or
switching to a tab.
and select Tickets. All tickets that are assigned to you are
displayed. You can limit the hits by defining search criteria, selecting a filter or
switching to a tab.
The tickets are listed.
- Tap on an item to display its details.

- Tap on
 (Edit) to edit the data.
 - Tap on
 (Add Photo) to add a photo to the record.
 - You can view linked data such as spare parts, service reports or sub-tickets by switching to the desired tab.
Adding Spare Parts
Service technicians may have to change spare parts of a device during service. You can add these spare parts to a ticket or service report.
To add spare parts:
- Switch to the desired ticket or service report.
- Tap on
(Add Spare Parts).
The quick add is displayed. How the quick add works is explained in the Offers chapter, see Offers.
- Enter your data for the desired spare parts.
- Tap on Overview and then on Close to return to the ticket.
Adding Service Reports
You can store information such as spare parts, working and travel time for the service technician in a service report.
To add a service report:
- Switch to the desired ticket.
- Tap on Actions and select Add Service
Report.
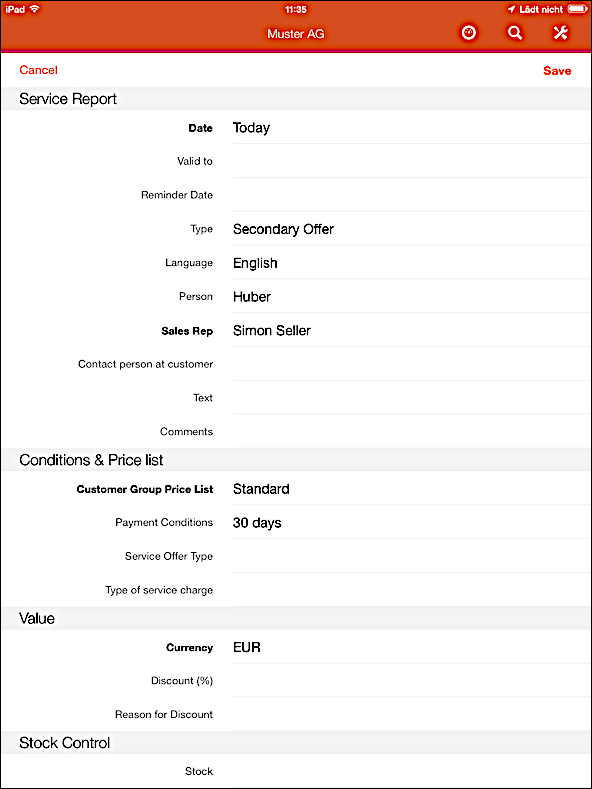
- Enter the data.
- Save the record.
Linking a Service Report to a Ticket or a Contact Person
To link a service report to a ticket and/or a contact person:
- Switch to the desired service report.
- Tap in the Contact person or Ticket
field.
The person or ticket search for all contact persons / tickets linked to the company are displayed.
- Select a record.
Adding Working Times and Expenses to a Service Report
To add working time and expenses:
- Switch to the desired service report.
- Tap on (Times and Expenses).
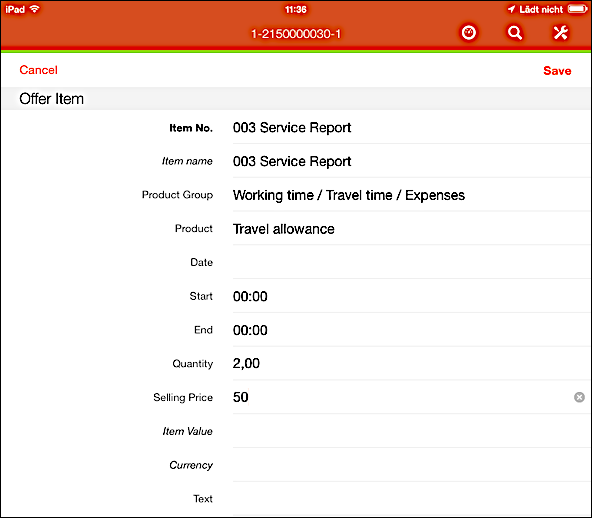
- Time and expenses are stored as a service offer item. Enter the data.
- Save.
Generating a Service Report
To generate a sevice report:
- Switch to the desired service report.
- Switch to the Report tab.
The service report is generated.
Having the Service Report Signed
You can have the service report signed by the client and sent it by e-mail.
- Switch to the desired service report.
- Tap on
 (Confirm) to display the
Signature dialog box.
(Confirm) to display the
Signature dialog box. - Have the customer sign the service report and tap on
Confirm.
The signature is inserted to the report.
Note: After signing the report (the Status field in the database is set to "Signed" and the service report cannot be changed anymore. - Tap on
 (Send E-Mail) and select the desired
e-mail address (company or contact person).
(Send E-Mail) and select the desired
e-mail address (company or contact person).