Leads
A lead is a potential customer.
It can be a new potential customer but also an existing customer, e.g. when a new product line is launched.
You can save information concerning the potential client (company- and person-related data) and information about the lead's "source" (e.g. a specific product was discussed during a trade fair).
Viewing Leads
To view a lead:
- Tap on
 and
select Leads.
and
select Leads.The existing leads are listed. You can limit the number of hits by:
- Enter search criteria in the Search field. Hits are shown while you are typing ("find as you type)".
- Enable available filters.
- Switch to the desired tab.
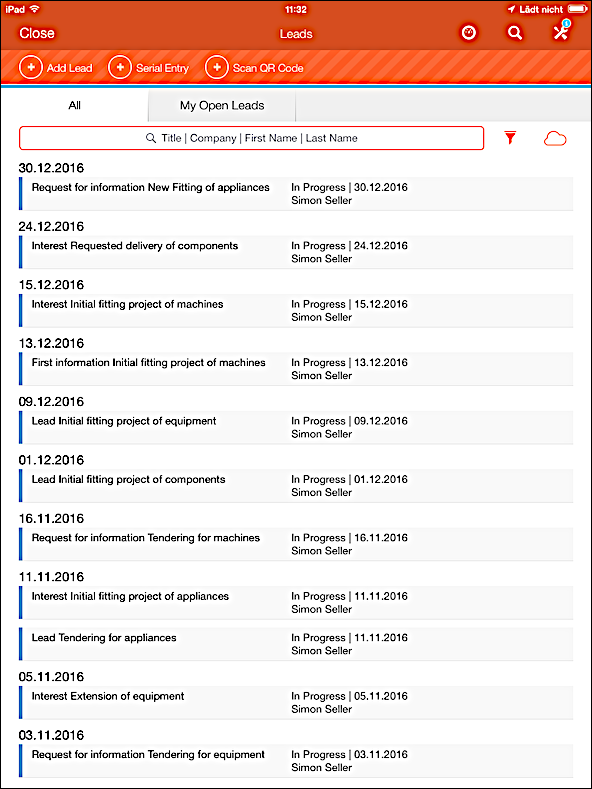
- Tap on an item to switch to its details.

Adding a Single Lead
To add a single lead:
- Switch to the list view.
- Tap on
 (Add Lead).
 - Enter the data.
- You can link your lead with a company or contact person. If the record for the interested party does not exist yet, leave the fields empty.
- You can link the lead with the "source" (e.g. an event, an opportunity, a ticket, etc.) in the Linked Elements area.
- Save the record.
- If the interested party is not yet stored in the data, you can add the record after
saving the lead by tapping on (Add Company or Add Contact
Person).
- Enter the data and save the company or contact person record.
Adding Several Leads
To add several leads:
- Switch to the list view.
- Tap on (Serial Entry).
The input mask is displayed.
- Enter the data for the first lead and save the data.
- After saving the input mask is displayed anew and you can enter the next lead.
- Tap on Cancel to stop this process.
Uploading Photos from Business Cards to Leads
During an event like a trade fair you might talk to a lot of interested parties. If, therefore, you do not find the time to enter leads at once, you can take a photo of your contacts business cards and store this photo in an empty lead to add the data to the database later on.
To upload a photo:
- Tap on
 to select the photo.
Scanning QR Code
To scan QR code:
- Switch the list view.
- Tap on
 (Scan QR Code).
This activates the camera and the QR code is displayed on the screen:
- Tap on
 .
.The data is displayed in the input mask.
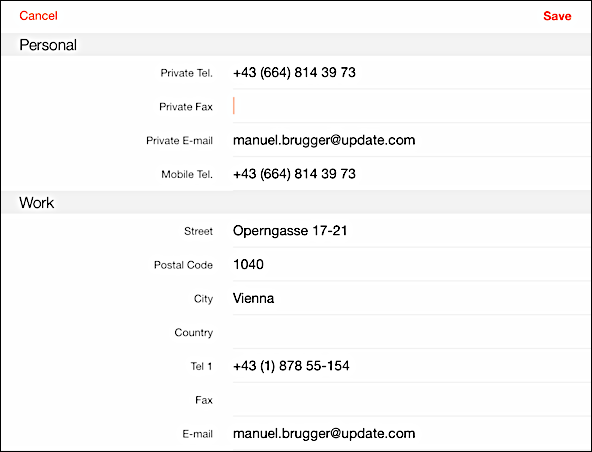
Note: Note: CRM.pad can only scan text and numeric fields, other field types are ignored. - If desired, you can edit the data before saving.