The Advanced tab
The Advanced tab is used to apply further settings for the image that is going to be inserted in the HTML Editor.
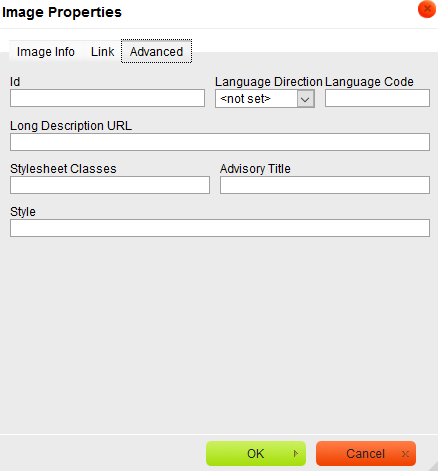
Find the available options in the table below:
| Field Name | Description |
|---|---|
| Id |
You can apply styles to all elements with a given ID. |
| Language Direction |
This indicates the direction of your chosen language: choose Left to Right (LTR) or Right to Left (RTL). |
| Language code |
This specifies the language of element content and attribute values. |
|
Long Description URL |
If the image is too complex to describe with simple text, you can enter a URL that links to a page with a longer description. You must create a page with the description. |
|
Stylesheet Classes |
You can apply styles or style classes to an image. However, there is no way to attach an external style
sheet to your message; you must enter the style rules in the
http://www.lyris.com/images/logo.gif
Note The border may not appear immediately if you do not click the Source button twice. |
| Advisory Title |
This attribute can be useful in several ways: improving accessibility for the visually impaired, search engine optimization, or creating tooltips. |
| Style |
You can apply one or more style rules to the image. To do so, enter a rule without curly brackets or a selector. To separate two or more rules, type a semicolon between each rule. For example:
|
Note
Make sure the path for your images is the absolute path (the complete URL), not the relative path. For example:
- Wrong:
/img/product.jpg
- Right:
http://example.com/img/product.jpg