Edit and Send a Notification(s) from a Notification Template
Since notification templates can be pre-configured in your team’s template library, you should not have to do much editing when the time comes to send one or a series of notifications for various communication scenarios. However, if the notification template is enabled for editing, you can edit the notification recipients, subject, and message when sending the notification(s).
To edit and send a notification or multiple notifications using the Alert Console:
- As an administrator or team leader with the permissions to send notifications, click the Alert Console link in the left navigation bar. This launches the Alert Console. Quick Compose and any other Notification Templates are displayed in the Alert Console screen.
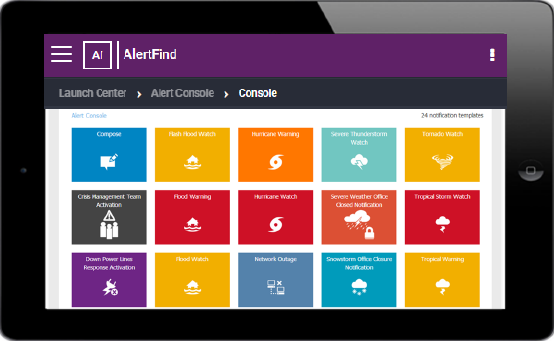
- Select a notification template by clicking it in the Alert Console window.
NOTE
The Open Incident button is no longer available. To use Quick Compose to create and send a notification, in the Alert Console, click Compose. See Use Quick Compose. To create and send a notification from the desktop using the notification advanced features, from the left menu bar, Launch Center section, select Compose (Advanced).
- In the template window, click the notification title bar to open it. If there is more than one notification, then click the first notification to open it.
- If needed, edit the recipients in the To text box, the subject in the Subject text box, and message text in the Message text box.
- When finished, click the notification title bar to close the notification.
- If there is more than one notification and you need to edit other notifications, repeat steps 3 and 4 for the other notifications you would like to edit.
- When finished, if you have one notification, click Send Selected Notification. If you have more than one notification, click Send All Notifications. Or, click Cancel to cancel the operation. The Alert Console window displays.