Additional Installations
Learn about the additional configuration for CRM.pad.
CRM.pad Installation
CRM.pad template configurations are only available for the ISI and LSI template, see Supported Versions section to find the template version you need. All necessary configurations are imported, when you import the most recent template package. The following configurations are included:
- ISI template:
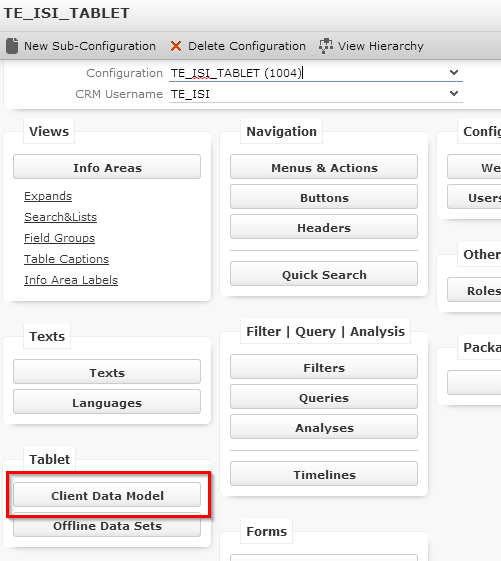
- TE_ISI_TABLET
- LSI template
- TE_LSI_TABLE
- TE_CG_TABLET
Please make sure that a current update.tablet configuration is imported in your designer. The ISI template CRM.pad is available in these languages:
- English
- German
- Dutch
- French
- Polish
- Chinese
The LSI template CRM.pad is available in these languages:
- English
- German
- Dutch
- French
- Chinese
Please make sure that your desired languages are set to active in designer.
To complete the template installation of the CRM.pad please go to designer, select ‘Client Data Model’ and update the data model:
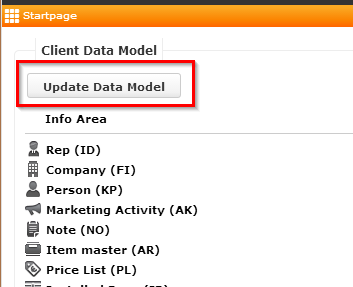
Please also have a look at the offline datasets to make sure that everything that you need is correctly synchronized! If you follow the installation guide for a Template Upgrade, the template CRM.pad configuration is also updated.
Installation and Upgrade information for LSI CRM.pad version 5 (BS)
Please change the tenant for 2 LSI-Template Configuration records. The records with Config. Category: “XML-Report (BASE)” and Config. Option: “Customer Report (BASE)” and Text 1: SHOW_SIGNATURE have to be set to tenant 9000 manually.
Those configuration records with the correct tenant are needed for the feature “Signature Box in CRM.pad reports”. Otherwise you cannot see this feature.


Addon Products (connectLive, Exchange connector SE, interface) (OP)
All settings files for addon products are delivered with the template package. You can find settings and example files for those products in the te.addon folder of your template. If you followed this installation guide you can find this folder in your web installation folder: C:\upddate.CRM\update.CRM web BTB.
CRM.server (BS: rep and settings, OP: create service)
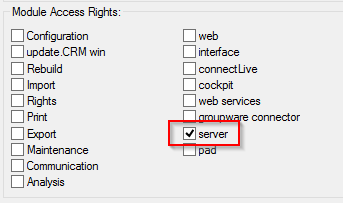
Create a rep for the update.CRM server or use the deliver rep ‘u8server’. The rep must have login rights for “server”:
The rep must have the correct role to be able to create eg. MA, AF. Now you need to enter your server user’s credentials in the users.xml: .. \web\system\settings\users.xml.

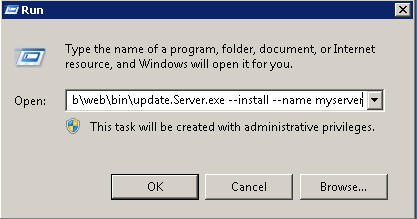
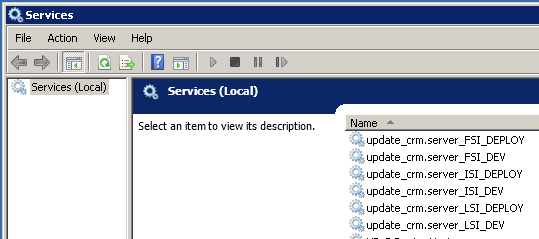
Now register the service on the application server using the update.Server.exe in the …\web\bin folder.
…\web\bin\ update.Server.exe --install --name "<SERVICENAME>
To remove a service enter the following command:
…\web\bin\update.Server.exe --uninstall --name "<SERVICENAME>
For more information, see Aurea CRM.core Administrator Guide.
Template User Guide (BS)
There is an additional template-specific user guide available.
Please visit https://support.aurea.com for an up-to-date package.
Download the ‘Online Help’ for your template and copy it into the folder …\web\web\help and overwrite all files.