Import Template with cockpit (OP, BS: Info about Reps)
Learn how to install updated datamodel templates.
The station which you want to import needs to be configured as “Main Office” and “Aut.Cat.Maintenance”.
![]()
- Start Aurea CRM cockpit, make sure to login in “English” if you have already
configured other languages. You should be prompted with the following dialog:

- Select “Use existing import file”.Note: The template package required for installation or upgrade is found inside the TE_<VERTICAL>_<Version>.zip. Ensure that you unzip the above zip files and select the TE_<VERTICAL>_package_<Version>.zip package to import.
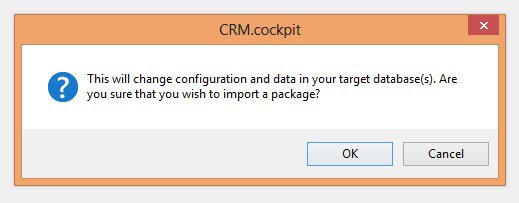
- Select the Template Package and continue. You are prompted with the following dialog,
click “OK”:
- Configure the next settings dialog as per the below screenshot. Do not check ‘Import
catalog maintenance items’.

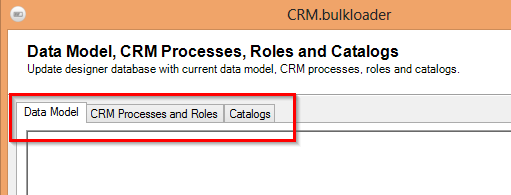
The ‘Aurea CRM.designer’ option uses the same functionality as the bulkloader. By enabling this option cockpit automatically updates the CRM.designer database with the current datamodel, catalogs, CRM processes (R4) and roles (R2).
You can also choose the catalogs you want to synchronize (new or changed catalogs), only those catalogs can be synced that are already in the designer. So you can choose if you want cockpit to do it, or manually do it later using CRM.bulkloader.
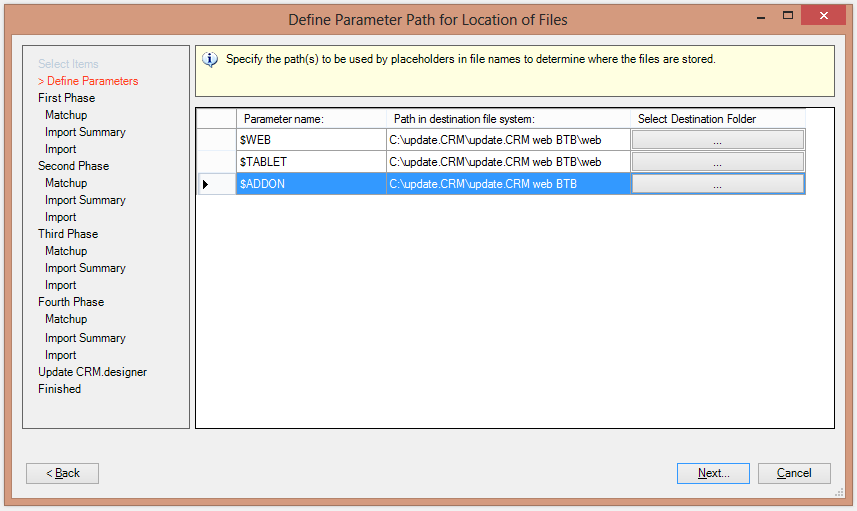
Now you need to select the appropriate destinations for the following parameter paths.(These parameters contain files which are required by the template).
$WEB parameter is mandatory. However, you can omit the
$TABLET and $ADDON parameter, if you don’t want to use
these products. You can later import the cockpit package again and only import the missing
parameters if you need these files (make sure to only check the box Files (from
file system) in the previous step).$WEB: This parameter contains all Template files which are needed for update.CRM. Use the web folder inside your installation directory, e.g. C:\update.CRM\update.CRM web BTB\web.$TABLET: This parameter contains the tablet resources (images) which are required for CRM.pad. The files is extracted to the default tabletResources folder. Therefore, select the same folder as used for the$WEBparameter.$ADDON: This parameter contains all settings files which are needed for several add-on products, such as interface or connector. You can place these wherever you want, you need to copy and edit these files before you use them with the product. E.g. select your installation directory, C:\update.CRM\update.CRM web BTB.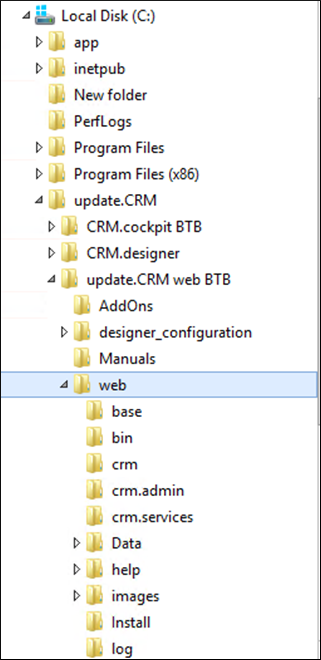
If the button with the three dots is not visible, use the scrollbar at the bottom of the window to scroll to the right or make the window bigger in the bottom right corner. You can also paste your destination path into the second column.
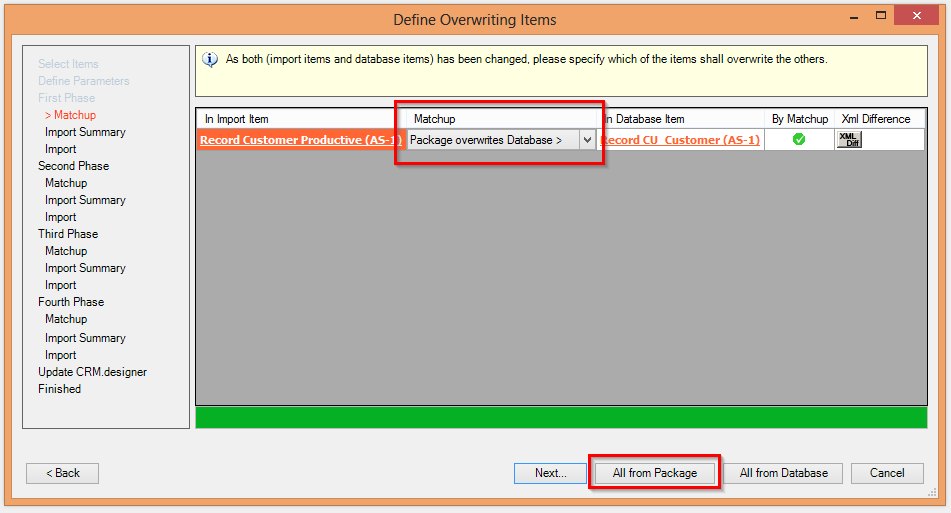
Now the matchup starts. You should always click “All from Package” if you are importing a Template. Subsequently, click on “Next”. This matchup could start two more times depending on what you configured before. Be sure to select “All from Package” every time the matchup is started.
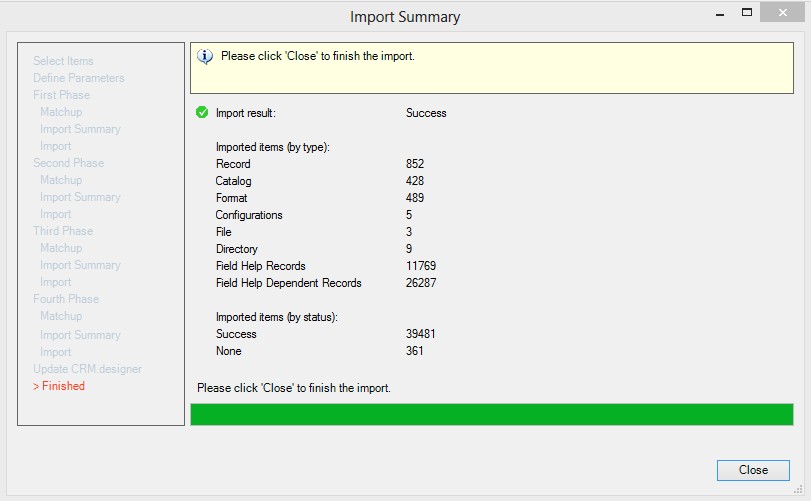
You now see an import summary. The template is imported after you click on “Start writing to Database”.
The matchup now starts once again, be sure to check “All from Package”! It is also possible that an empty matchup window is opened and closed after a few seconds without user interaction. This is intentional as the matchup did not find any items which were altered in this phase.
When the import is finished you should get a success message.