Creating Users
Users can be added to AlertFind in two ways:
- Support can import users. See Importing Users .
- New users can be manually added to AlertFind if this function is enabled. See Creating Users Manually.
Importing Users
The most common and efficient way to import users into AlertFind is to have Support import them. This method imports user accounts (including user roles and permissions) and groups. Support can import a list of users from several sources:
- Most common database applications
- Human resource management systems
- Excel spreadsheets
- Aurea Messaging Solution (AMS) databases
- Business continuity or disaster recovery planning tools
Contact Support to determine if a data source is supported, and what preparations, if any, must be made prior to the import.
Integrating AlertFind with Aurea Messaging Solution (AMS)
Users of Aurea Messaging Solution (AMS) can take advantage of its regular synchronization with Active Directory to extend the data collection into AlertFind. There are two steps in this method:
- Directory synchronizations between Active Directory and the Aurea data center take place according to the schedule established in the Aurea Messaging Solution (AMS) SyncManager component.
- In a separate process run each day in the data center, Aurea migrates selected Active Directory data to AlertFind.
Integrating Aurea Messaging Solution (AMS) and AlertFind this way allows you to update your directory data as often as once per day, instead of the once per week update schedule provided with non-integrated AlertFind. For more information on AlertFind integration, refer to the Aurea Messaging Solution (AMS) Administrator Guide or contact Support.
Creating Users Manually
If this function is enabled for your organization and you have the necessary user management permissions, you can create a new user by using this procedure.
To create a user manually:
- Verify that the team security context is correct. When a user is created manually, the user is automatically added to the current team. For more information, see Team Security Context.
- From the left navigation menu, Administration section, click Users.
- In the Users page, click New. A blank Create New User page appears.
- Complete the Personal Information section.
- Full Name — Enter the user’s full name as it should appear in the system. This field is required.
NOTE
Enter the user’s name in the same naming convention as all the other users in your system, such as FirstName LastName or LastName, FirstName. If you switch conventions between imported and manually entered users, it will be difficult for you to effectively sort user lists. This name is the name AlertFind speaks in notifications. Therefore, for a LastName, FirstName convention, AlertFind speaks the user’s name as “Smith, Joe.”
- Description — Enter a description of this user. This field is optional.
- Email — Enter the primary email address for this user. This address is used for all password resets or reminders, even if other email addresses are added to the user’s profile later. This field is required.
- Map Default Email To — Choose an email address to be considered the default email address for this user. Usually this is the work email address, but each organization may choose another option.
- Assign this user one or more User Names. At least one user name is required. Typically, a user’s user name is the same as the primary email address.
- Click the Usernames field to bring up the Username Editor. Use the Add, Edit, or Delete buttons to perform user name actions.
- For adding or editing a user name, first type in the portion of the user’s email address that appears before the
@symbol, such asjohnsmithorjohn_smith. AlertFind user names cannot include spaces, but they can include most special characters, such as underscores (_) or exclamation marks (!). Then select the domain for this email address using the drop-down list. The domain is the part of the email address that appears after the@symbol, such ascompanyname.com. - Click OK to submit the user name changes.
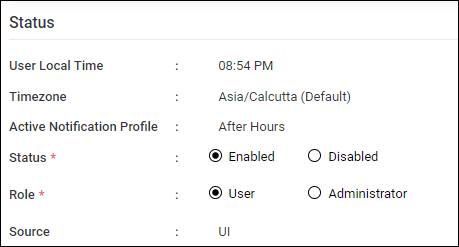
- Complete the Status section.
- Choose whether this new user will begin the Enabled or Disabled state. Administrators, team leaders, or users with necessary permissions can change this state at any time.
- Choose a Role for this new user. For more information about user roles, see Assigning User Roles.
- The Source field cannot be edited. It shows whether this user account was created by an import function or manually through the user interface (UI).
- Complete the Preferences section. These settings determine the voice and language for notifications this user receives. The voice and language users hear when they call into the Hotline is determined by the Hotline phone number.
- Hotline Phone Number — From the drop-down list, choose use all hotline phone numbers available to your organization, or assign a specific number for this user.
- Check Display hotlines in preferred language only to limit the hotlines displayed in this section to those in the user’s preferred language. Uncheck this box to display all available hotlines for the organization.
- Preferred Voice — From the drop-down, select the default voice and language for the organization, or assign another for this user.
- Complete the Authorization section.
- To set the user’s initial password, either check Generate Random Password or enter the initial password in the New Password and Confirm Password fields. Any password must be at least 6 characters long and contain letters or numbers.
- To set the user’s initial PIN, either check Use Default PIN (to use the default PIN for the organization as configured by an administrator on the Settings page), or enter the initial PIN in the New PIN and Confirm PIN fields. PINs are a numeric value between 4 and 20 digits.
- Click Save to create the new user.
Assigning User Roles
Each user account must be assigned a role: Administrator or User.
- Administrators can manage users and perform most functions granted to AlertFind during provisioning. The exact set of information that administrators can access is defined by the User Management settings in the company profile, which is set up by Support during provisioning. Common administrator functions include:
- Creating new users
- Editing user accounts
- Defining and editing default contact information
- Defining and editing groups and teams
- Sending and monitoring the progress of notifications
- Creating and editing incidents
- Creating notification templates
- Editing customizable text in the AlertFind interface
- Users generally use AlertFind to receive notifications, and may also use the Hotline and Hotline Pro. In some cases, users can log in to the AlertFind interface to maintain their personal contact information.
- Team leaders are users who have been granted team permissions, that enable them to perform additional functions within a specific team context. There is no separate team leader role. See Permissions for more information.
Change a user’s role:
- From any list of users, select a user name and click Edit. Alternatively, double-click a user name to bring up the User Overview page, and click Edit at the top of the User Overview page.
- Under the Status section, choose the Role
UserorAdministrator.
NOTE
To make this user a team leader, assign team permissions under a specific team context. See Granting Team Leader Permissions.
- Click Save to save the changes.
Adding Users Using the API
The AlertFind Data Management API can be used to create and modify user information. See Data Management API.